Weekly Farm Notes :: March 30th, 2016

Hello,

What a beautiful Spring week! We know you probably want to be outside as much as possible so below we have included lots of quick recipe ideas.

See you tomorrow at market!

~~~~~~~~~~~~~~~~~~~~~~~~~~~~~~~~~~~~~~~~~~~~~~~~~~~

March 30th Produce

Here are the items you can expect at Market {M} and in the CSA {CSA}:

  • Toscano, Red Russian & Siberian Kale {M/CSA}: here is a really useful list of 50 Things to Do with Kale. I like how the author provides a list of ingredients that pair well with kale. Lots of options for you to consider this week!
  • Tender Collards {M/CSA}: have you tried our Chickpea, Cashew & Collard Green Patties yet? They come together in a flash and can be eaten as is or used as a veggie burger. I love them topped with avocado and hot sauce 🙂 As an added bonus, you can make a big batch and freeze them for later.
  • Food Hook Swiss Chard {M/CSA}: I generally look upon vegan variations of classic recipes with suspicion. They may turn ok but they never really stand up to the original. However, I am more than interested to give this Swiss Chard with Vegan Bechamel Sauce a try. Traditional bechamel (which is the base for many dishes, including mac & cheese) is made with butter, flour and milk and can be very heavy. This sounds like a nice twist on the classic.
  • Spring Radishes {M/CSA}: have you checked out our latest post on Miso Pickles? Miso cured vegetables is an incredibly easy and flavorful way to preserve produce. I have seen a lot of recipes using turnips but radishes work just as well!
  • Red Butter Lettuce {M/CSA}: I think our Hemp Seed “Ranch” Dressing along with hard-boiled eggs, thinly sliced radishes, green onions and edible flowers would make a lovely Spring salad!
  • Awesome Asian & Lettuce Mix {M/CSA}: The mix this week includes Asian greens, variety of lettuces, kale, arugula and edible flowers. If you don’t want to eat it fresh, try our Super Greens and Sunflower Seed Pesto recipe! As with all pestos, you can easily freeze it for use later.
  • Green Onions and Wild Spring Onions {CSA}: I have been eyeing a recipe for Quick Scallion Kimchee in one of my favorite cookbooks for a while. Check out the recipe below to preserve your green onions for the next month!
  • Pak Choi {M}: I return again and again to an old recipe for Triple Sesame Noodles with Pak Choi. The sauce is really yummy and so easy to make. You could easily top this dish with a fried egg to round out the meal.
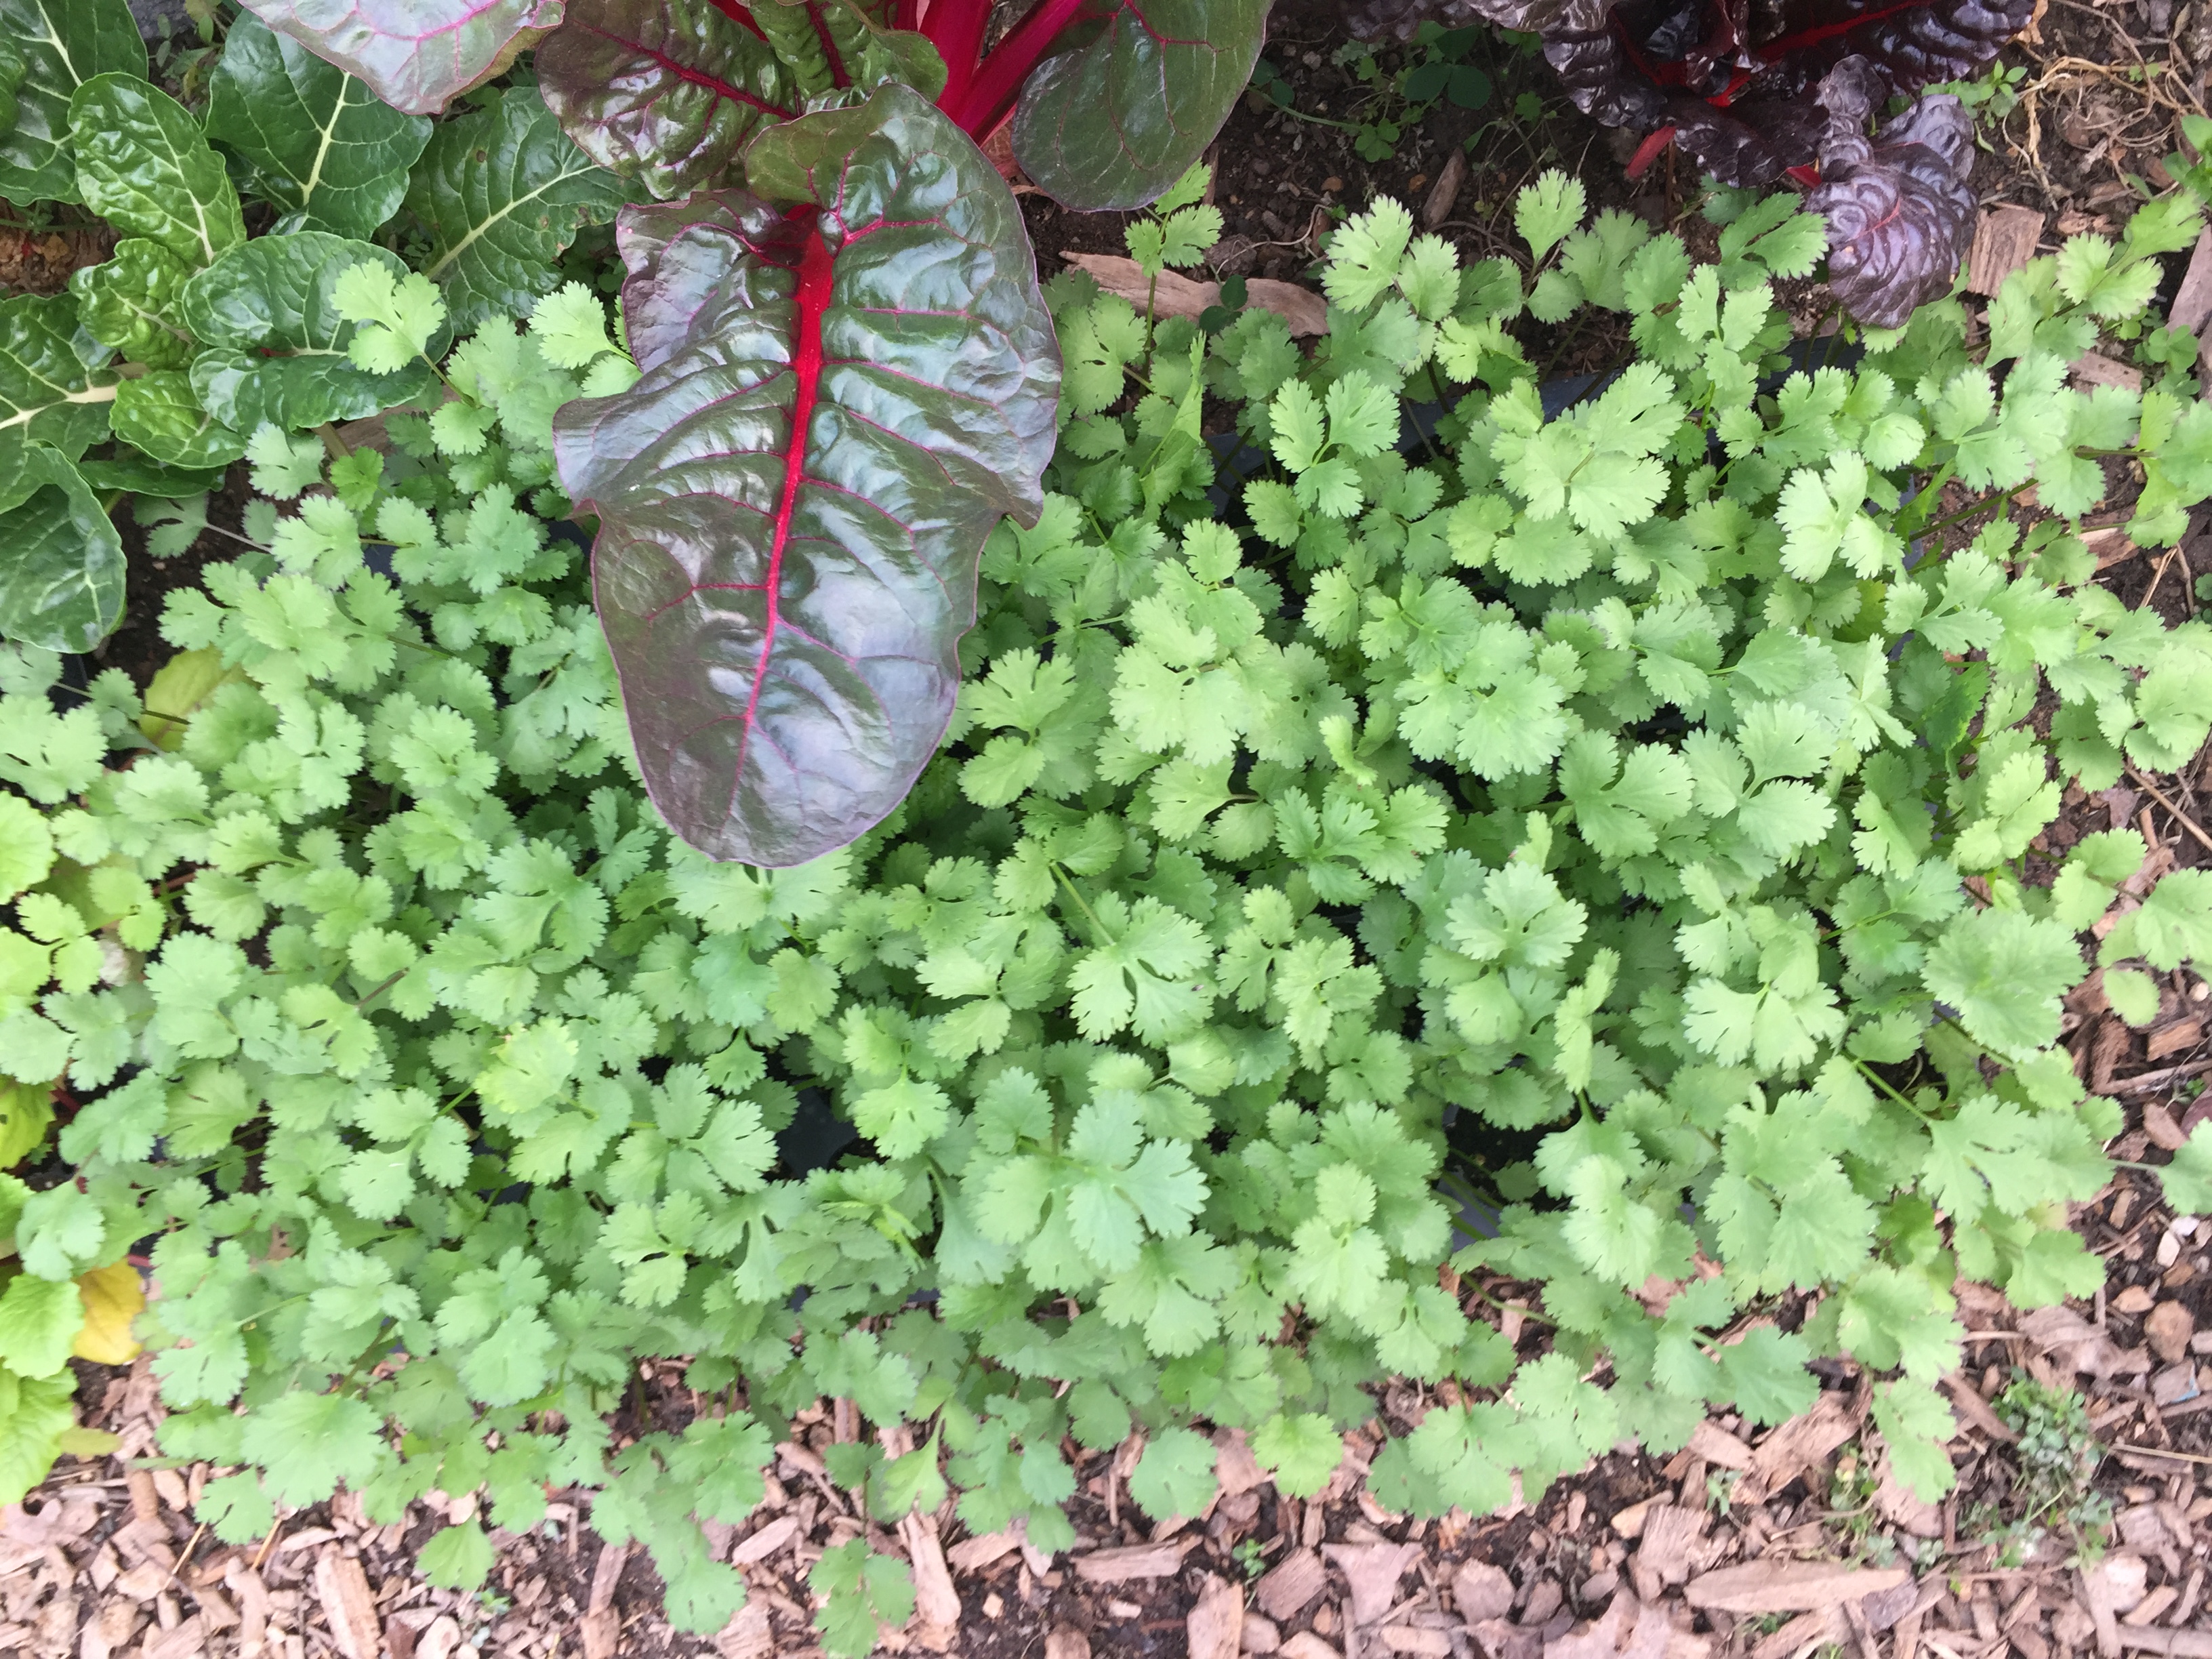
  • Cilantro {M}: I am always looking for new salad dressings and this Cilantro-Lime Dressing sounds delicious. You can use it on greens or in a bean salad.
  • Edible Spicy Asian Flowers {M}: toss these on your salad or add them to a simple pasta dish. They say you eat with your eyes first so why not make your meal as pretty as possible?!

~~~~~~~~~~~~~~~~~~~~~~~~~~~~~~~~~~~~~~~~~~~~~~~~~~~

Recipe :: Quick Scallion Kimchee

This recipe is from One Good Dish by David Tanis. It makes about 2 cups. It can be served with steamed rice or chopped and stirred into a bowl of brothy ramen-style noodles.

  • Ingredients:
    • 4 bunches scallions
    • 2 teaspoons salt
    • 4 garlic cloves, thinly sliced
    • 1 tablespoon raw sugar or dark brown sugar
    • 1 tablespoon grated ginger
    • 1/4 cup Korean red pepper flakes
    • 1 tablespoon toasted sesame oil
    • 1 tablespoon toasted sesame seeds
    • 1 tablespoon fish sauce
    • 1 tablespoon rice vinegar
  • Directions:
    • Trim the scallions and cut into 3-inch lengths. Put them in a glass or ceramic bowl, sprinkle with salt, and let stand for 10 minutes.
    • Mix together the garlic, sugar, ginger, red pepper flakes, sesame oil, sesame seeds, fish sauce, and rice vinegar. Add to the scallions and toss to coat.
    • Lay a plate over the bowl and leave in a warm place (at least 70 degrees F) for 24 hours. Or, for a stronger-tasting kimchee, let ripen for up to 72 hours. It will keep for a month, refrigerated.

~~~~~~~~~~~~~~~~~~~~~~~~~~~~~~~~~~~~~~~~~~~~~~~~~~~

Alice O’Dea Article

Have you read Alice O’Dea’s recent article? Delicious yet easy homemade bread is a hard thing to come by but this week Alice shares a version you can make in just about 2 hours!


Preserving the Harvest :: Miso Pickles

Hello!

The Walking to Spring CSA started this week and I couldn’t be happier to a refrigerator full of fresh produce. Let us know how your thoughts on this session – we would love to hear from you!

I wanted to share with you a preservation technique that you may find fun and useful. It is called Misozuke, which is a Japanese miso-cultured pickle. It is really easy and you only need a couple ingredients – miso and veggies. See below to learn more!

Basics
This is a pretty simple process but there are a few key steps to keep in mind:

  • Create a miso-doko: this is the miso pickling paste. You can use any type of miso you have on hand – white and red are the most common. You can use one type or mix together various types. You can add a little sake and/or mirin which will loosen it up and make it easier to submerge the vegetables (I think I will try this next time). Some recipes add other flavorings at this point, such as ginger and garlic.
  • Prepare your vegetables: you could probably use just about any vegetable but turnips, Daikon, kohlrabi and celery are the ones I have seen most often. I am sure broccoli, carrots, scallions and even the stems from your greens would work great. You can cut your vegetables any size but most are sliced about 1/2″ thick or cut into matchstick sized pieces. Whatever size you choose, be sure they are evenly sized so they ferment at the same rate.
  • Layer miso-doko and vegetables: you can do this in just about any kitchen vessel – a dinner plate, food storage container or even canning jars. You can spread a layer of miso in the bottom of the container, lay the prepared vegetables on top, and top them with more miso. If you loosened the miso, you may be able to just push the vegetables in the mixture. Some recipes I have found will place cheesecloth on either side of the vegetables to make it easier to get them out but I didn’t bother with that step.
  • Ferment: you have a choice to ferment on the counter at room temperature, in the refrigerator or a combination of the two. Some people will keep the mixture at room temperature for a day and then transfer to the refrigerator for the remaining time. If you decide to keep it in the refrigerator the whole time, as I did, it may take longer to reach a desired outcome.
  • Taste daily: this process is entirely new to me so I can’t provide a great guideline on how long it will take. Some recipes ferment for just a day while others leave it for two weeks. Taste a small piece everyday and simply remove them when they are to your liking.

Other Resources
I recommend checking out the links below to get an idea of the process others use to make these pickles. They are all a bit different but you can gleam a little from each one.

Leftover Miso
You can use the miso bed over and over as long as you like the flavor – some say up to 10 times. Once it loses flavor, however, there are plenty of ways to get use out of it.

  • Tekka: I am fascinated by this savory condiment made by cooking down miso and ground root vegetables. You can find a recipe and learn more about it here and here.
  • Miso-Sesame Dressing: this probably won’t be as full flavored as compared to using fresh miso but still a great option none-the-less.
    • Ingredients: 6 tablespoons water, 1/4 cup rice vinegar, 7 teaspoons red miso, 1 tablespoon soy sauce, 1-1/2 teaspoons honey, 1 (2-inch) piece ginger – peeled and chopped coarse, 1 small garlic clove – chopped coarse, 1/4 cup canola oil, 1 tablespoon toasted sesame oil
    • Direction: Process all ingredients except canola and sesame oil in a blender until finely chopped, about 15 seconds. With the blender running, add oils in steady stream until incorporated, then continue to process until smooth, about 15 seconds. Can be refrigerated for a week.
  • Simple Miso Soup: add a little of the miso paste to a cup and pour boiling water over, stirring to combine. Top with sliced scallions and enjoy.

Radish Miso Pickles
makes about 1/2 cup finished pickles

Ingredients:

  • 1/2 cup white miso
  • 4-5 French or globe radishes, sliced 1/2″ thick or cut into small wedges

Directions:

  • Place 1/4 cup of the miso in a thin layer on the bottom of a glass food storage container. Place the radishes in a single layer on top of the miso. Spread the remaining miso on top of the radishes. Cover and place in the refrigerator until done.

Weekly Farm Notes :: March 23rd, 2016

Hello,

The “Walking to Spring” CSA starts tomorrow! We are transitioning from Winter crops to Spring crops so this week we are including double Toscano kale and double collard greens, along with the other items listed below. We have lots of recipe / preservations ideas included below and on the website!

If you have a share, you should have received an email from Mark with details on our get together tomorrow after market. We hope to see you there!

See you tomorrow at market!

~~~~~~~~~~~~~~~~~~~~~~~~~~~~~~~~~~~~~~~~~~~~~~~~~~~

March 23rd Produce

Here are the items you can expect at Market {M} and in the CSA {CSA}:

  • Toscano, Red Russian & Siberian Kale {M/CSA}:
    • Salad: you can use all types of kale in salads but I particularly like Toscano. There is this one with currants, pine nuts (or sunflower seeds) and Parmesan or our Easy Kale Salad with Russian Dressing.
    • Super Greens Soup: check out the recipe below – it is a pureed soup using Swiss chard and kale but you could mix and match with any of your favorite greens. It can be easily frozen so make a big batch and save some for later!
    • Kale Chips: dehydrating is always a great option for all your greens! Check out this post for great tips plus a yummy recipe!
  • Tender Collards {M/CSA}:
    • Pot ‘O Greens: I am not a born Southerner but boy-o-boy do I love a mess of greens with beans and cornbread! While collards are traditionally made with meat products, there are plenty of vegetarian preparations. Check out this, this and this!
    • Relish: if you can’t get through all of your greens while fresh, check out our Collard Greens Relish recipe. I have had a batch in the refrigerator for a couple of months and it is still good!
  • Rainbow Swiss Chard {M/CSA}: you can add your chard to the Super Greens Soup below or any number of the recipes in our archives: Swiss Chard and Orange Muffins, Barley and Lentil Soup with Swiss Chard, or Millet & Quinoa Patties with Curried Swiss Chard.
  • Spring Radishes {M/CSA}: if you are planning an Easter dinner this weekend, you might like the Spring Dinner Menu posted on the Main Street Farmers Market blog. It includes an idea for pimento cheese toast with sliced radishes on top which is a tasty start to any meal!
  • Dragon Tongue Mustard Greens {CSA}: get to know your greens a bit more – check out this link for more information on this beautiful green!
  • Sweet Mint & Peppermint {M}: here is a great line-up of savory and sweet recipes that incorporate mint!
  • Edible Spicy Asian Flowers {M}: need some ideas on how to use edible flowers? Check out this post for lots of great ideas!
  • Organic Fed Pastured Hens {M}: there isn’t a shortage of ways to use eggs but here is a great way to make eggs into a meal that works great any time of day – Greens and Cheese Frittata Muffins!

~~~~~~~~~~~~~~~~~~~~~~~~~~~~~~~~~~~~~~~~~~~~~~~~~~~

Recipe :: Super Greens Soup with Lemon-Tarragon Cream

This is a great way to use up a lot of greens at once. The base of the soup is pureed and can be easily frozen. You don’t have to make the lemon-tarragon cream but it makes it a little more special. This recipe is from The Complete Vegetarian Cookbook and serves 4-6.

  • Ingredients:
    • 1/4 cup heavy cream
    • 3 tablespoons sour cream
    • 2 tablespoons plus 1/2 teaspoon extra-virgin olive oil
    • 1/4 teaspoon finely grated lemon zest plust 1/2 teaspoon juice
    • 1/2 teaspoon minced fresh tarragon
    • Salt and pepper
    • 1 onion, halved through the root end and sliced thin
    • 3/4 teaspoon light brown sugar
    • 3 ounces white mushrooms, trimmed and sliced thin
    • 2 garlic cloves, minced
    • Pinch cayenne pepper
    • 3 cups water
    • 3 cups vegetable broth
    • 1/3 cup Arborio rice
    • 12 ounces Swiss chard, stemmed and chopped coarse
    • 9 ounces kale, stemmed and chopped coarse
    • 1/4 cup fresh parsley leaves
    • 2 ounces (2 cups) baby arugula
  • Directions:
    • Combine cream, sour cream, 1/2 teaspoon oil, lemon zest and juice, tarragon, and 1/4 teaspoon salt in bowl. Cover and refrigerate until ready to use.
    • Heat remaining 2 tablespoons oil in Dutch oven over medium-high heat. Stir in onion, sugar, and 1 teaspoon salt and cook, stirring occasionally, until onion releases some moisture, about 5 minutes. Reduce heat to low and cook, stirring often and scraping up any browned bits, until onion is deeply browned and slightly sticky, about 30 minutes. (If onion is sizzling or scorching, reduce heat. If onion is not browning after 15-20 minutes, increase heat).
    • Stir in mushrooms and cook until they have released their moisture, about 5 minutes. Stir in garlic and cayenne and cook until fragrant, about 30 minutes. Stir in water, broth, and rice, scraping up any browned bits, and bring to boil. Reduce heat to low, cover and simmer for 15 minutes.
    • Stir in chard, kale and parsley, 1 handful at a time, until wilted and submerged in liquid. Return to simmer, cover, and cook until greens are tender, about 10 minutes.
    • Off heat, stir in arugula until wilted. Working in batches, process soup in blender until smooth, about 1 minute. Return pureed soup to clean pot and season with salt and pepper to taste. Drizzle individual portions with lemon-tarragon cream, and serve.

~~~~~~~~~~~~~~~~~~~~~~~~~~~~~~~~~~~~~~~~~~~~~~~~~~~

Alice O’Dea Article

Have you read Alice O’Dea’s recent article? This week she gives us an overview of Coconut Soup, a comforting dish for those with colds and allergies!


Farm Tour Pictures + Spring Details

Hello!

Instead of my regular recipe post, this week I am going to share some farm photos from my recent visit. Gina was working her day job and Mark was busy with errands so it was mostly Cormac (my son), Henry (the small farm dog, aka, our tour guide!) and myself exploring. Being on the farm was a great reminder of how much work it takes to get produce from farm to plate. We owe Mark & Gina a world of gratitude!

Also, a couple items to know about for the upcoming months:

  • Walking to Spring CSA Session: here are some items you can expect during the upcoming session: turnips, beets, radishes, spinach and cabbage.
  • Mushrooms: we are starting to grow mushrooms! You can expect to see oyster mushrooms this spring and shiitake mushrooms closer to the fall.
  • Plant Starts: we will have plant starts available to purchase soon. We have tomatoes, peppers and herbs but please let us know if there is anything you would like us to start for you!

That’s it for now. We hope you enjoy the farm pictures below!

~~~~~~~~~~~~~~~~~~~~~~~~~~~~~~~~~~

Mya and Theo Henry Cat High Tunnel Outside fields High tunnel Henry in high tunnel Food Food 2 high tunnel Cormac exploring Cormac exploring Food 3 Food 4 Food 5 Food 6 Food 7 Mark watering Field Farm tools Donkey Goats and chicken Donkey and goat Donkey, goat and chicken Cormac and Henry View walking towards back of farm Pigeon Mountain plants Henry Looking back towards farm Cormac exploring Cormac and Henry Take time to smell the flowers Exploring the hay Hay and pitchfork Farm tools Sky Tractor Plant starts Plant starts Plant starts Plant starts Plant starts Mark watering plant starts Farm dogs Scale Rooster


Weekly Farm Notes :: March 9th, 2016

Hello,

We are in between CSA sessions currently with the “Walking to Spring” session starting March 16th or 23rd. It is currently full but we may open more shares so please check back with us if interested!

See you tomorrow at market!

~~~~~~~~~~~~~~~~~~~~~~~~~~~~~~~~~~~~~~~~~~~~~~~~~~~

March 9th Produce

Here are the items you can expect at Market:

  • Toscano & Red Russian Kale: I am always trying to get my 2-year-old son to eat more vegetables. He is a good eater but plain sauteed greens are a bit much to ask. Smoothies are a great option but so is anything in bread form. Last week I made Vegetable Packed Pancakes and they were a big hit! They aren’t sweet so you can eat them as is, with a yogurt sauce or on the side of any number of main dishes.
  • Swiss Chard: if you are in a chard rut, check out this list of tasty recipes (Swiss chard taco wraps?! Yah, that’s happening). Remember, don’t throw away the stems!
  • Tender Collards: I love preserving seasonal produce but collards always seemed like a tough option. You could add them to soup or sauce but I wanted something a bit different. If this sounds familiar, you may like our Collard Green Relish recipe. It’s a great balance of sweet, tangy and spicy. It’s delicious with crackers a cheese!
  • Radishes: there is a great new recipe on the Main Street Farmers Market blog for Grains and Greens Salad. These are the type of recipes I love – a good base but with plenty of room for experimenting.
  • Peppery Arugula & Spicy Wasabi Arugula Flowers: with Spring right around the corner, it feels fitting to add edible flowers to our meals. If you aren’t sure how to use them, check out this link for more information.
  • Peppermint: basil isn’t the only herb that works well in pesto – mint is a great option, too! Check out the Mint & Pistachio Pesto recipe below.
  • Chickweed: there are lots of chickweed pesto and salad recipes out there but if you want something a bit different, try this Chickweed Pakoras recipe. It’s on my list for the week!
  • Dead Nettle & Henbit: if you look down as you walk around, I bet you will see a ton of Dead Nettle and Henbit growing (check out this link to identify both). I wouldn’t suggest picking any if you don’t know if it has been sprayed or not. You can feel rest assured ours is chemical free so pick some up and try this Dead Nettle and Henbit Pistou!

~~~~~~~~~~~~~~~~~~~~~~~~~~~~~~~~~~~~~~~~~~~~~~~~~~~

Recipe :: Mint & Pistachio Pesto

  • Ingredients
    • 3 medium garlic cloves, skin left on
    • 1 cup (1 ounce) packed mint leaves
    • 2-1/2 ounces feta cheese, crumbled
    • 1/2 cup (2 ounces) pistachios
    • Juice of one medium lime (2 tablespoons / 1 ounce)
    • 1/3 cup neutral oil (I used grapeseed oil)
    • 2 tablespoons of water (if needed)
    • Salt and freshly ground black pepper
  • Directions
    • Heat a small traditional skillet over medium heat.  Add the garlic cloves and cook, turning occasionally, until they are softened and the skins are charred, about 8-10 minutes.  Remove from heat and when cool enough to handle, remove the skins.  Mince and add to a food processor.
    • Add the remaining ingredients except the water and process until mostly broken down but still slightly chunky, about 10-15 one-second pulses, scraping down the sides of the bowl when needed.  Thin with a little water or additional oil if needed.  Taste and season with salt and pepper if needed.

~~~~~~~~~~~~~~~~~~~~~~~~~~~~~~~~~~~~~~~~~~~~~~~~~~~

Alice O’Dea Article

Have you read Alice O’Dea’s recent article? I love learning about new dishes, so was excited to read all about an Indian soup called rasam.


Vegetable Packed Pancakes

Hello,

Turning traditionally sweet food into something savory is nothing new. Of course there is Zucchini Bread and Carrot Cake but the vegetable additions are usually masked by lots of sugar and sweet spices. Nowadays, you can find items like Corn & Basil Cupcakes, Rosemary, Almond and Parmesan Cookies, and even our Savory Quick Bread with Broccoli Rabe and Sun-dried Tomatoes, which keep the basic shape of the original item but lacks most or all of the sweetness.

This is my take on a Buckwheat Vegetable Pancake recipe from Fresh Food Fast (one of my favorite cookbooks), which looks like a pancake but is served as a savory side dish. The author uses cabbage where I use kale but I think a number of vegetables would work well. These are great because you can flavor them in any number of ways – I added a few dashes of a Turkish spice blend but I think curry powder or Italian seasoning would be great too. You could also skip the spices and just add fresh herbs, like dill or parsley.

I didn’t try it, but you might be able to make this vegan by swapping the eggs for flax or chia eggs and using a plant based milk. Let me know how it turns out if you try it!

Also, if you want a dipping sauce to serve along side, try this spicy yogurt sauce: mix together 1 cup whole-milk yogurt, a couple tablespoons chopped cilantro, 1 small minced garlic clove, 1/2 teaspoon salt, and 1/8 teaspoon (or more as desired) cayenne.

Vegetable Packed Pancakes
makes about 10 3″ pancakes

Ingredients:

  • 1 cup all-purpose flour
  • 1/2 cup gluten-free flour of choice (I used 1/4 cup buckwheat + 1/4 cup brown rice flour but you could also use more all-purpose)
  • 1-1/4 teaspoons sea salt
  • 1 teaspoon baking powder
  • 1-1/2 cups milk (I used soy milk but use whatever you have on hand)
  • 2 large eggs
  • 1 tablespoon vegetable oil
  • 1-1/2 cups finely chopped kale
  • 1 large carrot, grated on the medium holes of a box grater, about 3/4 cup
  • 3 scallions, thinly sliced
  • Spices / herbs of choice, optional
  • 1/4 cup vegetable oil for frying

Directions:

  • In a large bowl, whisk together the flours, salt and baking powder. In a separate bowl, whisk together the milk, eggs, and oil. Pour the wet mixture over the dry and stir to combine.
  • Add the kale, carrots, scallions and spices / herbs, if using, to the batter and mix well. The batter will be thick.
  • Heat a tablespoon of oil over medium heat in a 12″ non-stick skillet until shimmering. Using a 1/3 cup dry measure, add three scoops of batter to the pan. Cook until the first side is spotty brown and there are bubbles around the edge, about 3-5 minutes. Flip and cook until the second side is spotty brown and the pancakes are cooked through, another few minutes. Transfer to a cooling rack and cook the remaining batter.
  • To keep all pancakes warm while working in batches, you can place the cooling rack inside a rimmed baking sheet and transfer to a 200 degree oven.

Weekly Farm Notes :: March 2nd, 2016

Hello,

We are in between CSA sessions currently with the “Walking to Spring” session starting March 16th or 23rd. It is currently full but we may open more shares so please check back with us if interested!

See you tomorrow at market!

~~~~~~~~~~~~~~~~~~~~~~~~~~~~~~~~~~~~~~~~~~~~~~~~~~~

March 2nd Produce

Here are the items you can expect at Market:

  • Toscano, Red Russian and Siberian Kale: check out our latest post – Super Greens & Sunflower Seed Pesto. There isn’t anything revolutionary here but I do like a pesto recipe that uses seeds over other expensive nuts. Also, the flavor of sunflower seeds stands up really nicely to a mix of greens but just plain kale would work great too.
  • Swiss Chard: I try to only go to the grocery store once, maybe twice a week. So there are times when there isn’t much left in the refrigerator and I need to feed a hungry 2-year-old (not to mention myself and an equally hungry husband). That is where this type of recipe comes in – bread, veggies and cheese will make anyone happy. You could really use any type of veggie but I think sauteed greens would be delicious.
  • Tender Collards: I am planning to use the collards from last week in a sweet potato coconut soup tonight. If the recipe turns out well, I will share it in a few days!
  • Mild Red Mustard: I haven’t experimented with mustard greens raw but I think this recipe, where it is tossed with walnuts, pears, Pecorino and a persimmon-shallot vinaigrette, sounds like a great salad option.
  • Peppery Arugula & Spicy Wasabi Arugula Flowers: these flowers would be a great addition to our Wasabi Arugula Rice Salad with Miso-Ginger Dressing recipe. You could use all sorts of greens in place of the wasabi arugula and then just top each plate with the flowers.
  • Chickweed: a couple options for the chickweed – 1) I think it would be great in our Dead Nettle and Henbit Pistou or 2) in this Chickweed Power Salad recipe. The pistou comes together in minutes whereas the salad takes a while to put together. Both delicious in very different ways but equally as enjoyable to consume 🙂

~~~~~~~~~~~~~~~~~~~~~~~~~~~~~~~~~~~~~~~~~~~~~~~~~~~

Alice O’Dea Article

Have you read Alice O’Dea’s recent article? This week Alice shares her favorite online resources for home cooks – one of which is our blog!!


Super Greens & Sunflower Seed Pesto

Hello!

You may find you are short on time to cook this weekend if you are enjoying the beautiful weather. No worries – you can throw together this pesto in no time with items you most likely have in your pantry. Don’t limit yourself to just tossing it with pasta, although that is a perfectly wonderful way to enjoy it. You could also use it on sandwiches, a base for pizza, tossed with broccoli or cauliflower just to name a few.

While you can use all sorts of greens, seeds/nuts and cheese in pesto, I especially like this mix for a few reasons. I used the arugula, spicy asian greens, Spigarello broccoli rabe leaves and basil mix from last week’s CSA share which really provides a great flavor base (you could also use kale or another hearty green). It is paired with sunflower seeds, which are economical and the flavor stands up well to the spicy and bitter greens. I then used a mix of Sequatchie Cove Creamery aged Coppinger and Parmesan, but you can also use just Parmesan or other aged cheese of choice.

Get out and enjoy the sunshine…and then make this when you come in to eat! Enjoy!

Super Greens & Sunflower Seed Pesto
makes about 1-1/2 cups

Recipe notes: I always find pesto needs salt and although not traditional, a little lemon juice, too. Be sure to taste after adding the cheese as you may find you don’t need it.

Ingredients:

  • 1/2 cup sunflower seeds
  • 3 medium garlic cloves
  • 5-1/4 ounces (about 3-1/2 packed cups) of hearty greens, tough stems removed and leaves roughly chopped
  • 1/2 cup extra-virgin olive oil
  • 3/4 cup Parmesan or other aged cheese of choice (grated on the large holes of a box grater)
  • 1/4 teaspoon sea salt, if desired
  • 2 teaspoons freshly squeezed lemon juice, if desired

Directions:

  • Place sunflower seeds in a single layer in a 12″ traditional skillet and place over medium heat. Stir occasionally until most of the seeds are toasted, about 5 minutes. Transfer to a large capacity food processor.
  • Place the garlic cloves (with skins still on) in the same skillet and place over medium heat. Flip occasionally until the skins are starting to blacken and the garlic gives slightly when squeezed, about 5-8 minutes. Remove from heat and when cool enough to handle, remove skins and add to the food processor.
  • Add the greens to the food processor and process until mostly broken down, about 15-30 seconds. With the motor running, add the olive oil in a steady stream until fully incorporated, scraping down the sides of the processor as needed. Transfer to a bowl and mix in the cheese. Taste, and add salt and lemon juice if needed. Serve immediately or store in an air-tight container in the refrigerator for 5-7 days.

Weekly Farm Notes :: Feb 24th, 2016

Hello,

This is the last week of the “Deep Winter” CSA! We hope you all have found the session nourishing. The “Walking to Spring” CSA session is full but we might open more shares later in the season – check back with us if you are interested!

The greens mix includes basil this week, which may seem odd given the season. It comes to us from a special place – Ray McWhorter, a teacher from the aquaponics “SPLASH” lab at Gilbert Elementary! It sounds like an impressive learning technique!

See you tomorrow at market!

~~~~~~~~~~~~~~~~~~~~~~~~~~~~~~~~~~~~~~~~~~~~~~~~~~~

February 24th Produce

Here are the items you can expect at Market {M} or in the CSA share {CSA}:

  • Rainbow Swiss Chard {CSA/M}: this rainy weather has me craving soup, like this Barley & Lentil Soup with Swiss Chard, or an Asian noodle soup like the Market Udon Bowl (to which you can add any of our greens to) or maybe Egg Drop Soup, again with greens added.
  • Red Russian {CSA/M}, Curly {CSA}, Toscano {M} & Red Ruffled {M) Kale: this Purple Kale, Cabbage and Fennel Ferment mixture sounds like a great way to preserve kale for the weeks and months to come!
  • Arugula, Spicy Asian Greens, Spigarello Broccoli Rabe Leaves and Basil Mix {CSA}: this mix of spicy and herby greens will make a great base for pesto! There are a million ways to make it, and while I don’t really think you need a recipe, you should at least read through this blog post on How to Make the Best Pesto. It all comes down to personal taste but the author does some interesting experiments that you might find valuable.
  • Tender Collards {CSA/M}: I am always looking for ways to get my toddler to happily eat greens. Sure, I can put them in smoothies or chop them finely to add to other dishes (which happens all.the.time), but something crunchy is always a hit. That is where Collard Green Chips come in. They couldn’t be easier and can be flavored in so many ways. Make them in the dehydrator or the oven and get your crunch on.
  • Lavender Leaves {CSA}: did you know that you can use lavender leaves in addition to the flowers? Check out our latest post with LOTS of great ways to use your leaves!
  • Mild Red Mustard {M}: there are references to soup above but thought I would include one more – see the recipe below for an easy Potato and Mustard Green Soup!
  • Chickweed {M}: this nutritious herb can be used in salads or as a substitute for spinach. You can also make a tea from the fresh leaves – add 2 tablespoons of chickweed to 1 cup of boiling water and allow to steep for 10 minutes. Add lemon and/or honey to taste!

~~~~~~~~~~~~~~~~~~~~~~~~~~~~~~~~~~~~~~~~~~~~~~~~~~~

Recipe :: Easy Potato and Mustard Greens Soup

This recipe is from Deborah Madison’s Vegetarian Cooking for Everyone. Serves 4-6.

Ingredients:

  • 2 tablespoons olive oil or butter
  • 2 onions, finely diced
  • 2 pounds potatoes, peeled
  • Salt and freshly ground pepper
  • 1 bay leaf
  • 2 tablespoons chopped parsley
  • 1 bunch mustard greens, de-stemmed, cooked and chopped
  • 2-3 pinches of red pepper flakes
  • Parmesan for serving

Directions:

  • Heat oil in a Dutch oven over medium heat until shimmering. Add onions and cook slowly. Meanwhile, quarter each potato lengthwise, then thinly slice. Irregular pieces are fine – the smaller ones will fall apart, giving body to the soup.
  • Add the potatoes, raise the heat, and saute, stirring frequently, until the onions begin to color and a glaze builds up on the bottom of the pan, about 10 minutes. Add 1-1/2 teaspoons salt, bay leaf and 1 cup water. Scrape the bottom of the pot to loosen the solids. Add 2 quarts water and bring to a boil. Lower the heat and simmer, partially covered, until the potatoes are soft, about 30 minutes. Remove the bay leaf, taste for salt, season with pepper and stir in the parsley, cooked mustard greens and red pepper flakes. For a soup with more body, pass 1 or 2 cups through a food mill.

~~~~~~~~~~~~~~~~~~~~~~~~~~~~~~~~~~~~~~~~~~~~~~~~~~~

Alice O’Dea Article

Have you read Alice O’Dea’s recent article? She is taking a break from cooking to talk about starting the process of decluttering, specifically her kitchen.


Lavender Leaves :: Ideas and Recipes

Hello!

You will be receiving lavender leaves from Begin Again Farms in your CSA share this week. You may be familiar with lavender flowers but the leaves have a ton of flavor too! I find the flavor of the leaves to be a bit more mild than the flowers but I am sure it depends on the variety.

Lavender works well with many different flavors – cream/ice cream, honey, lemon, orange, rosemary, sugar, vinegar and walnuts to name a few. It can be used fresh or dried in ways similar to rosemary. If you cook with rosemary often, you already know that less is more and the same holds true for lavender. Add a little at a time!

I am focusing on culinary ideas for using lavender but the leaves can also be used for home and aromatherapy purposes. Experiment and have fun!

  • Vinegar
    • Steep in vinegar and use in vinaigrettes or as a cleaning product. Scroll about half way down this page for a handful of different recipes and lots of uses!
  • Simple Syrup
    • Simmer a couple stems in a simple syrup and add to lemonade, iced tea or cocktails. Recipe below!
  • Tea
    • Use fresh or dried leaves to make tea – substitute leaves for the flowers in this Lavender Mint Tea.
  • Mixed with Fresh Cheese
    • Great mixed with ricotta, goat cheese or feta. A broiled feta recipe is included below!
  • Scented Sugar
    • Add about 1 tablespoon of leaves to 1 cup of sugar and store in an air-tight container for 2 weeks. Remove leaves and add to anything where you want a sweet, floral scent.
  • Cookies
    • Add to cookies for a light floral flavor. A shortbread recipe is included below!
  • Cake
    • I think lavender leaves would be a delicious substitute for rosemary in this Rosemary Olive Oil Cake. Please, someone make this and give me a bite 🙂
  • Dried Herb Mixture
    • Include dried leaves in a homemade Herbs de Provence mixture. It’s great on just about anything grilled or roasted! Recipe below!

~~~~~~~~~~~~~~~~~~~~~~~~~~~~~~~~~~

Simple Syrup
makes about 1-1/2 cups

Recipe notes: while I haven’t tried it, I think this syrup would be great in lemonade, iced tea or in any number of cocktails. I used this in a fizzy drink – I added a couple of tablespoons of syrup along with about 8 ounces of sparkling water, a good squeeze of lemon juice and lots of ice.

Ingredients:

  • 1 cup water
  • 1 cup granulated sugar
  • 2-2″ pieces of fresh lavender stems
  • 1-2″ piece of fresh rosemary
  • 2-3″ pieces of lemon zest

Directions:

  • Put all ingredients in a small saucepan and place over medium-high heat. Bring to a simmer, stirring occasionally, until sugar has dissolved. Remove from heat, remove the rosemary with a slotted spoon and leave the lavender and lemon zest to steep for 30 minutes. Remove the lavender and lemon zest and transfer to an air-tight container. Will keep in the refrigerator for a few weeks.

~~~~~~~~~~~~~~~~~~~~~~~~~~~~~~~~~~

Broiled Feta with Lavender-Balsamic Drizzle
serves 4-6

Recipe notes: 1) the broiled feta part of the recipe is from Cook’s Illustrated; 2) you can also mix the vinegar with extra virgin olive oil and use as a salad dressing; 3) serve the feta with crackers or warmed pita bread.

Ingredients:

  • 1/2 cup balsamic vinegar
  • 2-2″ pieces fresh lavender stems
  • 1 small shallot, peeled and thinly sliced
  • 8 ounces feta, sliced 1/2″ thick

Directions:

  • Place the vinegar, lavender and shallots in a small saucepan and heat over medium until simmering. Continue to cook until reduced by half and the vinegar is syrupy, about 5-10 minutes. Remove from heat and allow to cool. Transfer to an air-tight container and store in the refrigerator.
  • Adjust an oven rack 4 inches from the broiler element and heat the broiler. Pat the feta dry with paper towels and place on a foil-lined baking sheet (or in a broiler-safe gratin dish). Broil until the edges of the cheese are golden, 3 to 8 minutes. Drizzle with the lavender-balsamic reduction and serve immediately.

~~~~~~~~~~~~~~~~~~~~~~~~~~~~~~~~~~

Lavender-Lemon Shortbread Cookies
makes about 10-12 cookies

Ingredients:

  • 2 ounces (about 1/4 cup) granulated sugar
  • 4 ounces (1 stick) unsalted butter, room temperature
  • 1-1/2 teaspoons minced fresh lavender leaves
  • 1/2 teaspoon lemon zest
  • 1/4 teaspoon vanilla extract
  • 1/2 teaspoon table salt
  • 6 ounces (about 1 1/4 cups) all-purpose flour

Directions:

  • Using a hand or stand mixer, beat the sugar and butter together until fully incorporated and airy, about 1 minute. Add the lavender, lemon zest, vanilla and salt to the sugar and butter and mix until incorporated. With the mixer running, slowly add the flour over low speed until just incorporated, scraping down the sides of the bowl as needed.
  • At this point, the dough will look really crumbly but should hold together when squeezed. If the dough seems overly dry, add another tablespoon of butter. Transfer to a large piece of plastic wrap and form into a rough 1-1/2″ log. Cover with plastic and transfer to the refrigerator for 30 minutes.
  • Adjust oven rack to the middle position and heat to 375 degrees. Line a rimmed baking sheet with parchment paper and set aside. Remove dough from plastic wrap and carefully slice into 1/3″ rounds and evenly space on the baking sheet. Cook for 12-15 minutes or until very lightly browned. Transfer to a cooling rack and cool completely. Store in an air-tight container for up to 5 days.

~~~~~~~~~~~~~~~~~~~~~~~~~~~~~~~~~~

Skillet-Roasted Potatoes with Herbs de Provence
serves 4-6

Recipe notes: the cooking technique for the potatoes is from Cook’s Illustrated (and it’s my favorite way to cook red potatoes!); 2) there are a million ways to make Herbs de Provence – the recipe below is based off of what I had on hand. Many recipes include savory, marjoram and/or sage as well, so feel free to add those too if readily available.

Ingredients:

  • 1-1/2 pounds small red potatoes (about 1-1/2 inches in diameter), unpeeled, halved
  • 2 cups water
  • 3 tablespoons unsalted butter
  • 3 garlic cloves, peeled
  • 1-1/2 teaspoons Herbs de Provence (recipe below)
  • 1 teaspoon sea salt
  • 2 teaspoons Dijon mustard
  • 1/4 teaspoon freshly ground pepper

Directions:

  • Arrange potatoes in single layer, cut side down, in 12-inch nonstick skillet. Add water, butter, garlic, Herbs de Provence, and salt and bring to simmer over medium-high heat. Reduce heat to medium, cover, and simmer until potatoes are just tender, about 15 minutes.
  • Remove lid and use slotted spoon to transfer garlic to cutting board. Increase heat to medium-high and vigorously simmer, swirling pan occasionally, until water evaporates and butter starts to sizzle, 15 to 20 minutes. When cool enough to handle, mince garlic to paste. Transfer paste to bowl and stir in mustard and pepper.
  • Continue to cook potatoes, swirling pan frequently, until butter browns and cut sides of potatoes turn spotty brown, 4 to 6 minutes longer. Off heat, add garlic/mustard mixture and toss to thoroughly coat. Serve immediately.

Herbs de Provence

  • Ingredients:
    • 1 tablespoon dried thyme
    • 1-1/2 teaspoons dried and minced lavender leaves
    • 1-1/2 teaspoons dried rosemary
    • 1 teaspoon dried oregano
  • Directions:
    • Mix all ingredients together and store in an air-tight container.