Dưa Cải Chua

Don’t it always seem to go that you don’t know what you’ve got till it’s gone. -Joni Mitchell

It’s hard to believe in the middle of winter, when you’re so hungry for fresh veg you can’t stand it, but by mid-spring sometimes you can get greens fatigue. They just keep coming!

That bounty is wonderful, but when you’re running out of ideas for how to eat them fresh, remember how hungry you were for those greens just a couple months ago. Fortunately, your greens don’t have to go the same way as Joni Mitchell’s proverbial paradise.

Cucumbers, peppers, cabbage, and radishes aren’t the only spring and summer veggies you can pickle. Give your mustard and other spicy, peppery greens the same treatment, and you can have a taste of spring even after summer has passed.
18289798_10101376597390158_235019803_o

Dưa Cải Chua is a Vietnamese dish of pickled Spicy Asian Mustard Greens. It’s simple to make and easy to customize to your preferred palate—you can adjust to find your perfect balance of salt, sweet, sour, and spice. And best of all, you can make it with what’s in your share and a few common items in your pantry.

You’ll need:
2 bunch mustard greens, about 4 pounds
4-6 cloves of garlic
1 bunch of spring onion or white onion
Large pot boiled water
2.5-3 tablespoons salt
3 tablespoon sugar
Sriracha, Sambal Oelek, minced Sereno Peppers, or Szechuan Peppercorns
Fish Sauce (optional)
Clean mason jars
A Kraut Source fermentation kit (we sell them at our booth!) or ziplock bags & mason jar lids

Clean and separate your mustard greens and onions. Pick out any leaves that have gotten too yellow—though a little yellow or limpness is ok, as Dưa Cải Chuaa is a great way to use up greens that have languished in the back of your fridge a little longer than you intended (shhh, we won’t tell). A salad spinner an a little chilled tap water will do the trick.

18261626_10101376691860838_1489664596_o

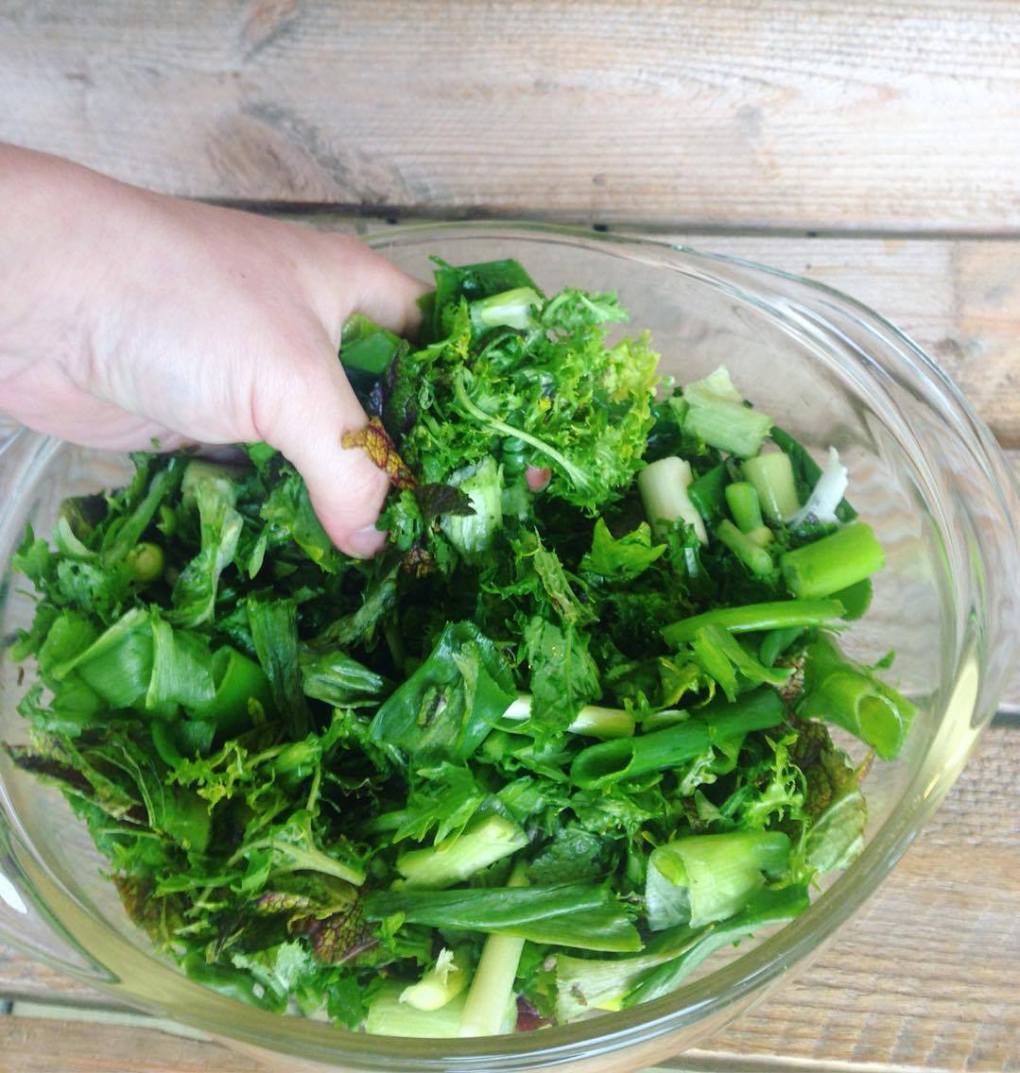
Dry the leaves and shred, then slice the onions. Some recommend letting the greens air dry and get limp for up to 12 hours. Others to simply pat dry with paper towels. It depends on how much time and counter space you have, and how fresh your mustard greens are. Once your leaves are dry, massage them till they are even more limp and even start to sweat a little. Mix with your onions and garlic and set aside.

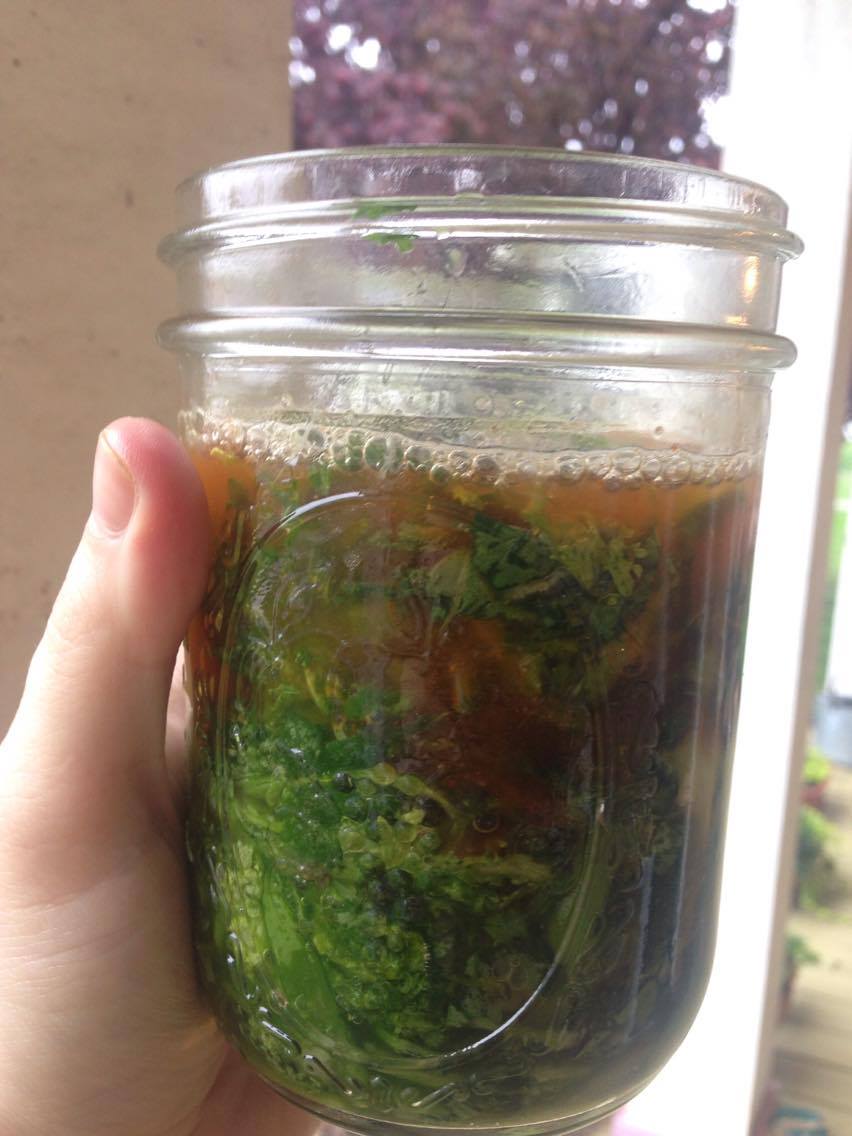
Rinse your mason jars with boiling water to sterilize them. While the jars are cooling, use remaining boiled water to make a brine with the salt, sugar, and whatever spices you are adding. Taste with a clean spoon as you go to make sure you like the level of heat and balance of flavors.

Sriracha will produce a sweeter, milder Dưa Cải Chuaa. Sambal oelek will be spicier. Minced serano peppers are more traditional, but can get very spicy very quickly. Sezchuan peppercorns will be a different flavor—making the dish more Chinese than Vietnamese— and the level of heat will depend on how fresh your peppercorns are. Fish sauce will make it saltier and add an extra briny, umami flavor.

18261341_10101376597285368_1326493658_o

Pack your jars with the blend of mustard greens, onions, and garlic as tightly as possible. Press them down with a rubber spatula, which you can also use to break up air pockets. Pour the brine in with a funnel, until the greens are covered by at least an inch of brine. Don’t overfill your jars though—you want the brine to sit just below the neck of the jar, at least an inch from the lid.

This is when you either screw on your Kraut Source fermentation kit lid or, if you don’t have one, gently press a plastic bag into the mouth of the jar. Fill with tap water, taking care not to spill. The water will press the baggie flush against the top of the brine, making the contents air tight. Secure lip of the baggie to the mouth of the jar with a rubber band.
18261675_10101376597365208_1316923617_o

Let the Dưa Cải Chuaa sit on your counter for a week. After it’s done fermenting, take your baggies or Kraut Source lid off, and replace with regular mason jar tops. The Dưa Cải Chuaa will keep for months in the fridge unopened, much like kimchi or sauerkraut.

Traditionally, Dưa Cải Chuaa is eaten much like kimchi or kraut, used to add flavor to soups, salads, meats, rice, and more. Add it to stir fry, grain bowls, eggs, or noodle dishes.


18261624_10101376691850858_654425559_o

If you used Szechuan Peppercorns for more of a Chinese flare, add your pickled greens to Dan-Dan Noodles, a traditional spicy Szechuan dish made with thick, chewy noodles in a spicy soy-based sauce. For a Japanese-style meal, fry some of your Dưa Cải Chuaa (called Takana in Japan) in sesame oil before adding to rice.

Or if you want to stick close to Vietnam, you can make Canh Dưa Cải Chuaaa beef soup with pickled mustard greens. Or add to another Vietnamese dish Thịt Kho. a slow-braised pork dish with eggs. It would also be wonderful in Pho.


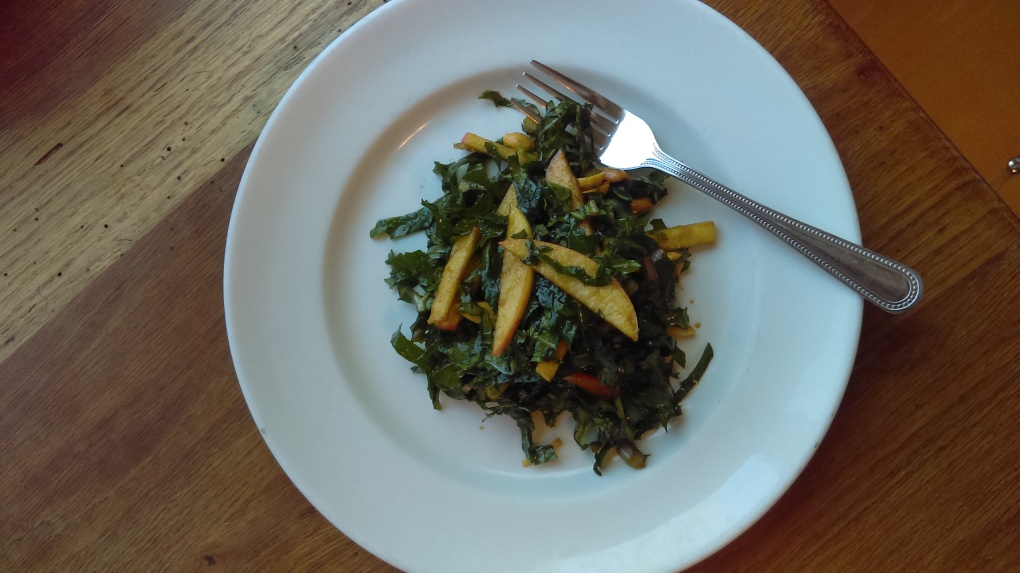
Kale Salad with Apples and Peanuts from the Kitchen of Blackwell Smith

Hello from Tant Hill Farm! With the abundance of Nutrient dense greens this time of year our body screams out for them! Its part of the seasonal eating. With these greens are beautiful stems that are full of nutrition as well. Some may cut the stem out and use the tender leaves. but please don’t throw them away. There are multiple uses for these stems, check out This website for some great ideas. If you are unable to use the stems, an addition to a compost bin or pile will guarantee it goes back into the earth. Below is a recipe from Blackwell Smith. His recipes are quick and delicious. Have fun with your Greens and stems, your body will love you for it!

From Blackwell Smith:

Stems in greens. What do you do with these? Basically if you don’t simmer them in a pot, puree in a smoothie or slice them very small, you may end up with something undesirable, tough or stringy. We have a recipe that will help you get the most out of your produce. It’s simple, easy and quick. You can keep it in the cooler for few days or eat it right out of the mixing bowl.

Kale salad with apples and peanuts
Ingredients
1 bunch of your favorite Tant Hill Farm kale
1 apple
1/3 cup peanuts
1 teaspoon fresh ginger fine chopped
1 teaspoon Sriracha
1/2 tablespoon soy sauce
1 tablespoon honey
2 tablespoons olive oil
2 tablespoons apple cider vinegar
Directions
-hold kale in one bunch tightly slice stems no more than a 1/8th inch slowly moving up the leaves
-cut apple off of core, lay flat, cut thin strips
– pour all liquid ingredients and ginger into mixing bowl and stir together
– put kale, peanuts and apples into bowl and mix with dressing
– serve now or save for later
You could use almonds instead of peanuts. Oranges can substitute for apples. Summer fest or mustard would make excellent additions or substitutes.
Remember fresh food is the best food!!!

Warm Red Kitten Spinach Salad With Wasabi Arugula and Farm Fresh Hard Boiled Eggs from the Kitchen of Blackwell Smith

 My wife and I love warm spinach salad.
The Red Kitten spinach really holds up to the warm vinaigrette. That wasabi punch is damped slightly but still present. Farm fresh eggs add a creamy rich flavor. It’s perfect as a meal or side.
Ingredients
2 farm fresh eggs
1 bag Red Kitten spinach
1 bag Wasabi arugula
2 teaspoons diced fresh ginger
1 teaspoon diced fresh turmeric
1 medium shallot diced
2.5 tablespoons olive oil
1 tablespoon honey
1 table spoon Sherry vinegar
Salt and fresh cracked pepper to taste
Hard boiled eggs
-place both eggs in small sauce pan and cover with room temperature water
-place pot on high heat and 2 tablespoons salt
-start kitchen timer for 15 minutes
-leave pot on high heat uncovered till timer goes off
-pour water off of eggs add cold tap water and let it rest for ten minutes
-crack then peel eggs in a bowl of water (this is very helpful)
-cut eggs into quarter wedges
-room temp eggs are best for this dish so cook just before service
Warm vinaigrette
-add olive oil, ginger, shallots and turmeric to cold small saute 7 inch saute pan
-place pan on eye turn on medium high heat
-slowly bring oil up til aromatics are bubbling and frying slightly not caramelizing 2 to 3 minutes
-place spinach and arugula in large mixing bowl season with salt and pepper (if more peppery arugula is desired add it after spinach is tossed)
-add honey and vinegar, pinch of salt and pepper
-bring vinaigrette back to a boil and pour over spinach lightly tossing with tong till all leaves are dressed
-place on plate garnish with quartered eggs
You could add mushrooms, nuts, cheese or dried fruits. Remember less is more. The spinach is the star of this salad. Fresh food is the best food!!

Apple Goat Cheese Collard Wraps from the Kitchen of Blackwell Smith

So I got these delicious and tender collards the other day. I tasted one. Crisp, fresh and delicious. Perfect for some lettuce style wraps only greener. This is really simple with no cooking time.

4 collard leaves
1 oz goat cheese
4 dates pitted
1/2 apple cut in 8th inch thick slices
Shallot cut into rings 8 to 12 pieces
1 teaspoon apple cider vinegar
1 tablespoon olive oil
Sea salt and fresh cracked black peppercorns
Step one
Place collard on plate
Step two
Tear up each date placing one on each leaf
Step three
Place 5 apple slices over dates
Step four
Crumble goat cheese over apples
Step five
Place 2 or 3 shallot ring along the wrap

Step six

Drizzle olive oil and vinegar on wraps
Step seven
Sprinkle sea salt and pepper on wraps
This is a quick and delicious treat. Perfect for lunch, brunch or snack.
If you have other similar ingredients try those. Enjoy!

Chana Uttapam

Hello,

I haven’t had authentic uttapam but when I was researching this recipe, they are the closest thing I could find to describe the final outcome. The original recipe was labeled “chana dosa” but dosa are thin, crispy crepes made from a rice and urad dal. These are not like that at all. They are more like vegetable filled pancakes or fritters made with chickpea flour.

This recipe is fast, healthy and can be varied in so many ways. Stick with the base of 1 cup chickpea flour + 3/4 cup water + 1 cup grated or minced veggies and you can experiment from there. I used beets in the version I made but you can put just about anything in them. Here are some ideas:

  • Finely grated beets + 1 tbsp minced mint + 1 tsp garam masala + 1/2 tsp ground turmeric
  • Finely grated zucchini + minced basil + lemon zest + chile pepper
  • Finely grated arrots + cilantro + cumin + orange zest
  • Finely grated kohlrabi + dill + mustard seeds
  • Cooked and minced Swiss chard + saffron + orange zest
  • Cooked and minced kale + garlic + thyme + red pepper flakes

I would also recommend serving them with a sauce of your choice. It could be yogurt, sour cream, a tahini sauce or good old fashioned ketchup.

Enjoy!

Chana Uttapam (adapted from The Everyday Ayurveda Cookbook)
makes about 20 small patties

Recipe note: some vegetables can be finely grated and used raw (beets, summer squash, sweet potatoes) but others I would recommend cooking first (eggplant, onions, bell peppers all come to mind).

Ingredients:

  • 1/2 teaspoon table salt
  • 1 cup chickpea flour
  • 3/4 cup water
  • 1 cup grated and/or cooked vegetables
  • Vegetable oil for frying

Directions:

  • Whisk the salt and flour together in a bowl. Slowly add the water, whisking constantly. Fold in the vegetables and any herbs and spices desired.
  • Heat a tablespoon or two of oil over medium heat in a 12″ non-stick skillet until shimmering. Drop small spoonfuls of batter in the oil, smoothing out the surface, making sure not to crowd the pan (I used about a tablespoon of batter for each one). Cook until lightly brown, about 4-5 minutes, then flip and cook on the other side for an additional 4-5 minutes. Transfer to a paper towel lined plate and repeat with remaining oil and batter. Serve immediately.

Escarola Strascinata (Sauteed Escarole)

Hello!

Dr. Oliver and his wife are Tant Hill CSA shareholders and inspired us to grow escarole. Mrs. Oliver is Italian and provided us with this recipe. We hope you enjoy it!

Escarola Strascinata (Sauteed Escarole)

The usual recipe for sautéed escarole is escarola strascinata, “dragged” in the pan with garlic and oil. The addition of anchovies and black olives is optional, but make it more festive and give the dish more complexity.

Ingredients:

  • 3 tablespoons extra-virgin olive oil
  • 4 cloves garlic, crushed
  • 3 anchovy fillets (optional)
  • 1 pound escarole, leaves trimmed and separated
  • 1/4 teaspoon sea salt, plus more as needed
  • 1/4 cup pitted oil-cured black olives (optional)

Directions:

  • Heat the olive oil in a large skillet over medium heat. Add the garlic and if desired, the anchovies, and cook, stirring, until the garlic is translucent and anchovies dissolve, about 2 minutes.

  • Add the whole escarole leaves to the skillet, with a little water from washing still clinging to them, and season with the salt. Stir in the olives if desired. Once the escarole begins to wilt, cover the skillet and cook until the leaves are tender, about 8-10 minutes. Check occasionally to make sure the pan is not dry; if it is, add a few tablespoons of water and cover again.

  • Once the escarole is wilted and tender, uncover and cook for another 1-2 minutes to evaporate any excess liquid. Season with additional salt (keeping in mind that the anchovies and olives contain salt), and serve warm.


Quick Sauteed Escarole with Flavorful Breadcrumbs

Hello!

I love the ease of quickly sauteing greens in the skillet but often find they need a boost of flavor and texture. That’s where tasty, crunchy breadcrumbs come in. They are so simple to put together (and can be made in the same skillet right before the escarole is cooked) and I think they take this dish from good to awesome.

If you aren’t familiar with escarole, it is a bitter green related to endive. As a side note: I found our escarole only slightly bitter, but I am sure it varies. It is high in Vitamins A, K and in folate. Check out this link to learn more about the nutritional benefits of this green.

This is more of a idea than an exact recipe as you can vary it in so many ways. I think the base of olive oil, bread crumbs and garlic is key but otherwise, you can take from or add almost anything. You can add a bunch of fresh parsley or basil at the end. To make it a meal, serve it with white beans, pasta or over polenta. I topped it with Parmesan but I think Pecorino would be a better choice as it would stand up to the other flavors a bit more.

Enjoy!

Quick Sauteed Escarole with Flavorful Breadcrumbs
makes 3-4 servings as a side dish

Recipe note: you probably only need about 1/2 to 3/4 cup of breadcrumbs if you using it just to top the greens. I would use a full cup if you are planning to mix the greens with pasta, beans or polenta. I used 3 small pieces of bread to get 1 cup of breadcrumbs.

Ingredients:

  • 3 tablespoons olive oil
  • 1 cup fresh breadcrumbs (see note)
  • 2-3 garlic cloves, minced
  • 1-2 anchovy filets, minced (optional)
  • 1/2 teaspoon red pepper flakes
  • 2 small heads of escarole, sliced 1/2″ thick crosswise, well cleaned and drained
  • Salt and freshly ground black pepper
  • Shaved Parmesan or Pecorino for serving

Directions:

  • Heat 2 tablespoons of olive oil in a 12″ non-stick skillet over medium heat until shimmering. Add the breadcrumbs and toss to combine. Stir often, until the breadcrumbs are crunchy and browned all over, about 5 minutes. Add the garlic, anchovy, if using and red pepper flakes. Transfer to a paper towel lined plate and set aside.
  • Once cooled slightly, wipe out any excess breadcrumbs from the skillet and return to the stovetop. Heat the remaining tablespoon of oil over medium heat until shimmering. Add the escarole, salt and pepper and cook, stirring often, until wilted and cooked but it still retains a little crunch, about 5 minutes. Transfer to a serving dish and top with breadcrumbs and cheese.


Vegetable Packed Pancakes

Hello,

Turning traditionally sweet food into something savory is nothing new. Of course there is Zucchini Bread and Carrot Cake but the vegetable additions are usually masked by lots of sugar and sweet spices. Nowadays, you can find items like Corn & Basil Cupcakes, Rosemary, Almond and Parmesan Cookies, and even our Savory Quick Bread with Broccoli Rabe and Sun-dried Tomatoes, which keep the basic shape of the original item but lacks most or all of the sweetness.

This is my take on a Buckwheat Vegetable Pancake recipe from Fresh Food Fast (one of my favorite cookbooks), which looks like a pancake but is served as a savory side dish. The author uses cabbage where I use kale but I think a number of vegetables would work well. These are great because you can flavor them in any number of ways – I added a few dashes of a Turkish spice blend but I think curry powder or Italian seasoning would be great too. You could also skip the spices and just add fresh herbs, like dill or parsley.

I didn’t try it, but you might be able to make this vegan by swapping the eggs for flax or chia eggs and using a plant based milk. Let me know how it turns out if you try it!

Also, if you want a dipping sauce to serve along side, try this spicy yogurt sauce: mix together 1 cup whole-milk yogurt, a couple tablespoons chopped cilantro, 1 small minced garlic clove, 1/2 teaspoon salt, and 1/8 teaspoon (or more as desired) cayenne.

Vegetable Packed Pancakes
makes about 10 3″ pancakes

Ingredients:

  • 1 cup all-purpose flour
  • 1/2 cup gluten-free flour of choice (I used 1/4 cup buckwheat + 1/4 cup brown rice flour but you could also use more all-purpose)
  • 1-1/4 teaspoons sea salt
  • 1 teaspoon baking powder
  • 1-1/2 cups milk (I used soy milk but use whatever you have on hand)
  • 2 large eggs
  • 1 tablespoon vegetable oil
  • 1-1/2 cups finely chopped kale
  • 1 large carrot, grated on the medium holes of a box grater, about 3/4 cup
  • 3 scallions, thinly sliced
  • Spices / herbs of choice, optional
  • 1/4 cup vegetable oil for frying

Directions:

  • In a large bowl, whisk together the flours, salt and baking powder. In a separate bowl, whisk together the milk, eggs, and oil. Pour the wet mixture over the dry and stir to combine.
  • Add the kale, carrots, scallions and spices / herbs, if using, to the batter and mix well. The batter will be thick.
  • Heat a tablespoon of oil over medium heat in a 12″ non-stick skillet until shimmering. Using a 1/3 cup dry measure, add three scoops of batter to the pan. Cook until the first side is spotty brown and there are bubbles around the edge, about 3-5 minutes. Flip and cook until the second side is spotty brown and the pancakes are cooked through, another few minutes. Transfer to a cooling rack and cook the remaining batter.
  • To keep all pancakes warm while working in batches, you can place the cooling rack inside a rimmed baking sheet and transfer to a 200 degree oven.

Pasta with Tatsoi & Gingered Butter Sauce

Hello,

You are receiving tatsoi in your CSA share this week so I wanted to share this really fast and flavorful recipe that I made a few weeks ago. There isn’t much to it so I would suggest serving it as a side dish or adding some protein to make it a complete meal. Enjoy!

Pasta with Tatsoi & Gingered Butter Sauce
Serves 4-6 as a main dish, 6-8 as a side dish

Ingredients:

  • 1 pound pasta (I used penne but really anything would work)
  • 1/2 pound (1 medium head) of tatsoi
  • 1-2 teaspoons vegetable oil
  • 1 teaspoon grated ginger
  • 1 teaspoon minced garlic
  • 1/2 cup sake
  • 3 tablespoons butter
  • Salt and freshly ground pepper to taste

Directions:

  • Cook pasta according to package instructions then drain and set aside.
  • Remove the root end of the tatsoi and thinly slice the stems and leaves, taking care to keep them separate.
  • Heat the vegetable oil in a 12″ traditional skillet over medium heat until shimmering. Add the stems and cook, stirring occasionally, until softened and just starting to brown, about 5 minutes. Add the ginger and garlic and cook, stirring constantly, for 1 minute. Add the sake, bring to a simmer and cook until slightly reduced, about 5-7 minutes. Remove from heat and whisk in the butter 1 tablespoon at a time until fully incorporated. Add the tatsoi leaves and stir until wilted. Toss with the pasta and season to taste.

Roasted Radish and Salad Turnip with Barley Salad

Hello!

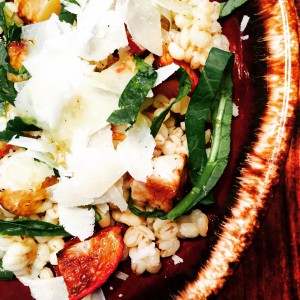
Just a quick recipe for roasted radishes and salad turnips. I had only eaten them raw until very recently and I like the change that roasting brings. I tossed mine with a simple barley salad but you could just serve these as a side dish on their own.

If you do serve these with the barley salad, I would suggest checking out our salad post here for some tips and tricks to building a salad. In that post, I described the elements I think are essential for a great salad, and they apply here too.

  • Both raw (radish / salad turnip greens) and cooked (radishes / salad turnips ) textures
  • Hits on most of the 5 basic flavors – bitter (radishes), sweet (sherry vinegar & honey dressing), sour (sherry vinegar and honey dressing), salty (Parmesan cheese), umami (Parmesan cheese)
  • Ample amount of protein (not a lot in this salad but the cheese does offer some)
  • Cohesive dressing (sherry vinegar & honey dressing)

Give this technique a try and let us know what you think!

Roasted Radish & Salad Turnips with Barley Salad
4 servings

Ingredients:

  • 1 cup pearled barley, rinsed to remove excess starch
  • Vegetable oil
  • Salt and freshly ground pepper
  • 3-4 large radishes, greens removed and reserved, stem end removed, and sliced in quarters
  • 3-4 large salad turnips, greens removed and reserved, stem end removed, and sliced in quarters
  • 1 teaspoon minced shallot (from about 1 small shallot)
  • 1 teaspoon honey
  • 1 tablespoon sherry vinegar
  • 3 tablespoons extra-virgin olive oil
  • Shaved Parmesan and thinly sliced reserved greens for serving

Directions:

  • For the barley: Line a rimmed baking sheet with aluminum foil and set aside. In a medium saucepan with a tight fitting lid, bring 3 cups of water and a big pinch of salt to a boil. Add the rinsed barley and a drizzle of vegetable oil (to reduce foaming) and return to a simmer. Cover and cook, stirring occasionally, until tender and the water is absorbed, about 35-40 minutes. Spread out evenly on the rimmed baking sheet and allow to cool (this will ensure the grains don’t clump up and stick together).
  • For the radishes and salad turnips: adjust oven rack to the middle position and preheat to 450 degrees. Line a rimmed baking sheet with aluminum foil and set aside. Toss prepared radishes and salad turnips with about 1-2 teaspoons vegetable oil and sprinkle with salt and pepper. Spread evenly on the rimmed baking sheet and roast on the middle rack until the first side in golden brown, about 15 minutes. Flip and roast on the other side until golden brown, about another 10 minutes. Test doneness with a paring knife and set aside.
  • For salad: whisk together the shallots, honey, sherry vinegar, olive oil and salt and pepper to taste. Toss dressing with barley and roasted vegetables in large serving bowl. Top with thinly sliced greens and Parmesan and serve.