Hi! This is my first post for Tant Hill Farm so I think an introduction is in order. My name is Laura Robinson and I just recently moved to Chattanooga with my husband and 16 month old son. I am a chef and have worked as a culinary instructor, personal chef and caterer in the past but I am now taking some time off to be home with my son. I will be blogging, creating recipes and helping with social media (follow us on Facebook, Instagram, Twitter and Pinterest!). My passion is creating simple yet flavorful recipes based on local and seasonal food that both feeds the body and the soul. I hope to help bridge the gap between buying local produce and figuring out what to do with it when you get home. Check out my website if you want more information on me and what I do. Now on to the good stuff!
~~~~~~~~~~~~~~~~~~~~~~~~~~~~~~~~~~~~~~~~~~~~~~~~~~~~~~~~~~~~~~~~~
Fermented food has clearly moved into the American mainstream. Look up any “2015 Food Trends” list and it is bound to be close to the top of the list. However, it is anything but a fresh concept; humans have been fermenting food and drink for thousands of years. Not only to make food healthier and longer lasting, but also to make it oh so tasty.
I am just getting into home fermentation myself and traditional sauerkraut was my first experiment. This time around, I was looking for something a bit different when I stumbled across curtido, the Salvadorian version of sauerkraut. It is typically made with cabbage, carrots (both of which were in the Deep Winter CSA last week!) and onions and served along side cheese-filled corn tortillas, called pupusas. As much as I would love to make a traditional pupusa to eat along side the curtido when it has finished fermenting, the truth is I have limited time and will most likely stuff it in a grilled cheese (which I think will be equally as good!). I also think it would be great with marinated tempeh or grilled meat.
The following recipe was based on this one but the thing I love most about fermenting is that you really don’t need a recipe. Don’t have carrots? No worries! Don’t like spicy food? Leave out the peppers! I am by no means an expert but there are so many great resources available to learn more: check out anything by Sandor Katz, like Wild Fermentation and The Art of Fermentation, and Cultures for Health. There is also a great Facebook page called Wild Fermentation that has over 36,000 members, and I have found it to be a great resource.
In the end, I hope you use this as a starting point. Experiment and then share the results! We can’t wait to hear how it turns out. Enjoy!
Curtido
Recipe notes: 1) using a food processor or mandoline makes speedy work of slicing the vegetables; 2) you can use many types of salt, the best being those that are unrefined and natural – check out this link for more information; 3) I have found a variety of salt level recommendations – I prefer the one listed below but you need a kitchen scale (I love the Oxo digital scale) – if you don’t have a scale, this source recommends using 1-3 tablespoons of salt per medium head of cabbage (or equivalent of another vegetable).
Ingredients:
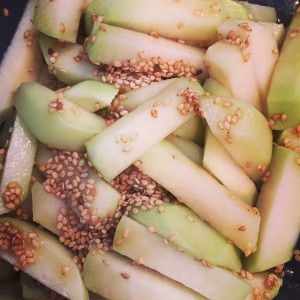
- 2.25 pounds (5 small) cabbage, cored and sliced thin
- 12.5 ounces (about 16 small) carrots, shredded on the large holes of box grater
- 1 large onion, peeled and sliced thin
- 3 large jalapenos, stemmed, seeded, cut lengthwise then sliced into half moons
- 2 teaspoons dried oregano
- 2 teaspoons dried red chili flakes
- Salt: 3 tablespoons of salt per 5 pounds of trimmed and sliced vegetables
- For brine if needed: 1.5 tablespoons pickling salt plus 4 cups water
Directions:
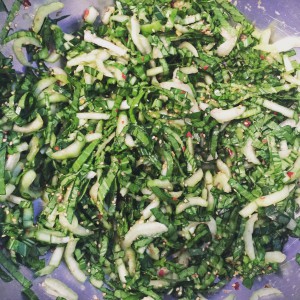
- Add cabbage, carrots, onion, jalapenos, oregano and chili flakes to a large mixing bowl. Weigh ingredients to determine how much salt is needed (see recipe note). Add 3 tablespoons of salt for every 5 pounds of vegetables. I had a little over 3 pounds of vegetables so I used a little under 2 tablespoons salt.
- Massage and pound the vegetables together until they have wilted and released their liquid. The goal of this step is get the vegetables to release enough of their own liquid to cover everything by an inch. You may massage everything for 5 minutes and have enough liquid or you may be at for 30 minutes and they still haven’t released much at all – it all depends on the water content of the vegetable.
- Before you can determine if you have enough liquid to cover the vegetables, you need to pack them into whatever fermentation vessel you plan to use. There are so many options – this website does a great job of breaking it down. Although it is not ideal (because the mouth of the jar is small), I am using a large glass canning jar (see picture below). Once you have chosen a vessel, you need to start packing it with the vegetable mixture. It is best to do this layer by layer – add a couple scoops of vegetables and pound it down to 1) release as much liquid as possible and 2) remove any air pockets (lacto-fermentation happens in the absence of oxygen and the sauerkraut could spoil around any air pockets). Continue to repeat the action of adding vegetables and pounding them down until all of the sauerkraut is added. Hopefully the vegetables have released enough liquid to cover everything by an inch, but if not, use the brine amount listed in the ingredient section to cover the vegetables.
- The next important step is to weigh the vegetables down as anything that rises to the surface will mold. Again, there are so many options here. I used a plastic bag, which I stuffed into the top of canning jar, and then filled it with water. Transfer the vessel to a cool, dry place to ferment.
- Now all you have to do is wait! The amount of time is completely determined by your taste buds – taste it every day or two to see how it is progressing. It might only take 3-5 days for it to get to a place that you like. I plan to let mine go for a couple of weeks, maybe longer. You can even wait a couple of months but I am not sure I have the patience to wait that long!