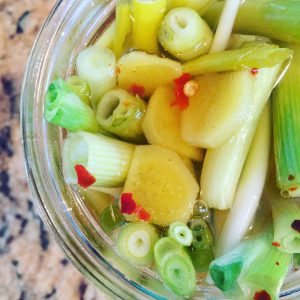
Dưa Cải Chua

Don’t it always seem to go that you don’t know what you’ve got till it’s gone. -Joni Mitchell

It’s hard to believe in the middle of winter, when you’re so hungry for fresh veg you can’t stand it, but by mid-spring sometimes you can get greens fatigue. They just keep coming!

That bounty is wonderful, but when you’re running out of ideas for how to eat them fresh, remember how hungry you were for those greens just a couple months ago. Fortunately, your greens don’t have to go the same way as Joni Mitchell’s proverbial paradise.

Cucumbers, peppers, cabbage, and radishes aren’t the only spring and summer veggies you can pickle. Give your mustard and other spicy, peppery greens the same treatment, and you can have a taste of spring even after summer has passed.
18289798_10101376597390158_235019803_o

Dưa Cải Chua is a Vietnamese dish of pickled Spicy Asian Mustard Greens. It’s simple to make and easy to customize to your preferred palate—you can adjust to find your perfect balance of salt, sweet, sour, and spice. And best of all, you can make it with what’s in your share and a few common items in your pantry.

You’ll need:
2 bunch mustard greens, about 4 pounds
4-6 cloves of garlic
1 bunch of spring onion or white onion
Large pot boiled water
2.5-3 tablespoons salt
3 tablespoon sugar
Sriracha, Sambal Oelek, minced Sereno Peppers, or Szechuan Peppercorns
Fish Sauce (optional)
Clean mason jars
A Kraut Source fermentation kit (we sell them at our booth!) or ziplock bags & mason jar lids

Clean and separate your mustard greens and onions. Pick out any leaves that have gotten too yellow—though a little yellow or limpness is ok, as Dưa Cải Chuaa is a great way to use up greens that have languished in the back of your fridge a little longer than you intended (shhh, we won’t tell). A salad spinner an a little chilled tap water will do the trick.

18261626_10101376691860838_1489664596_o

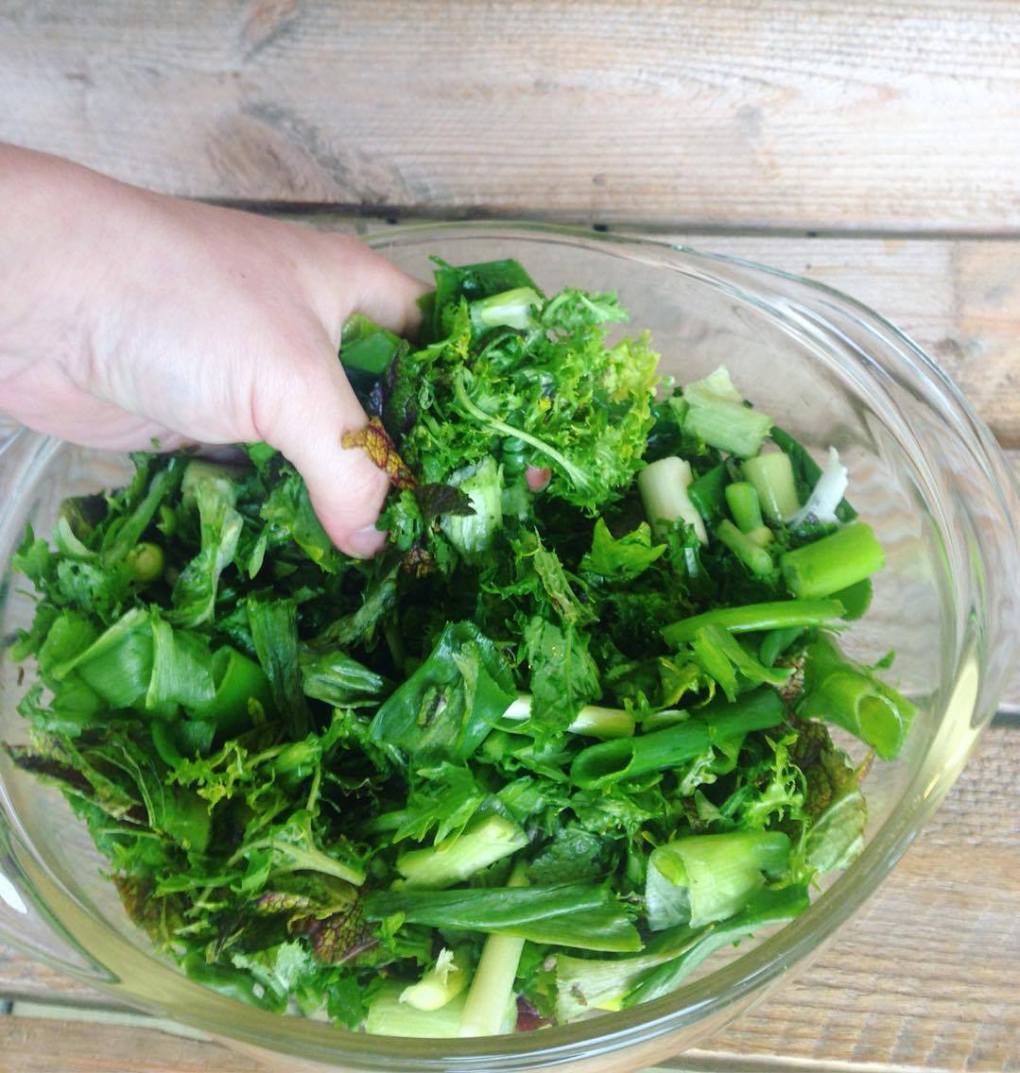
Dry the leaves and shred, then slice the onions. Some recommend letting the greens air dry and get limp for up to 12 hours. Others to simply pat dry with paper towels. It depends on how much time and counter space you have, and how fresh your mustard greens are. Once your leaves are dry, massage them till they are even more limp and even start to sweat a little. Mix with your onions and garlic and set aside.

Rinse your mason jars with boiling water to sterilize them. While the jars are cooling, use remaining boiled water to make a brine with the salt, sugar, and whatever spices you are adding. Taste with a clean spoon as you go to make sure you like the level of heat and balance of flavors.

Sriracha will produce a sweeter, milder Dưa Cải Chuaa. Sambal oelek will be spicier. Minced serano peppers are more traditional, but can get very spicy very quickly. Sezchuan peppercorns will be a different flavor—making the dish more Chinese than Vietnamese— and the level of heat will depend on how fresh your peppercorns are. Fish sauce will make it saltier and add an extra briny, umami flavor.

18261341_10101376597285368_1326493658_o

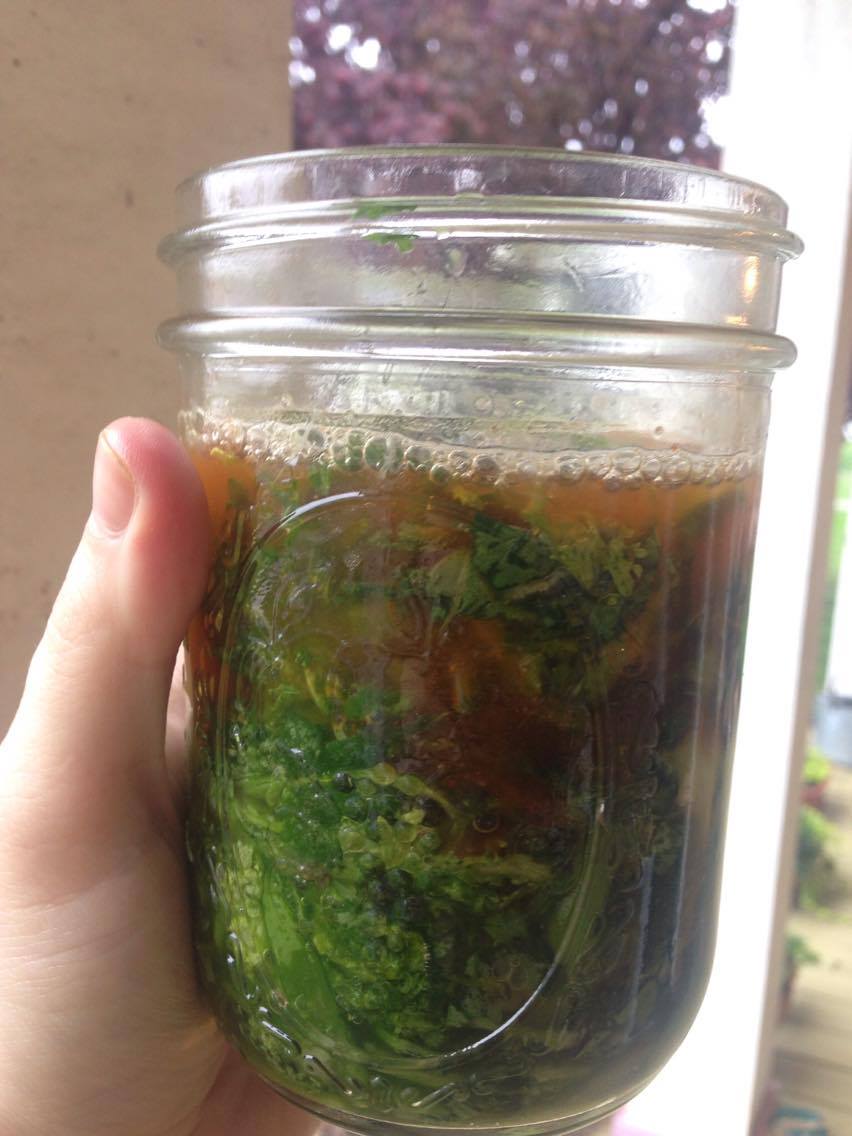
Pack your jars with the blend of mustard greens, onions, and garlic as tightly as possible. Press them down with a rubber spatula, which you can also use to break up air pockets. Pour the brine in with a funnel, until the greens are covered by at least an inch of brine. Don’t overfill your jars though—you want the brine to sit just below the neck of the jar, at least an inch from the lid.

This is when you either screw on your Kraut Source fermentation kit lid or, if you don’t have one, gently press a plastic bag into the mouth of the jar. Fill with tap water, taking care not to spill. The water will press the baggie flush against the top of the brine, making the contents air tight. Secure lip of the baggie to the mouth of the jar with a rubber band.
18261675_10101376597365208_1316923617_o

Let the Dưa Cải Chuaa sit on your counter for a week. After it’s done fermenting, take your baggies or Kraut Source lid off, and replace with regular mason jar tops. The Dưa Cải Chuaa will keep for months in the fridge unopened, much like kimchi or sauerkraut.

Traditionally, Dưa Cải Chuaa is eaten much like kimchi or kraut, used to add flavor to soups, salads, meats, rice, and more. Add it to stir fry, grain bowls, eggs, or noodle dishes.


18261624_10101376691850858_654425559_o

If you used Szechuan Peppercorns for more of a Chinese flare, add your pickled greens to Dan-Dan Noodles, a traditional spicy Szechuan dish made with thick, chewy noodles in a spicy soy-based sauce. For a Japanese-style meal, fry some of your Dưa Cải Chuaa (called Takana in Japan) in sesame oil before adding to rice.

Or if you want to stick close to Vietnam, you can make Canh Dưa Cải Chuaaa beef soup with pickled mustard greens. Or add to another Vietnamese dish Thịt Kho. a slow-braised pork dish with eggs. It would also be wonderful in Pho.


Weekly Farm Notes :: December 14th, 2016

Hello,

Our fall CSA has ended (unless you received a text from us with details on an extension) – however, we will still be at market and will have a weekly share available for only $25/week! This will make your market shopping fast and easy! Contact us by Tuesday morning to reserve your share.

Still looking for the perfect gift? Give the gift of health with a CSA share! Stop by our booth or call us at 423-637-9793 to purchase.

Also, don’t forgot we will be attending the Nutrition World Farmers Market every Saturday from 11am-1pm. Stop by and say hey!

See you at market!

~~~~~~~~~~~~~~~~~~~~~~~~~~~~~~~~~~~~~~~~~~~~~~~~~~~

December 14th Produce

Here are the items you can expect at Market {M} and in the CSA {CSA}:

  • Awesome Asian & Lettuce Mix {M/CSA}: if you haven’t tried our Cumin Roasted Sweet Potatoes & Avocado Salad, now is the time while you can still find sweet potatoes at the market! It is one of my favorite salads as of late – I hope you try it!
  • Variety of Kale {M/CSA}: the combination of eggs, greens and cheese is one I fall back on time and time again. Combine those three ingredients and you have a satisfying main meal in no time. This Kale & Goat Cheese Frittata looks like a great place to start if you want to play around with these ingredients!
  • Swiss Chard {M/CSA}: while you can use just about any green in our latest recipe – Millet Pie with Greens & Feta – I like how quick Swiss chard cooks down. Thinly slicing the stems and cooking them with the onions is an added bonus!
  • Summerfest & Hon Tsai Tai Asian Greens {M/CSA}: these mild, tender greens would be a great addition to our Vegan Pho soup. Toss them in right at the end as they only take a minute or so to cook.
  • Bold & Peppery Arugula {M/CSA}: this arugula is great sauteed and could be paired with just about anything. If you are looking for a quick and healthy recipe, try this Arugula Wilted with Mushrooms & Onions.
  • Red Butter Lettuce {CSA}: I love to use butter lettuce for wraps. There are endless recipes you can find online but I love this Quinoa & Chickpea Lettuce Cup recipe. You can adjust the recipe in numerous ways and make a version you love.
  • Pak Choi Leaves {CSA}: have you checked out our Edamame & Pak Choi Salad yet? It is a great way to get a healthy dose of raw greens and protein along with lots of flavor. We hope you like it!
  • Dragon Tongue Spicy Asian Mustard Greens {M}: did you know mustard greens are linked to cancer prevention? They are also touted as cholesterol lowering machines, along with kale and collards, so be sure to get your daily dose of these greens!
  • Tender Collards {M}: you may not think of collards as a festive food, but it can be with our Collard Green Relish! Make a batch now to serve over the holidays.
  • Red Kitten Spinach {M}: if you need a quick breakfast you can take on the road, try our Greens & Cheese Frittata Muffins. Make a big batch to enjoy throughout the week!
  • Organic, Range Free, Soy Free Eggs {M}: here is another muffin-type meal that would be great with any number of our greens – Quinoa Kale Bites. A few eggs bind together quinoa, kale (or other greens) and cheese to make a healthy on-the-run meal.
  • Wasabi Arugula {M}: this arugula has a bite so I like to pair it with something sweet. Try our Wasabi Arugula Rice Bowl with Miso-Ginger Dressing or just simply toss the dressing with the greens for a yummy salad!

Quick Pickled Green Onions

Hi!

I love fresh green onions but sometimes I can’t get through a whole bunch before they go bad. This recipe is the perfect solution – it’s quick, easy and adds an extra punch of flavor. You can leave out the ginger and red pepper flakes and replace it with any herbs or spices you like.

This will be great with any number of dishes. Slice them thinly and add to eggs, rice or noodle dishes. Keep them whole and tuck them into a sandwich or serve along side a piece of fish.

This recipe is adapted from The Joy of Pickling, which I highly recommend if you are a pickle fanatic (and if you are, join the club!).

Enjoy!

Quick Pickled Green Onions
makes 1 pint

Ingredients:

  • 3/4 cup white distilled vinegar
  • 3/4 cup water
  • 2 tablespoons granulated sugar
  • 1-1/2 teaspoons sea salt
  • 1/2″ piece fresh ginger, peeled and thinly sliced
  • 1/4 teaspoon hot pepper flakes
  • 2 bunches scallions, trimmed, light and green parts only

Directions:

  • Put the vinegar, water, sugar, salt, ginger and hot pepper flakes in a small saucepan and bring to a boil over medium-high heat. While the mixture heats, pack the green onions into a wide mouth glass pint jar; I like to arrange them vertically.
  • Once the vinegar mixture comes to a boil, remove from heat and pour over the scallions. Cover jar tightly with a nonreactive cap and allow to cool to room temperature. Transfer to the refrigerator.
  • The green onions should be ready to eat in a week and should keep for several months.

Preserving the Harvest :: Stem Preserves


Hello,

We hope you all enjoyed a Thanksgiving filled with your favorite food and people.

We also hope you have been enjoying the wealth of greens in your CSA share each week. The kale, collards, Swiss chard, arugula, tatsoi, pak choi, mustard greens, and broccoli rabe have been plentiful lately! The only downside to so many greens is that you are left with a lot of stems, which are typically not included in recipes where you use the greens. You can always juice or add them to smoothies but we realize it’s nice to have other options. That is where this recipe comes in handy.

Sugar is the most recent category of foodstuffs to be vilified in the media, and for good reason. It’s not hard to find articles, like this one, this one and this one, that make you think twice about eating anything with a trace of sugar. But as with almost anything in life, moderation is key. Plus, sugar is a great preservative. The reason why is explained below:

“…sugar attracts water very well; the more sugar there is in any solution, the more water it tries to draw from its surroundings. This is bad news for any microbe that happens to be inside a jar of jam. High concentrations of sugar will suck the microbe’s vital water right through its cell wall, causing it to dehydrate. This process is called “osmosis,” and it can be deadly for bacteria and mold.”

So while I would never suggest adding a lot more sugar to your diet, I think preserving some items with the use of a simple, inexpensive ingredient can bring some simple joy to everyday life.

I originally developed this recipe as a way to use some beet stems that were way too pretty to toss into the compost heap. But why couldn’t it work for other stems as well? The stems are cooked down with sugar, bourbon and spices over a long enough period that any tough stems are sure to soften and take on the added flavors while imparting a little of their own too. And I think you can take the flavorings in all sorts of fun directions – play around with different types of booze, sugars and flavorings. I haven’t tested those below but really, how could they turn out bad?!

  • Gin, granulated sugar, rosemary, orange zest/juice
  • Gin, granulated sugar, Earl Grey tea, lemon zest/juice
  • Gin, pomegranate molasses, mint, lime zest/juice
  • Bourbon, honey, grapefruit zest/juice
  • Bourbon, granulated sugar, pineapple, ginger
  • Tequila, agave nectar, chile peppers, orange zest/juice
  • Vodka, honey, lemon zest/juice, lemon verbena
  • Vodka, honey, blackberries, rose

I used the stems from 4 beets in my original recipe and therefore only had about 1/2 cup of preserves in the end. Going forward, I plan to toss all of my unused stems into the freezer throughout the week. At the end of the week, I will thaw out the stems overnight and then thinly slice when ready to proceed with the recipe.

I think this would be an awesome addition to a cheese plate but there are so many other possibilities. Grown up peanut butter and jelly, anyone?!

Stem Preserves
makes about 1/2 cup

Ingredients:

  • 1 cup thinly sliced beet stems (from 4 medium beets)
  • 1 cup water
  • 1/4 cup bourbon (I used 1816 Cask from Chattanooga Whiskey)
  • 1/4 cup packed light brown sugar
  • 1-3″ cinnamon stick
  • Pinch of ground cloves
  • 3″ piece of lemon peel, white pith removed
  • 5 grinds fresh black pepper
  • 1-2 teaspoons freshly squeezed lemon juice

Direction:

  • Place all ingredients except the lemon juice in a medium saucepan and mix to combine. Bring to a boil, then reduce to a simmer and cook, stirring occasionally, until most of the liquid has evaporated but with a small amount of syrupy liquid remaining. Transfer to a small, air-tight jar and cool to room temperature. Taste, adding lemon juice as needed to balance the sweetness. Store in the refrigerator for up to 2 weeks.

Bread & Butter Bitter Melon Pickles

Hello,

One of our shareholders mentioned the idea of turning bitter melon into bread and butter pickles and I knew I had to make a version myself. I adapted this recipe from The America’s Test Kitchen Do-It-Yourself Cookbook (which I highly recommend!). You get the typical sweet-sour notes up front with bitterness from the melon on the back end. I have yet to use it with anything but here is a nice list of suggested uses. I think adding it to a German potato salad sounds pretty amazing!

I purchased fresh turmeric from Sequatchie Cove Farm at the Main Street Farmers Market last week. I used it here but feel free to use 1/4 teaspoon dried turmeric in its place. Enjoy!

Bread & Butter Bitter Melon Pickles
makes about 1 pint

Ingredients:

  • 1/2 pound bitter melon, cut in half lengthwise, seeds removed and sliced 1/8″ thick
  • 1 small onion, halved and sliced through root end into 1/8″ thick pieces
  • 1 tablespoon kosher salt
  • 1/2 cup cider vinegar
  • 1/2 cup water
  • 1/2 cup granulated sugar
  • 1 teaspoon yellow mustard seeds
  • 1/2 teaspoon freshly grated turmeric
  • 1/8 teaspoon celery seeds
  • Pinch ground cloves

Directions:

  • Toss bitter melon, onion and salt together in a colander and set over the sink or a bowl. Set aside at room temperature for 1 hour. Rinse and drain vegetables well.
  • Bring vinegar, water, sugar, mustard seeds, turmeric, celery seeds and cloves to a boil in a medium saucepan over medium-high heat. Add vegetables, return to a boil, and cook for 1 minute. Remove from heat.
  • Using a slotted spoon, transfer pickles to a pint sized jar with a tight fitting lid. Pour hot brine over pickles and let cool to room temperature. Cover and refrigerate for 2 days before eating. Pickles can be refrigerated for up to 2 months.

Swiss Chard & Orange Oat Muffins

Hello!

I am thinking ahead to Thanksgiving and how to make life easier for the meals just before and after the main event. One can’t be bothered to make breakfast the day of or the day after (I can’t even step foot in the kitchen for a few days after Thanksgiving…unless it’s to eat leftovers). While this is not a quick, throw together recipe, it will pay off in the end when you can pull a healthy and delicious breakfast out of the refrigerator or freezer. The muffins themselves aren’t overly sweet so I think they could also serve as a side dish if you leave off the oat and brown sugar topping.

I should also note that no, these don’t end up tasting like Swiss chard. The orange flavor is most evident with a little hint of the saffron in the background. I used closer to 8 ounces of greens in my first round of testing and I still didn’t pick up on much chard flavor. Enjoy!

Swiss Chard and Orange Oat Muffins (adapted from here)
makes 12 muffins

Ingredients:

  • 1 teaspoon + 1/4 cup olive oil, divided
  • 6 ounces (about 10 medium to large leaves) Swiss chard, de-stemmed and roughly chopped
  • Pinch of saffron
  • 1 cup + 1/3 cup old fashioned rolled oats, divided
  • 1/3 cup brown sugar
  • 1 cup (5 ounces) all-purpose flour
  • 2-1/2 teaspoons baking powder
  • 1/2 teaspoon baking soda
  • 1 teaspoon table salt
  • 2 large eggs
  • 3 tablespoons honey
  • 1-1/2 cups milk of choice (I have used both whole and soy milk with good results)
  • 1 teaspoon orange zest
  • 1/2 cup raisins, roughly chopped

Directions:

  • Adjust oven rack to the middle position and preheat to 400 degrees. Liberally spray a 12-cup muffin tin with non-stick cooking spray and set aside.
  • Heat 1 teaspoon olive oil in a 12″ non-stick skillet over medium heat until shimmering. Add the Swiss chard and cook, stirring constantly, until the leaves are wilted, about 1-2 minutes. Transfer to a colander set over the sink and cool slightly. Press on the greens with the back of a spoon to extract as much liquid as possible. Transfer to a cutting board and chop fine. Transfer to a large mixing bowl and set aside.
  • Heat the remaining 1/4 cup olive oil over medium-low heat in a small saucepan until just warmed, about 3-5 minutes. Remove from heat, add the saffron, and allow to cool. Transfer to the bowl with the Swiss chard and set aside.
  • Take 1 cup (4 ounces) of oats and grind into a fine flour. This works best in a spice or coffee grinder but a small food processor also works. Transfer to a medium mixing bowl and set aside. Take the remaining 1/3 cup of oats and mix with the brown sugar in a small mixing bowl and set aside.
  • To the bowl with the oat flour, add the all purpose flour, baking powder, baking soda and salt and whisk to combine.
  • In the bowl with the Swiss chard and olive oil, add the eggs, honey, milk, orange zest and raisins. Whisk to thoroughly combine. Add the dry ingredients to the wet and fold to just combine without overmixing. Note: the batter will look a bit looser or wet than you might be used to – this is expected. Equally divide the batter between muffin tins until it almost reaches the top. Top each muffin with the oat & brown sugar mixture and transfer to the oven. Cook for 14-16 minutes (I needed 16 minutes), rotating once half way through, until a toothpick inserted into the middle comes out clean or with just a crumb or two attached. Allow to cool in the muffin tin for 10 minutes and then remove and transfer to a cooling rack.
  • To store: after they have cooled completely, the muffins can be refrigerated in an air-tight container for 3-5 days, although they will dry out a bit. They can also be wrapped tightly in plastic wrap and aluminum foil for 3-6 months. Thaw in the refrigerator overnight before using.

Quick Pickled Okra

Hello!

A quick note about market tomorrow – Mark and Gina won’t be setting up but are looking forward to seeing you soon!

~~~~~~~~~~~~~~~~~~~~~~~~~~~~~~~~~

Gina and I were fortunate enough to attend a Quick Pickle workshop at Crabtree Farms a few weeks ago. It was led by Caroline Thompson from The Farmer’s Daughter and was co-sponsored by Harvested Here (we are one of their customers!). We had a great time, sampling lots of quick pickles and then making a batch of our own to take home. I made quick pickled whole okra with fresh mint, cumin, hot peppers and garlic and loved it! You get very little “slime” with this technique and it is really quick to put together. They are great for snacking and really satisfy the need for something crunchy and tangy.

It just so happens that we will have okra in our upcoming CSA session! Have you signed up yet? Well get to it – the “Fall into Greens” session starts in just a few weeks!

The recipe below is from the workshop handout. Thanks again to Caroline for providing us with this great information!

Quick Pickled Okra
1 packed pint jar

Recipe notes: 1) you can use almost any vinegar but I prefer white, apple cider or rice vinegar; 2) I have only used tap water but Caroline mentioned that filtered water is ideal; 3) I typically use raw granulated sugar but you can use honey, sorghum or maple syrup too; 4) pickling salt is recommended because it does not contain anit-caking agents that can discolor your pickles; 5) the spicing is where you get to have a lot of fun! I made another version at home with coriander, cumin, black peppercorns, garlic, ginger and hot peppers. Play around and be creative!

Ingredients:

  • 3/4 cup vinegar
  • 3/4 cup water
  • 2 tablespoons sugar
  • 1-1/2 teaspoons pickling salt
  • Up to a 1 tablespoon of whole spices, herbs or flavorings
  • Washed and sliced (if desired) vegetables and fruits

Directions:

  • Heat vinegar, water, sugar and salt in a small saucepot until sugar and salt have dissolved. Meanwhile, pack a clean pint jar with your spices and flavorings, and then pack tightly with the vegetables or fruit. Pour hot brine over produce into the jar. Using a skewer or straw, unleash any large air bubbles you may see. Allow to cool before putting in the fridge. Store in the fridge for up to 2 months, if they last that long!

Easiest Refrigerator Pickles

Hello!

We are moving into our new house this week (yay!) so I have very limited time in the kitchen. I remembered Smitten Kitchen’s Easiest Fridge Dill Pickle recipe when I was trying to decide what to do with cucumbers, and I am so glad I did! This recipe couldn’t be easier or more delicious and it is perfect with our Diva cucumbers. I adjusted the recipe slightly by using a different type of vinegar and swapping out the dill for a dried spice blend. This is a recipe I will make again and again and we hope you like it too!

Easiest Refrigerator Pickles
makes 3-4 cups of pickles + brine

Recipe notes: 1) although not necessary, a mandoline makes slicing the cucumbers a quick and painless process; 2) I used 3 teaspoons of salt as I like my pickles salty – reduce amount to 2 teaspoons if you are sensitive to salt; 3) you can use different types of vinegar (white wine, distilled, etc) but I prefer rice vinegar as it has the lowest acidity level and doesn’t leave the pickles with a sharp bite.

Ingredients:

  • 2 pounds (about 3 medium) cucumbers, sliced very thin (I used the 3mm setting on my mandoline, which is about .12 inches)
  • 2-3 teaspoons kosher salt
  • 1/2 cup rice vinegar
  • A tablespoon or two of chopped dill or other seasonings as desired (I used 1 teaspoon of Penzey’s Greek Seasoning which contains oregano, garlic, lemon, black pepper and marjoram and I LOVED the flavor!)

Directions:

  • In a large mixing bowl, toss cucumbers, salt, vinegar and herbs/seasoning, if using, together until well combined. Note: the liquid will NOT cover the pickles, and that is ok. The salt will begin to draw water out of the cucumbers and soon there will be plenty of liquid. Set aside for an hour. Transfer to an air tight container and refrigerate. The pickles will keep for a couple of weeks, but come on, they won’t last that long!

Roasted Tomatillo Salsa

Hi everyone!

This is just a quick post with a tasty recipe for roasted tomatillo salsa. My husband said it was the best tomatillo salsa he has every tried, so thought I should share it!

We hope you enjoy the 4th!

Roasted Tomatillo Salsa
makes about 1 cup

Recipe notes: 1) you can use cilantro in place of papalo, but I would add 3 or 4 times as much; 2) broilers vary widely, so keep a close eye on ingredients in the oven.

Ingredients:

  • 12 ounces (about 20) tomatillos, husk removed, cleaned, and cut in half lengthwise
  • 2 small or 1 medium jalapeno, stem removed and cut in half lengthwise (remove seeds and ribs for a less spicy version)
  • 1/2 medium yellow onion (about 4 ounces), peeled and sliced 1/4″ thick
  • 1 large garlic clove, unpeeled
  • 1/2 teaspoon minced papalo
  • 3/4 teaspoon kosher salt
  • 1/4 teaspoon granulated sugar
  • 1 teaspoon freshly squeezed lime juice
  • 2 tablespoons water (more if you want a thinner salsa)

Directions:

  • Adjust oven rack to the upper position and pre-heat the broiler to high.
  • Line a rimmed baking sheet with aluminum foil. Place the tomatillos and jalapeno cut side down on the baking sheet. Add the onion and garlic clove to the baking sheet and spread all ingredients evenly. Broil for about 5-7 minutes, or until most ingredients are blistered and blackened. You may need to remove the blackened items and return the rest to cook under the broiler for a few more minutes. Once cool enough to handle, peel the garlic clove.
  • Transfer all ingredients to a blender and blend on high until ingredients are fully broken down and incorporated, about 15 seconds. Taste and adjust seasoning if needed.

Preserve the Harvest :: Quick Pickled Radish Leaves

Making quick pickles is one of the fastest and easiest ways to preserve the harvest. These types of pickles are made by pouring an acidic brine over produce, allowing the brine to flavor the vegetable or fruit over a number of days in the refrigerator. Although they are called quick “pickles” it is important to understand a few important ways in which they differ from fermented pickles.

  • Time: quick pickles are ready in a matter of hours or days whereas fermented pickles take weeks or even months.
  • Flavor development: quick pickles get their flavor from the acidic brine and any flavoring components whereas fermented pickles get flavor from bacteria present during the fermentation process. Fermented pickles tend to have a more complex and developed flavor but you have more control over the final flavor with quick pickles.
  • Refrigeration: quick pickles have to be refrigerated and typically last only a few weeks, unlike fermented pickles which have a much longer shelf life.

Quick pickling is pretty foolproof but here are a few tips to get you started:

  • Vinegar/Water Ratio: I suggest starting with equal parts vinegar to water to see how you like the balance of flavor. You can always adjust it during the next batch. To determine the amount of brine needed, just measure the amount that will fit in the jar you intend to use.
  • Types of Vinegar: I wouldn’t use balsamic vinegar but just about anything else goes – apple cider vinegar, rice vinegar, white wine vinegar, red wine vinegar, distilled white vinegar. I like to use rice vinegar because it’s has the lowest acidity level (~4%) of those I mentioned above (wine vinegars are around 7%) so the flavor of the vegetables and spices can shine through a bit more.
  • Flavorings: Whole spices and crushed garlic are great places to start when deciding how to flavor your brine. I prefer to keep the spicing relatively mild so I can use my pickles on just about anything. Mustard seeds, bay leaves and peppercorns are classic but don’t stop there. I have added cumin seeds, fennel seeds, allspice, cinnamon sticks, cloves and dried hot chiles to batches in the past.
  • Sugar: a lot of recipes I find include sugar – and some of them have A LOT! I don’t find that I need sugar because I use rice vinegar. If you are using a vinegar with a higher acidity level (see Types of Vinegar section above) then you might want to add a tablespoon or two to help balance the flavor.
  • Vegetables: some vegetables, like greens, thinly sliced onions or thinly sliced cucumbers don’t need to be pre-cooked. Just pour the hot brine over the vegetables and you are set. Others, like carrots or beets, need to be cooked a little beforehand to ensure they aren’t too crunchy.
  • Time: the amount of time you let the vegetables sit in the brine is completely up to your taste buds. I recommend trying them every day to see how they change.

Below is a rough outline of what I used to preserve the radish leaves from last week’s CSA share. We look forward to hearing your quick pickle recipes!

Quick Pickled Radish Leaves

Ingredients:

  • 1 large bunch radish leaves, trimmed, washed and sliced into 1″ strips
  • 1-1/2 cups rice vinegar
  • 1-1/2 cups water
  • 1 tablespoon kosher salt
  • 2 large garlic cloves, peeled and smashed
  • 1 teaspoon black mustard seeds
  • 1/2 teaspoon fennel seeds
  • 1/2 teaspoon coriander seeds
  • A few allspice berries
  • A few dried hot peppers

Directions:

  • Place radish leaves in a quart sized glass canning jar and set aside.
  • Place the remaining ingredients in a small saucepan and bring to a boil over medium heat. Remove from heat and carefully pour brine and spices over the radish leaves. Set aside and allow to cool to room temperature. Place in the refrigerator and use within 2-3 weeks.