Hello!
I just went through a week of intense preserving to help Mark & Gina use up pounds and pounds of kale and collards, along with some parsley and edible flowers, that would have gone to the compost heap otherwsie. I could have made it easier on myself by just processing the greens in two or three ways but I couldn’t control myself and ended up preserving by: making soup, blending and freezing greens, making and freezing compound butter, fermenting, dehydrating and steeping edible flowers in a sweetened apple cider vinegar mixture (called a shrub – more to come on this!). I list all of these items to give you some insight into the various paths I used to preserve the harvest. Each process has it’s upsides and downsides. For example, blending kale with water and then freezing it in ice cube trays is really simple and cheap (no added ingredients) but freezer space is limited and how many kale cubes does one really need?
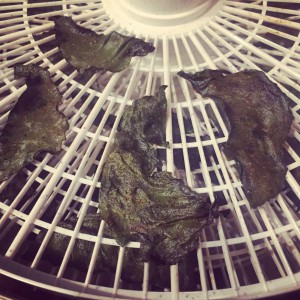
Dehydrating has tradeoffs as well – it is simple to prepare, relatively hands off and the finished product can be stored at room temperature. However, it is energy intensive as each batch has to dry for hours at a time (even tender greens take 2 hours in my dehydrator). For someone with limited time, however, I think the tradeoff is worth while.
The dehydrating process is really simple:
- Wash greens well
- Dry well
- I put mine through a salad spinner and then pat them dry with a clean towel.
- Remove ribs and cut into desired shapes
- If you are against wasting the ribs, I would at least cut them out and then dehydrate them separately from the leaves as they will dry at different rates.
- Season if desired
- This step depends on how you intend to use the greens. If you want to eat them as “chips”, I would suggest tossing them with at least a little oil and salt (see below for recipe idea). If you just want to dehydrate them in order to throw them in soups later, you can probably skip this step.
- Dehydrate
- Using a dehydrator: I have tried various temperatures but find that 135 degrees works best for greens. It only takes 2-3 hours at this temperature, whereas it can take hours and hours more if you drop it down much lower. I know raw foodist don’t cook anything over 104 degrees as they believe the nutritional value is lost. This may be true but since dried greens are such a small part of my overall diet, I don’t worry about it much.
- If you don’t have a dehydrator but are looking to purchase one, this article gives a lot of helpful information.
- Using an oven: I have never dehydrated food in an oven so I would do your own research if this is the route you wish to take. From what I have read, most ovens don’t go below 170 so you have to prop the oven door open to maintain the correct temperature. It seems like this could be difficult to control but I would love to hear from anyone who tries it.
- Using a dehydrator: I have tried various temperatures but find that 135 degrees works best for greens. It only takes 2-3 hours at this temperature, whereas it can take hours and hours more if you drop it down much lower. I know raw foodist don’t cook anything over 104 degrees as they believe the nutritional value is lost. This may be true but since dried greens are such a small part of my overall diet, I don’t worry about it much.
- Store in an airtight container in a cool, dark, dry spot.
- This is a good article to understand where and why dehydrated food should be stored and how long you can expect it to last.
In the end, you can dehydrate just about anything. Since greens are so plentiful right now, give this a shot if you are out of other ideas!
Spiced Swiss Chard Chips
Recipe notes: 1) depending on the size of your dehydrator, you may be able to fit more greens at once. I am using a round, 4 level Nesco dehydrator.
Ingredients:
- 1 tablespoon vegetable oil
- 1/4 teaspoon five spice powder
- 1/4 teaspoon ground turmeric
- 1/8 teaspoon cayenne, or more if desired
- 1/8 teaspoon table salt
- 1/2 pound (about 15 medium leaves) Swiss chard, washed and dried thoroughly
Directions:
- Whisk oil, spices and salt together in a large mixing bowl. Set aside.
- Trim Swiss chard ribs and set aside. Cut leaves into desired shapes. I cut the leaves in half along the ribs and then cut each half into halves or thirds, depending on the size.
- Place leaves in the mixing bowl and toss gently but thoroughly with the spices. Arrange the leaves on the dehydrating trays, taking care not to overlap them too much.
- Dehydrate at 135 degrees F, checking after 2 hours to see if they are crisp. If not, continue to dehydrate, checking every 20-30 minutes. Allow to cool to room temperature and transfer to an airtight container. Store in a cool, dry place. These should last for months but I bet they won’t stick around that long 🙂


Pingback: Weekly Farm Notes :: May 5th, 2015 | Tant Hill Farm
Pingback: Weekly Farm Notes :: May 19th, 2015 | Tant Hill Farm
Pingback: Weekly Farm Notes :: June 2nd, 2015 | Tant Hill Farm
Pingback: Weekly Farm Notes :: Nov 4th, 2015 | Tant Hill Farm
Pingback: Weekly Farm Notes :: Nov 18th, 2015 | Tant Hill Farm
Pingback: Deep Winter CSA Starts Next Week! | Tant Hill Farm