Dưa Cải Chua

Don’t it always seem to go that you don’t know what you’ve got till it’s gone. -Joni Mitchell

It’s hard to believe in the middle of winter, when you’re so hungry for fresh veg you can’t stand it, but by mid-spring sometimes you can get greens fatigue. They just keep coming!

That bounty is wonderful, but when you’re running out of ideas for how to eat them fresh, remember how hungry you were for those greens just a couple months ago. Fortunately, your greens don’t have to go the same way as Joni Mitchell’s proverbial paradise.

Cucumbers, peppers, cabbage, and radishes aren’t the only spring and summer veggies you can pickle. Give your mustard and other spicy, peppery greens the same treatment, and you can have a taste of spring even after summer has passed.
18289798_10101376597390158_235019803_o

Dưa Cải Chua is a Vietnamese dish of pickled Spicy Asian Mustard Greens. It’s simple to make and easy to customize to your preferred palate—you can adjust to find your perfect balance of salt, sweet, sour, and spice. And best of all, you can make it with what’s in your share and a few common items in your pantry.

You’ll need:
2 bunch mustard greens, about 4 pounds
4-6 cloves of garlic
1 bunch of spring onion or white onion
Large pot boiled water
2.5-3 tablespoons salt
3 tablespoon sugar
Sriracha, Sambal Oelek, minced Sereno Peppers, or Szechuan Peppercorns
Fish Sauce (optional)
Clean mason jars
A Kraut Source fermentation kit (we sell them at our booth!) or ziplock bags & mason jar lids

Clean and separate your mustard greens and onions. Pick out any leaves that have gotten too yellow—though a little yellow or limpness is ok, as Dưa Cải Chuaa is a great way to use up greens that have languished in the back of your fridge a little longer than you intended (shhh, we won’t tell). A salad spinner an a little chilled tap water will do the trick.

18261626_10101376691860838_1489664596_o

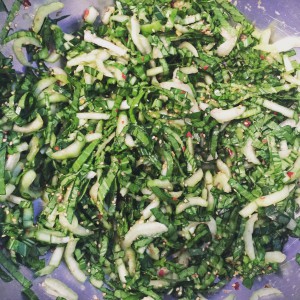
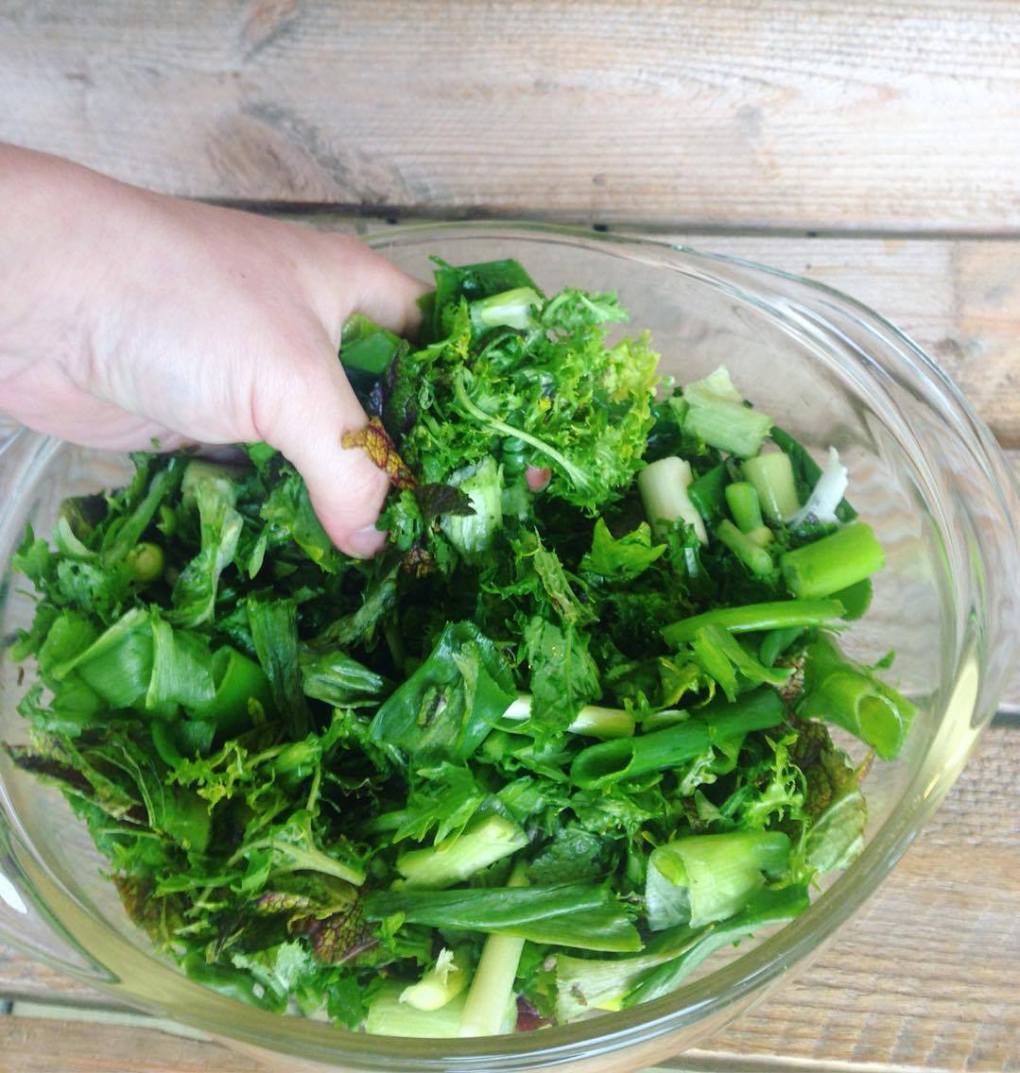
Dry the leaves and shred, then slice the onions. Some recommend letting the greens air dry and get limp for up to 12 hours. Others to simply pat dry with paper towels. It depends on how much time and counter space you have, and how fresh your mustard greens are. Once your leaves are dry, massage them till they are even more limp and even start to sweat a little. Mix with your onions and garlic and set aside.

Rinse your mason jars with boiling water to sterilize them. While the jars are cooling, use remaining boiled water to make a brine with the salt, sugar, and whatever spices you are adding. Taste with a clean spoon as you go to make sure you like the level of heat and balance of flavors.

Sriracha will produce a sweeter, milder Dưa Cải Chuaa. Sambal oelek will be spicier. Minced serano peppers are more traditional, but can get very spicy very quickly. Sezchuan peppercorns will be a different flavor—making the dish more Chinese than Vietnamese— and the level of heat will depend on how fresh your peppercorns are. Fish sauce will make it saltier and add an extra briny, umami flavor.

18261341_10101376597285368_1326493658_o

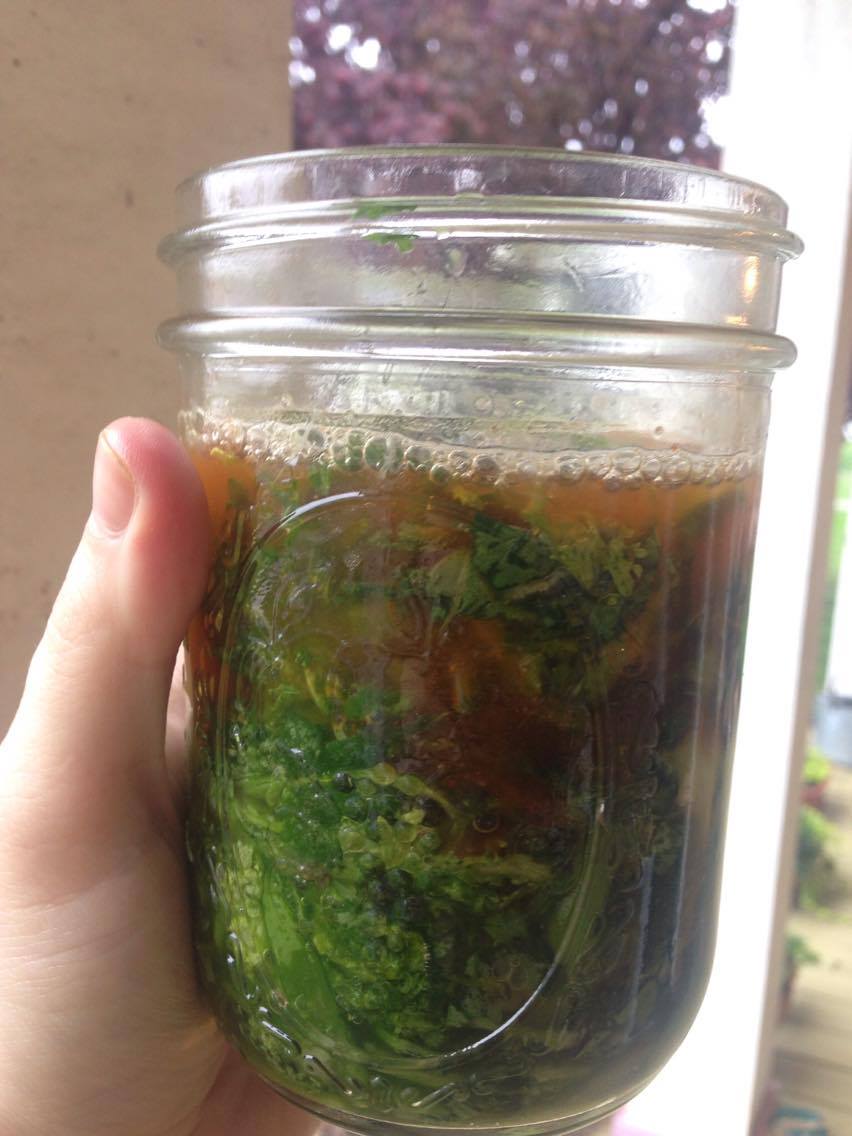
Pack your jars with the blend of mustard greens, onions, and garlic as tightly as possible. Press them down with a rubber spatula, which you can also use to break up air pockets. Pour the brine in with a funnel, until the greens are covered by at least an inch of brine. Don’t overfill your jars though—you want the brine to sit just below the neck of the jar, at least an inch from the lid.

This is when you either screw on your Kraut Source fermentation kit lid or, if you don’t have one, gently press a plastic bag into the mouth of the jar. Fill with tap water, taking care not to spill. The water will press the baggie flush against the top of the brine, making the contents air tight. Secure lip of the baggie to the mouth of the jar with a rubber band.
18261675_10101376597365208_1316923617_o

Let the Dưa Cải Chuaa sit on your counter for a week. After it’s done fermenting, take your baggies or Kraut Source lid off, and replace with regular mason jar tops. The Dưa Cải Chuaa will keep for months in the fridge unopened, much like kimchi or sauerkraut.

Traditionally, Dưa Cải Chuaa is eaten much like kimchi or kraut, used to add flavor to soups, salads, meats, rice, and more. Add it to stir fry, grain bowls, eggs, or noodle dishes.


18261624_10101376691850858_654425559_o

If you used Szechuan Peppercorns for more of a Chinese flare, add your pickled greens to Dan-Dan Noodles, a traditional spicy Szechuan dish made with thick, chewy noodles in a spicy soy-based sauce. For a Japanese-style meal, fry some of your Dưa Cải Chuaa (called Takana in Japan) in sesame oil before adding to rice.

Or if you want to stick close to Vietnam, you can make Canh Dưa Cải Chuaaa beef soup with pickled mustard greens. Or add to another Vietnamese dish Thịt Kho. a slow-braised pork dish with eggs. It would also be wonderful in Pho.


Quick Pickled Green Onions

Hi!

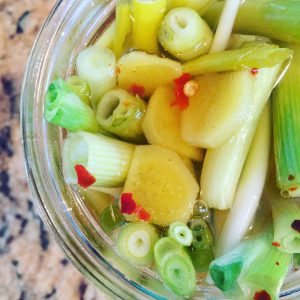
I love fresh green onions but sometimes I can’t get through a whole bunch before they go bad. This recipe is the perfect solution – it’s quick, easy and adds an extra punch of flavor. You can leave out the ginger and red pepper flakes and replace it with any herbs or spices you like.

This will be great with any number of dishes. Slice them thinly and add to eggs, rice or noodle dishes. Keep them whole and tuck them into a sandwich or serve along side a piece of fish.

This recipe is adapted from The Joy of Pickling, which I highly recommend if you are a pickle fanatic (and if you are, join the club!).

Enjoy!

Quick Pickled Green Onions
makes 1 pint

Ingredients:

  • 3/4 cup white distilled vinegar
  • 3/4 cup water
  • 2 tablespoons granulated sugar
  • 1-1/2 teaspoons sea salt
  • 1/2″ piece fresh ginger, peeled and thinly sliced
  • 1/4 teaspoon hot pepper flakes
  • 2 bunches scallions, trimmed, light and green parts only

Directions:

  • Put the vinegar, water, sugar, salt, ginger and hot pepper flakes in a small saucepan and bring to a boil over medium-high heat. While the mixture heats, pack the green onions into a wide mouth glass pint jar; I like to arrange them vertically.
  • Once the vinegar mixture comes to a boil, remove from heat and pour over the scallions. Cover jar tightly with a nonreactive cap and allow to cool to room temperature. Transfer to the refrigerator.
  • The green onions should be ready to eat in a week and should keep for several months.

Roasted Tomatillo Salsa

Hi everyone!

This is just a quick post with a tasty recipe for roasted tomatillo salsa. My husband said it was the best tomatillo salsa he has every tried, so thought I should share it!

We hope you enjoy the 4th!

Roasted Tomatillo Salsa
makes about 1 cup

Recipe notes: 1) you can use cilantro in place of papalo, but I would add 3 or 4 times as much; 2) broilers vary widely, so keep a close eye on ingredients in the oven.

Ingredients:

  • 12 ounces (about 20) tomatillos, husk removed, cleaned, and cut in half lengthwise
  • 2 small or 1 medium jalapeno, stem removed and cut in half lengthwise (remove seeds and ribs for a less spicy version)
  • 1/2 medium yellow onion (about 4 ounces), peeled and sliced 1/4″ thick
  • 1 large garlic clove, unpeeled
  • 1/2 teaspoon minced papalo
  • 3/4 teaspoon kosher salt
  • 1/4 teaspoon granulated sugar
  • 1 teaspoon freshly squeezed lime juice
  • 2 tablespoons water (more if you want a thinner salsa)

Directions:

  • Adjust oven rack to the upper position and pre-heat the broiler to high.
  • Line a rimmed baking sheet with aluminum foil. Place the tomatillos and jalapeno cut side down on the baking sheet. Add the onion and garlic clove to the baking sheet and spread all ingredients evenly. Broil for about 5-7 minutes, or until most ingredients are blistered and blackened. You may need to remove the blackened items and return the rest to cook under the broiler for a few more minutes. Once cool enough to handle, peel the garlic clove.
  • Transfer all ingredients to a blender and blend on high until ingredients are fully broken down and incorporated, about 15 seconds. Taste and adjust seasoning if needed.

Fresh Tomato Salsa with Papalo

Hello!

I love fresh, easy to prepare meals, especially in the scorching heat of summer. It doesn’t get fresher than this quick, flavorful salsa. Pair with tortilla chips and a protein source (I would go for a black bean salad) and you have dinner! Margaritas wouldn’t hurt either 🙂

This salsa is unique with the addition of papalo, an intense herb somewhat similar to cilantro, but with an aroma and flavor all its own. It is also called papaloquelite, poreleaf, mampuito, summer cilantro, and Bolivian coriander. It is often used as an alternative to cilantro, which makes sense as it thrives in the summer heat when cilantro will bolt. For more information, including recipes, check out this site.

Fresh Tomato Salsa with Papalo

Recipe notes: 1) if you are inclined, you can drain the diced tomatoes for 30 minutes in a colander to make the salsa less watery (which might be desirable depending on how to plan to use the salsa); 2) the spiciness of jalapenos vary greatly, so I always recommend adding some of the minced flesh to start, taste, then add more flesh and/or seeds/ribs until the desired heat level is reached; 3) papalo has an intense flavor, so start with just a small amount and add more as desired. You can substitute cilantro but I would use 2-3 times the amount called for.

Ingredients:

  • 1 pound firm, ripe tomatoes, cut into 1/2″ dice (see recipe note)
  • 1 medium jalapeno, cut in half, seeds/ribs removed, minced and reserved, flesh minced (see recipe note)
  • 1/3 cup minced red onion
  • 1/4 – 1/2 teaspoon minced papalo (see recipe note)
  • 1 large garlic clove, minced (about 1/2 teaspoon)
  • 4 teaspoons freshly squeezed lime juice
  • 1/4 teaspoon granulated sugar
  • 1/4 teaspoon table salt
  • Few grinds of fresh black pepper

Directions:

  • In a medium mixing bowl, add all ingredients and mix well to combine. Taste and adjust seasoning as needed. Best eaten fresh.


Raw Spicy Pak Choi Salad

Hello!

If you haven’t used the pak choi from last weeks share yet, give this quick, flavorful recipe a try. I used two heads of pak choi because I had one left over from last week but you can easily cut the dressing ingredients in half if you just have one. I plan to serve this with a quick ramen soup but I think it would be great with salmon or tofu and served on rice. I would suggest serving it immediately after tossing the pak choi with the dressing as it will start to wilt and soften fairly quickly.

Have a great weekend!

Raw Spicy Pak Choi Salad
adapted from One Good Dish by David Tanis

Ingredients:

  • 4 medium garlic cloves, minced
  • 1 tablespoon sorghum syrup or brown sugar
  • 1 tablespoon grated ginger
  • 1 tablespoon toasted sesame seeds
  • 1 tablespoon toasted sesame seed oil
  • 1 tablespoon fish sauce or soy sauce
  • 1 tablespoon rice vinegar
  • 1 teaspoon red pepper flakes
  • Salt to taste
  • 2 medium heads of pak choi, about 1-3/4 pounds total, trimmed, cleaned, and ribs and leaves thinly sliced (about 1/8″ thick)
  • Handful of shelled edamame (optional)

Directions:

  • Whisk all ingredients except pak choi together in a medium mixing bowl until well combined. Taste and adjust seasoning as needed. Toss with pak choi and edamame, if using, and serve.


Preserve the Harvest :: Dehydrated Greens + Recipe

Hello!

I just went through a week of intense preserving to help Mark & Gina use up pounds and pounds of kale and collards, along with some parsley and edible flowers, that would have gone to the compost heap otherwsie. I could have made it easier on myself by just processing the greens in two or three ways but I couldn’t control myself and ended up preserving by: making soup, blending and freezing greens, making and freezing compound butter, fermenting, dehydrating and steeping edible flowers in a sweetened apple cider vinegar mixture (called a shrub – more to come on this!). I list all of these items to give you some insight into the various paths I used to preserve the harvest. Each process has it’s upsides and downsides. For example, blending kale with water and then freezing it in ice cube trays is really simple and cheap (no added ingredients) but freezer space is limited and how many kale cubes does one really need?

Dehydrating has tradeoffs as well – it is simple to prepare, relatively hands off and the finished product can be stored at room temperature. However, it is energy intensive as each batch has to dry for hours at a time (even tender greens take 2 hours in my dehydrator). For someone with limited time, however, I think the tradeoff is worth while.

The dehydrating process is really simple:

  • Wash greens well
  • Dry well
    • I put mine through a salad spinner and then pat them dry with a clean towel.
  • Remove ribs and cut into desired shapes
    • If you are against wasting the ribs, I would at least cut them out and then dehydrate them separately from the leaves as they will dry at different rates.
  • Season if desired
    • This step depends on how you intend to use the greens. If you want to eat them as “chips”, I would suggest tossing them with at least a little oil and salt (see below for recipe idea). If you just want to dehydrate them in order to throw them in soups later, you can probably skip this step.
  • Dehydrate
    • Using a dehydrator: I have tried various temperatures but find that 135 degrees works best for greens. It only takes 2-3 hours at this temperature, whereas it can take hours and hours more if you drop it down much lower. I know raw foodist don’t cook anything over 104 degrees as they believe the nutritional value is lost. This may be true but since dried greens are such a small part of my overall diet, I don’t worry about it much.
      • If you don’t have a dehydrator but are looking to purchase one, this article gives a lot of helpful information.
    • Using an oven: I have never dehydrated food in an oven so I would do your own research if this is the route you wish to take. From what I have read, most ovens don’t go below 170 so you have to prop the oven door open to maintain the correct temperature. It seems like this could be difficult to control but I would love to hear from anyone who tries it.
  • Store in an airtight container in a cool, dark, dry spot.
    1. This is a good article to understand where and why dehydrated food should be stored and how long you can expect it to last.

In the end, you can dehydrate just about anything. Since greens are so plentiful right now, give this a shot if you are out of other ideas!

Spiced Swiss Chard Chips

Recipe notes: 1) depending on the size of your dehydrator, you may be able to fit more greens at once. I am using a round, 4 level Nesco dehydrator.

Ingredients:

  • 1 tablespoon vegetable oil
  • 1/4 teaspoon five spice powder
  • 1/4 teaspoon ground turmeric
  • 1/8 teaspoon cayenne, or more if desired
  • 1/8 teaspoon table salt
  • 1/2 pound (about 15 medium leaves) Swiss chard, washed and dried thoroughly

Directions:

  • Whisk oil, spices and salt together in a large mixing bowl. Set aside.
  • Trim Swiss chard ribs and set aside. Cut leaves into desired shapes. I cut the leaves in half along the ribs and then cut each half into halves or thirds, depending on the size.
  • Place leaves in the mixing bowl and toss gently but thoroughly with the spices. Arrange the leaves on the dehydrating trays, taking care not to overlap them too much.
  • Dehydrate at 135 degrees F, checking after 2 hours to see if they are crisp. If not, continue to dehydrate, checking every 20-30 minutes. Allow to cool to room temperature and transfer to an airtight container. Store in a cool, dry place. These should last for months but I bet they won’t stick around that long 🙂

Curtido (Salvadorian Sauerkraut)

Hi! This is my first post for Tant Hill Farm so I think an introduction is in order. My name is Laura Robinson and I just recently moved to Chattanooga with my husband and 16 month old son. I am a chef and have worked as a culinary instructor, personal chef and caterer in the past but I am now taking some time off to be home with my son. I will be blogging, creating recipes and helping with social media (follow us on Facebook, Instagram, Twitter and Pinterest!). My passion is creating simple yet flavorful recipes based on local and seasonal food that both feeds the body and the soul.  I hope to help bridge the gap between buying local produce and figuring out what to do with it when you get home. Check out my website if you want more information on me and what I do. Now on to the good stuff!

~~~~~~~~~~~~~~~~~~~~~~~~~~~~~~~~~~~~~~~~~~~~~~~~~~~~~~~~~~~~~~~~~

Fermented food has clearly moved into the American mainstream. Look up any “2015 Food Trends” list and it is bound to be close to the top of the list. However, it is anything but a fresh concept; humans have been fermenting food and drink for thousands of years. Not only to make food healthier and longer lasting, but also to make it oh so tasty.

I am just getting into home fermentation myself and traditional sauerkraut was my first experiment. This time around, I was looking for something a bit different when I stumbled across curtido, the Salvadorian version of sauerkraut. It is typically made with cabbage, carrots (both of which were in the Deep Winter CSA last week!) and onions and served along side cheese-filled corn tortillas, called pupusas. As much as I would love to make a traditional pupusa to eat along side the curtido when it has finished fermenting, the truth is I have limited time and will most likely stuff it in a grilled cheese (which I think will be equally as good!). I also think it would be great with marinated tempeh or grilled meat.

The following recipe was based on this one but the thing I love most about fermenting is that you really don’t need a recipe. Don’t have carrots? No worries! Don’t like spicy food? Leave out the peppers! I am by no means an expert but there are so many great resources available to learn more: check out anything by Sandor Katz, like Wild Fermentation and The Art of Fermentation, and Cultures for Health. There is also a great Facebook page called Wild Fermentation that has over 36,000 members, and I have found it to be a great resource.

In the end, I hope you use this as a starting point. Experiment and then share the results! We can’t wait to hear how it turns out. Enjoy!

Curtido

Recipe notes: 1) using a food processor or mandoline makes speedy work of slicing the vegetables; 2) you can use many types of salt, the best being those that are unrefined and natural – check out this link for more information; 3) I have found a variety of salt level recommendations – I prefer the one listed below but you need a kitchen scale (I love the Oxo digital scale) – if you don’t have a scale, this source recommends using 1-3 tablespoons of salt per medium head of cabbage (or equivalent of another vegetable).

Ingredients:

  • 2.25 pounds (5 small) cabbage, cored and sliced thin
  • 12.5 ounces (about 16 small) carrots, shredded on the large holes of box grater
  • 1 large onion, peeled and sliced thin
  • 3 large jalapenos, stemmed, seeded, cut lengthwise then sliced into half moons
  • 2 teaspoons dried oregano
  • 2 teaspoons dried red chili flakes
  • Salt: 3 tablespoons of salt per 5 pounds of trimmed and sliced vegetables
  • For brine if needed: 1.5 tablespoons pickling salt plus 4 cups water

Directions:

  • Add cabbage, carrots, onion, jalapenos, oregano and chili flakes to a large mixing bowl. Weigh ingredients to determine how much salt is needed (see recipe note). Add 3 tablespoons of salt for every 5 pounds of vegetables. I had a little over 3 pounds of vegetables so I used a little under 2 tablespoons salt.
  • Massage and pound the vegetables together until they have wilted and released their liquid. The goal of this step is get the vegetables to release enough of their own liquid to cover everything by an inch. You may massage everything for 5 minutes and have enough liquid or you may be at for 30 minutes and they still haven’t released much at all – it all depends on the water content of the vegetable.
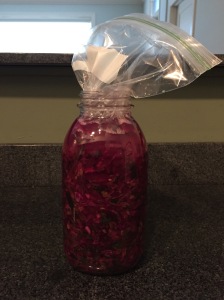
  • Before you can determine if you have enough liquid to cover the vegetables, you need to pack them into whatever fermentation vessel you plan to use. There are so many options – this website does a great job of breaking it down. Although it is not ideal (because the mouth of the jar is small), I am using a large glass canning jar (see picture below). Once you have chosen a vessel, you need to start packing it with the vegetable mixture. It is best to do this layer by layer – add a couple scoops of vegetables and pound it down to 1) release as much liquid as possible and 2) remove any air pockets (lacto-fermentation happens in the absence of oxygen and the sauerkraut could spoil around any air pockets). Continue to repeat the action of adding vegetables and pounding them down until all of the sauerkraut is added. Hopefully the vegetables have released enough liquid to cover everything by an inch, but if not, use the brine amount listed in the ingredient section to cover the vegetables.
  • The next important step is to weigh the vegetables down as anything that rises to the surface will mold. Again, there are so many options here. I used a plastic bag, which I stuffed into the top of canning jar, and then filled it with water. Transfer the vessel to a cool, dry place to ferment.
  • Now all you have to do is wait! The amount of time is completely determined by your taste buds – taste it every day or two to see how it is progressing. It might only take 3-5 days for it to get to a place that you like. I plan to let mine go for a couple of weeks, maybe longer. You can even wait a couple of months but I am not sure I have the patience to wait that long!

Raw Curtido Fermenting Curtido