Weekly Farm Notes :: Sep 30th, 2015

Hello!

Just to rehash from last week, we have new information on the website:

  • If you can’t remember what is what after you get home, check out our produce pictures and detailed information tab for pictures of each individual item in your CSA basket. We are still working to update this information so check back each week.
  • We added a tab that will allow you to easily search our recipes. Wondering what you can do with your greens? Check out this tab for constantly updated ideas!

See you at market!

~~~~~~~~~~~~~~~~~~~~~~~~~~~~~~~~~~~~~~~~~~~~~~~~~~~

September 30th Produce

Here are the items you can expect at Market (denoted by M) and/or in the CSA (denoted by CSA):

  • Awesome Asian Mix {CSA}: wow, check out this mix – you get Yukina Savoy, Tokyo Bekana, Ruby Streaks, Red Komatsuna, and Suehihung Mustard! You can either eat it raw in a salad or saute it.
  • Broccoli Rabe {CSA}: I found a recipe for sauteed broccoli rabe, blue cheese and bacon pizzas that looked really interesting. Swap out the bacon for mushrooms for a vegetarian version.
  • Hakurei and Red Scarlet Salad Turnips {M/CSA}: why not combine the turnips AND the greens in the next salad you make? Here is a recipe for a turnip green salad with a sweeter dressing to help balance any spiciness or bitterness from the greens (check out our salad post for lots of great salad making tips!).
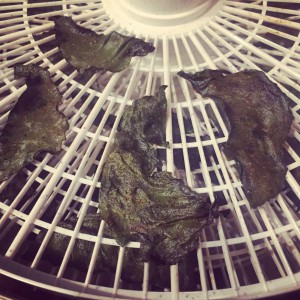
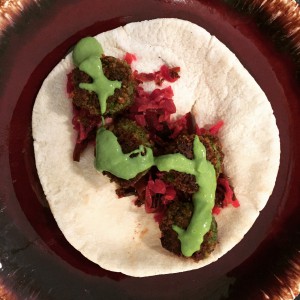
  • Radishes and Greens {M/CSA}: wondering what to do with all those lovely radish greens? Make a pesto of course!
  • Toscano and Siberian Kale {M/CSA}: this is one of my all time favorite fast foods. Try it with different greens and even different types of grains.
  • Pak Choi {M/CSA}: to prepare pak choi, separate the greens from the stems, slice and wash. I suggest sauteing the stems over medium-high heat for a couple minutes on one side or until browned. Flip and allow the other side to cook for a minute before adding the greens. They will cook very fast so just flip them around for a minute and serve. I served mine with sesame noodles – look for that recipe soon!
  • Spicy Mustard Greens {M/CSA}: I am planning to saute these greens and add them to a homemade hummus recipe. I will share the recipe with you if it turns out well!
  • Collard Greens {M}: there are lots of recipes for collard green and white bean soup so it must be good! Here is one such post but I bet you can make it or something similar by following our soup making tips.
  • Summerfest Komatsuna {M}: these greens work great in smoothies given their mild flavor profile. Try it in your favorite smoothie recipe and let us know what you think!
  • Daikon Radish and Greens {M}: did you know daikon radishes are one of the main ingredients to kimchi? If you don’t have the time or experience to start a fermentation, why not try quick pickling them? Follow our Quick Pickled Okra post and just swap out okra for daikon.


Weekly Farm Notes :: Sep 23rd, 2015

Hello!

We are in the process of adding more information to our website that we think you will find useful. First, we have added a tab with produce pictures and detailed information, including storage tips, nutrition and recipe links. Second, we added a tab that will allow you to easily search our recipes. Both tabs are a work in process so please check back weekly for updated information. Please let us know if you are looking for additional information and we would be happy to include it!

See you at market!

~~~~~~~~~~~~~~~~~~~~~~~~~~~~~~~~~~~~~~~~~~~~~~~~~~~

September 23rd Produce

Here are the items you can expect at Market (denoted by M) and/or in the CSA (denoted by CSA):

  • Summerfest Komatsuna {CSA}: I simply chopped this up last week and added it to a basic miso soup recipe (along with some brown rice to make it a complete meal). This recipe takes just 15 minutes!
  • Swiss Chard {CSA}: this is my kind of recipe – protein, veggies and cheese in one bowl makes my heart happy.
  • Snap Green Beans {CSA}: do you ever have left over cornbread that gets a bit dry? I had some last week that I crumbled and sauteed in butter until brown and crispy. I sprinkled the cornbread crumbles over steamed green beans for a tasty side dish.
  • Hakurei Salad Turnips {CSA}: we roasted our salad turnips and radishes last week and added them to a simple barley salad. Check out our recipe here!
  • Collard Greens {M/CSA}: I am thinking ahead to cooler weather and the holidays and this Collard Green Gratin sounds like something I should try soon.
  • Royal Radishes and Greens {M/CSA}: we roasted our salad turnips and radishes last week and added them to a simple barley salad. Check out our recipe here!
  • Siberian Kale {M/CSA}: we are big smoothie fans here at Tant Hill! We love adding greens to our smoothies and kale is the perfect option. Check out our Pinterest page where we have gathered some recipes from around the web.
  • Pak Choi {M/CSA}: check out our quick, delicious recipe for Raw Spicy Pak Choi Salad. Serve this along side one of my favorite weeknight dinners of rice topped with a fried egg. It’s the best type of fast food.
  • Okra {M}: we have a couple okra recipes on the website for you to try – Quick Pickled Okra and Fresh Okra Cakes. I am also experimenting with dehydrating okra this week and will report back!
  • Arugula {M}: umm, why haven’t I made this salad before?! It’s a great use for your radishes too.
  • Spicy Asian Greens {M}: these greens deserve a great dressing. Check out the dressing section of our Essential Elements to a Satisfying Salad post and easily make your own!
  • Yukina Savoy {M}: this green looks like tatsoi but actually belongs to the Brassica family along with cabbage, broccoli and kale. You can use it any way that you would use spinach but here is a simple recipe for Mushrooms and Yukina Savoy if you need some inspiration.

~~~~~~~~~~~~~~~~~~~~~~~~~~~~~~~~~~~~~~~~~~~~~~~~~~~

Other :: Alice O’Dea Article

Have you read Alice O’Dea’s latest article? This week she discusses making a roux – an essential element for many sauces and stews. Learn this now and use it all Fall and Winter long!


Weekly Farm Notes :: June 16th, 2015

Hello,

Just a quick note with items to expect at market tomorrow. Along with the produce listed below, we will also have cut flowers available – zinnia, coneflowers and gladiolus. We hope to see there!

~~~~~~~~~~~~~~~~~~~~~~~~~~~~~~~~~~~~~~~~~~~~~~~~~~~

June 17th Produce

Here are some of the items you can expect this week:

  • Tomatoes: You simply can’t go wrong with caprese – that delicious combination of tomatoes, basil and mozzarella. Check out the recent recipe posted by Main Street Farmers Market.
  • Blackberries: I found a really interesting recipe for Cold Brined Pickled Blackberries in Root to Leaf: A Southern Chef Cooks Through the Seasons. See below for the details. I love trying new techniques and look forward to trying this one soon.
  • Snap Green Beans: you gotta watch this video on how to quickly snap green beans. Good stuff!
  • Cabbage: we will have lots of cabbage options for you this week! Flathead, Cone, Savoy and Napa cabbage. Interested in fermenting some of that cabbage? Check out our recipe for Curtido, also know as Salvadorian Sauerkraut!
  • Red Russian, Toscano & Biera Kale: mix kale, delicious cheese from Sequatchie Cove and top it with an egg and you have dinner! Check out this recipe from our friends at Signal Mountain Farm.
  • Mint: looking for ways to use your mint? Check out this delicious recipe list from The Kitchn.
  • Papalo: I have never even heard of this herb! Can’t wait to experiment with it this week. Let us know how you use it!

~~~~~~~~~~~~~~~~~~~~~~~~~~~~~~~~~~~~~~~~~~~~~~~~~~~

Recipe :: Cold Brined Pickled Blackberries

As mentioned above, this is a recipe from Root to Leaf: A Southern Chef Cooks Through the Seasons. I really recommend you check it out!

Ingredients:

  • 4 cups blackberries
  • 6 juniper berries or a shot of London dry-style gin
  • 8 black peppercorns
  • 1 small bay leaf
  • 1/2 ” piece fresh ginger, sliced
  • 3 allspice berries
  • 2 cups red wine vinegar
  • 6 tablespoons sugar
  • 3 tablespoons kosher salt
  • 1 sprig fresh thyme
  • 1 shallot, quartered

Directions:

  • Fill a 1-quart jar with blackberries and place in the refrigerator. Lightly crush juniper, peppercorns, bay leaf, ginger and allspice. In a medium saucepan over high heat, combine vinegar, sugar, salt and 2 cups water and stir to dissolve sugar. Add crushed spices, thyme and shallot. When mixture comes to a boil, reduce heat and simmer for 10 minutes. Remove from heat and cool to room temp then chill for 1 hour. Pour brine over berries and refrigerate for up to 4 weeks.


Weekly Farm Notes :: June 2nd, 2015

Hello,

The Spring CSA ended last week but we will still have lots of goodies available tomorrow. See below for details on the produce you can expect. Also, I have included a recipe for Saffron Cauliflower and details on Yardlong Beans. Hope to see you at the market tomorrow!

~~~~~~~~~~~~~~~~~~~~~~~~~~~~~~~~~~~~~~~~~~~~~~~~~~~

June 3rd Produce

Here are some of the items you can expect this week:

  • Tomatoes!: since the tomato season is just kicking off, I am going to suggest simply slicing your tomatoes, dousing them in your favorite extra-virgin olive oil and sprinkling with balsamic vinegar, salt and pepper. There are many weeks ahead of tomato dishes, why not just enjoy them raw?
  • Kohlrabi: here is an easy, flavorful way to enjoy kohlrabi: mix together 3 tablespoons sesame oil, 4 teaspoons white vinegar, 4 teaspoons soy sauce, 2-3 tablespoons sugar, 4 teaspoons sesame seeds (I like the black seeds because they stand out more). Then peel and slice kohlrabi thinly and marinate in the mixture.
  • Flat Head Cabbage: I guess it’s about time for grilling recipes! Check out this recipe for grilled cabbage with yogurt and mint. It’s a great way to use mint from the market too!
  • Cheddar Cauliflower: this version of cauliflower was first discovered in Canada in 1970, although it took years of crossbreeding before it was widely available. The color comes from a genetic mutation that allows the plant to hold more beta carotene. It also contains about 25% more vitamin A than white cauliflower (information from The Kitchn). Check out the recipe below if you need some inspiration!
  • Rainbow Chard: summer weather calls for raw salads. This Creamy Maple Mustard Raw Chard Salad sounds great!
  • Tender Collards: don’t forget, you can dehydrate your greens! Check out more here.
  • Toscano & Red Russian Kale: kale is a great in these Greens & Cheese Frittata Muffins!
  • Lemon Balm: have you ever tried a shrub? It’s a sweetened vinegary drink and it tastes amazing steeped with lemon balm! Check out our recipe here.
  • Mint: use your mint in the grilled cabbage recipe above!

~~~~~~~~~~~~~~~~~~~~~~~~~~~~~~~~~~~~~~~~~~~~~~~~~~~

Recipe :: Saffron Cauliflower

This recipe comes from one of my favorite cookbooks, Plenty: Vibrant Vegetable Recipes from London’s Ottolenghi. It serves 4 as a side dish.

Ingredients:

  • 1-1/2 teaspoons saffron
  • 1/3 cup boiling water
  • 1 medium head of cauliflower, divided into medium florets
  • 1 large red onion, sliced
  • 2/3 cup golden raisins
  • 1/2 cup green olives, pitted and cut lengthwise in half
  • 4 tablespoons olive oil
  • 2 bay leaves
  • Salt and black pepper
  • 4 tablespoons roughly chopped parsley

Directions:

  • Preheat oven to 400 degrees F. Put the saffron strands in a small bowl and pour over the boiling water. Leave to infuse for a minute, then pour the saffron and water into a large mixing bowl. Add the remaining ingredients, except the parsley, and mix well.
  • Transfer mixture to a medium ovenproof dish, cover with foil and place in the oven. Cook for 40-45 minutes, or until the cauliflower is tender but still a bit firm, not soft. Halfway through the cooking time remove the dish from the oven and stir well, then cover again and return to bake.
  • Once the cauliflower is cooked, take it out of the oven, remove the foil and allow to cool down slightly before stirring in the parsley. Taste and adjust seasoning, then serve warm or at room temperature.

~~~~~~~~~~~~~~~~~~~~~~~~~~~~~~~~~~~~~~~~~~~~~~~~~~~

Summer Produce :: Yardlong Beans

Yardlong beans go by many names: bora, bodi, long-podded cowpea, asparagus bean, pea bean, snake bean, or Chinese long bean. Because it grows well is sub-tropical and tropical climates, it is typically found throughout Southeast Asian countries. Here are some interesting tidbits I discovered in my research:

  • Yardlong beans become waterlogged when cooked steamed or boiled so are best cooked with oil
  • Although the beans can grow to be 3 feet long, optimal picking is between 12-18″
  • They are a good source of protein, vitamin A, thiamin, riboflavin, iron, phosphorus, and potassium, and a very good source for vitamin C, folate, magnesium, and manganese
  • I have found references to canning and fermenting these beans so I plan on trying both this summer!

Weekly Farm Notes :: May 19th, 2015

Hello,

Now that we are close to the end of the Spring CSA, we wanted to give you a heads up on what to expect from us this summer. To start, we will have lots of beans! The list includes green beans, yard long beans, Crowder peas, Italian beans, October beans, and half white runners. To give you some insight into each variety, we will highlight a different bean each week. Up this week: Crowder peas! Check out the details below.

Hope to see you at the market tomorrow!

~~~~~~~~~~~~~~~~~~~~~~~~~~~~~~~~~~~~~~~~~~~~~~~~~~~

May 20th Produce

Here are some of the items you can expect this week:

  • Kohlrabi: I have been daydreaming of kohlrabi fritters lately. You too? This recipe looks like a great place to start.
  • Beets: you HAVE to try roasting beets and combining them with kalamata olives, orange and goat cheese. It is one of the best flavor combinations I have ever tried. It’s great on a sandwich or as a salad. I wrote about it here – give it a try and let us know what you think!
  • Green Leaf Lettuce: the lettuce this week has turned a little bitter so we wanted to provide a salad dressing recipe that would stand up to it. See below!
  • Salad Turnips: I have loved adding these raw to my sandwiches this week. Today I sliced these thinly and added them to a sandwich with hard boiled eggs, avocado and Sriracha. Talk about good food, fast!
  • Tender Collards: don’t forget, you can dehydrate your greens! Check out more here.
  • Toscano & Beira Kale: I really love these little baked quinoa and kale bites. I have a feeling you will too.
  • Napa Chinese Cabbage: I posted this recipe last week for spicy raw pak choi but I think it would be equally as good with this cabbage. I served it along side a ramen noodle soup and it was perfect.

~~~~~~~~~~~~~~~~~~~~~~~~~~~~~~~~~~~~~~~~~~~~~~~~~~~

Recipe :: Sesame-Miso Dressing

This recipe is from Cook’s Illustrated and will coat 10 cups of washed and dried salad greens.

Ingredients:

  • 2 tablespoons white miso
  • 1 tablespoon honey
  • 1 tablespoon soy sauce
  • 2 tablespoons water
  • 2 tablespoons peanut oil
  • 2 tablespoons sesame seeds, toasted and crushed
  • 1 scallion, sliced thin

Directions:

  • Whisk together miso, honey, soy sauce, and water in medium bowl; gradually whisk in peanut oil, then stir in sesame seeds and scallion.

~~~~~~~~~~~~~~~~~~~~~~~~~~~~~~~~~~~~~~~~~~~~~~~~~~~

Summer Produce :: Crowder Peas

I had never heard of crowder peas so thought we would start here. Below are a few interesting tidbits I found on this site. I am really looking forward to trying these this summer!

  • The crowder pea variety gets its name from the way its peas crowd themselves in the pod.
  • Blackeye peas, crowder peas, field peas, and Lady Cream peas are varieties of the same species commonly called “cowpeas” or “Southern peas”.
  • It has a rich, hearty flavor and creates a dark pot liquor when cooked.
  • 1 cup (172 grams) of cooked crowder peas has only 200 calories, very little fat and 45% RDA of fiber.

~~~~~~~~~~~~~~~~~~~~~~~~~~~~~~~~~~~~~~~~~~~~~~~~~~~

Other News

Have you read Alice O’Dea’s latest article? Check out her latest article on shrubs (which featured our recipe!).


Weekly Farm Notes :: May 13, 2015

Hello! I am late writing this and short on time but hope it helps. Hope to see you at the market tonight!

~~~~~~~~~~~~~~~~~~~~~~~~~~~~~~~~~~~~~~~~~~~~~~~~~~~

May 13th Produce

Here are some of the items you can expect this week:

  • Purple & White Kohlrabi: see below for a tasty way to prepare your kohlrabi!
  • Pak Choi: let us know how you use your pak choi! I need some inspiration 🙂
  • Romaine & Red Leaf Lettuce: if you need a go-to dressing for your salad greens, check out this Balsamic-Mustard Vinaigrette!
  • Salad Turnips: aren’t familiar with salad turnips? They are much sweeter than your average turnip and I love them raw. I love this idea of just slicing them thin and making a sandwich!
  • Red & Green Mustard: I love mustard greens in Indian inspired sauces. I made a more labor intensive version of this recipe last weekend and it was great tossed with veggies and served along side brown rice and naan.
  • Toscano Kale: thank you to Signal Mountain farm for this delicious recipe for Kale and Potato Fritters!

~~~~~~~~~~~~~~~~~~~~~~~~~~~~~~~~~~~~~~~~~~~~~~~~~~~

Recipe :: Kohlrabi Home Fries

This recipe is adapted from The New York Times and I love how simple and adaptable it is.

Ingredients:

  • 1-1/2  to 2 pounds kohlrabi
  • 2-3 tablespoons rice flour, chickpea flour, or semolina
  • Salt to taste
  • 2-4 tablespoons vegetable oil
  • Chili powder, ground cumin, curry powder or paprika to taste

Directions:

  1. Peel the kohlrabi and cut into thick sticks, about 1/3 to 1/2 inch wide and about 2 inches long.
  2. Heat the oil over medium-high heat in a heavy skillet (cast iron is good). Meanwhile, place the flour in a large bowl, season with salt if desired and quickly toss the kohlrabi sticks in the flour so that they are lightly coated.
  3. When the oil is rippling, carefully add the kohlrabi to the pan in batches so that the pan isn’t crowded. Cook on one side until browned, about 2 to 3 minutes. Then, using tongs, turn the pieces over to brown on the other side for another 2 to 3 minutes. The procedure should take only about 5 minutes if there is enough oil in the pan. Drain on paper towels, then sprinkle right away with the seasoning of your choice. Serve hot.

~~~~~~~~~~~~~~~~~~~~~~~~~~~~~~~~~~~~~~~~~~~~~~~~~~~

Events

May 16th: Wildwood Harvest is having an open house from 10am-2pm. I plan on bringing a picnic to enjoy on the farm – hope to see you there!

May 22nd: Crabtree Farms is hosting a “Buying Local on a Budget” class from 6-7:30pm.


Preserve the Harvest :: Dehydrated Greens + Recipe

Hello!

I just went through a week of intense preserving to help Mark & Gina use up pounds and pounds of kale and collards, along with some parsley and edible flowers, that would have gone to the compost heap otherwsie. I could have made it easier on myself by just processing the greens in two or three ways but I couldn’t control myself and ended up preserving by: making soup, blending and freezing greens, making and freezing compound butter, fermenting, dehydrating and steeping edible flowers in a sweetened apple cider vinegar mixture (called a shrub – more to come on this!). I list all of these items to give you some insight into the various paths I used to preserve the harvest. Each process has it’s upsides and downsides. For example, blending kale with water and then freezing it in ice cube trays is really simple and cheap (no added ingredients) but freezer space is limited and how many kale cubes does one really need?

Dehydrating has tradeoffs as well – it is simple to prepare, relatively hands off and the finished product can be stored at room temperature. However, it is energy intensive as each batch has to dry for hours at a time (even tender greens take 2 hours in my dehydrator). For someone with limited time, however, I think the tradeoff is worth while.

The dehydrating process is really simple:

  • Wash greens well
  • Dry well
    • I put mine through a salad spinner and then pat them dry with a clean towel.
  • Remove ribs and cut into desired shapes
    • If you are against wasting the ribs, I would at least cut them out and then dehydrate them separately from the leaves as they will dry at different rates.
  • Season if desired
    • This step depends on how you intend to use the greens. If you want to eat them as “chips”, I would suggest tossing them with at least a little oil and salt (see below for recipe idea). If you just want to dehydrate them in order to throw them in soups later, you can probably skip this step.
  • Dehydrate
    • Using a dehydrator: I have tried various temperatures but find that 135 degrees works best for greens. It only takes 2-3 hours at this temperature, whereas it can take hours and hours more if you drop it down much lower. I know raw foodist don’t cook anything over 104 degrees as they believe the nutritional value is lost. This may be true but since dried greens are such a small part of my overall diet, I don’t worry about it much.
      • If you don’t have a dehydrator but are looking to purchase one, this article gives a lot of helpful information.
    • Using an oven: I have never dehydrated food in an oven so I would do your own research if this is the route you wish to take. From what I have read, most ovens don’t go below 170 so you have to prop the oven door open to maintain the correct temperature. It seems like this could be difficult to control but I would love to hear from anyone who tries it.
  • Store in an airtight container in a cool, dark, dry spot.
    1. This is a good article to understand where and why dehydrated food should be stored and how long you can expect it to last.

In the end, you can dehydrate just about anything. Since greens are so plentiful right now, give this a shot if you are out of other ideas!

Spiced Swiss Chard Chips

Recipe notes: 1) depending on the size of your dehydrator, you may be able to fit more greens at once. I am using a round, 4 level Nesco dehydrator.

Ingredients:

  • 1 tablespoon vegetable oil
  • 1/4 teaspoon five spice powder
  • 1/4 teaspoon ground turmeric
  • 1/8 teaspoon cayenne, or more if desired
  • 1/8 teaspoon table salt
  • 1/2 pound (about 15 medium leaves) Swiss chard, washed and dried thoroughly

Directions:

  • Whisk oil, spices and salt together in a large mixing bowl. Set aside.
  • Trim Swiss chard ribs and set aside. Cut leaves into desired shapes. I cut the leaves in half along the ribs and then cut each half into halves or thirds, depending on the size.
  • Place leaves in the mixing bowl and toss gently but thoroughly with the spices. Arrange the leaves on the dehydrating trays, taking care not to overlap them too much.
  • Dehydrate at 135 degrees F, checking after 2 hours to see if they are crisp. If not, continue to dehydrate, checking every 20-30 minutes. Allow to cool to room temperature and transfer to an airtight container. Store in a cool, dry place. These should last for months but I bet they won’t stick around that long 🙂

Green Tahini Sauce

Our friends over at Choose To Eat have a recipe for falafel that comes together really fast with the use of canned chickpeas. Falafel is great served with a tahini sauce but we thought it would be even better with a healthy dose of greens included. You can use any greens you have on hand – kale, spinach, tender collards, Swiss chard, mustard greens, even radish tops. Serve the falafel and sauce with pita and my personal favorite, our Curtido recipe, and you have a filling, healthful dinner in no time!

Green Tahini Sauce
makes about 1 cup

Ingredients:

  • 1/2 cup tahini
  • 1/2 cup water
  • 1/4 cup olive oil
  • 1 large garlic clove
  • 1/2 to 3/4 packed cup of chopped greens
  • 1 tablespoon fresh lemon juice
  • 1/4 teaspoon cumin seeds
  • 1/4 teaspoon table salt

Directions:

  • Place all ingredients into a blender and process until very smooth, 30-60 seconds depending on your blender. Taste and add extra greens, salt or lemon juice to taste.

Quinoa & Kale Bites

Hello!

This is just a quick post to share a recipe I made this week. It is inspired by this recipe from the 101 Cookbooks blog. I changed a few things but the base is the same – quinoa, kale and edamame baked in muffin tins. It is nutritious, fast to prepare and will provide a number of quick meals you can eat on the run. We hope you enjoy it!

Quinoa & Kale Bites
makes 12 muffin bites

Ingredients:

  • 3 cups cooked quinoa (from about 1 cup raw quinoa)
  • 1/2 packed cup of cooked finely chopped kale or other tender greens
  • 4 large eggs, lightly beaten
  • 1/2 cup shelled edamame, roughly chopped
  • 1/3 cup shredded Manchego or cheese of choice
  • 1 tablespoon minced cilantro
  • 1 teaspoon minced garlic (from about 3 medium cloves)
  • 1/4 teaspoon lemon zest (from about 1/4 of a large lemon)
  • Salt to taste (will depend on saltiness of cheese; I used 3/4 teaspoon table salt)

Directions:

  • Adjust oven rack to middle position and heat to 350 degrees.
  • Spray a standard 12 cup muffin tin with non-stick cooking spray and set aside.
  • Combine all ingredients in a large mixing bowl and mix until thoroughly combined. Fill each muffin tin almost to the top with the mixture and pat down lightly to even out the top. Bake for 25 minutes or until the muffins are set and they are golden brown around the sides. Remove from oven and allow to cool in the tin for 5-10 minutes. Transfer to a cooling rack and cool completely before storing in the refrigerator.

Preserve the Harvest :: Quick Pickled Radish Leaves

Making quick pickles is one of the fastest and easiest ways to preserve the harvest. These types of pickles are made by pouring an acidic brine over produce, allowing the brine to flavor the vegetable or fruit over a number of days in the refrigerator. Although they are called quick “pickles” it is important to understand a few important ways in which they differ from fermented pickles.

  • Time: quick pickles are ready in a matter of hours or days whereas fermented pickles take weeks or even months.
  • Flavor development: quick pickles get their flavor from the acidic brine and any flavoring components whereas fermented pickles get flavor from bacteria present during the fermentation process. Fermented pickles tend to have a more complex and developed flavor but you have more control over the final flavor with quick pickles.
  • Refrigeration: quick pickles have to be refrigerated and typically last only a few weeks, unlike fermented pickles which have a much longer shelf life.

Quick pickling is pretty foolproof but here are a few tips to get you started:

  • Vinegar/Water Ratio: I suggest starting with equal parts vinegar to water to see how you like the balance of flavor. You can always adjust it during the next batch. To determine the amount of brine needed, just measure the amount that will fit in the jar you intend to use.
  • Types of Vinegar: I wouldn’t use balsamic vinegar but just about anything else goes – apple cider vinegar, rice vinegar, white wine vinegar, red wine vinegar, distilled white vinegar. I like to use rice vinegar because it’s has the lowest acidity level (~4%) of those I mentioned above (wine vinegars are around 7%) so the flavor of the vegetables and spices can shine through a bit more.
  • Flavorings: Whole spices and crushed garlic are great places to start when deciding how to flavor your brine. I prefer to keep the spicing relatively mild so I can use my pickles on just about anything. Mustard seeds, bay leaves and peppercorns are classic but don’t stop there. I have added cumin seeds, fennel seeds, allspice, cinnamon sticks, cloves and dried hot chiles to batches in the past.
  • Sugar: a lot of recipes I find include sugar – and some of them have A LOT! I don’t find that I need sugar because I use rice vinegar. If you are using a vinegar with a higher acidity level (see Types of Vinegar section above) then you might want to add a tablespoon or two to help balance the flavor.
  • Vegetables: some vegetables, like greens, thinly sliced onions or thinly sliced cucumbers don’t need to be pre-cooked. Just pour the hot brine over the vegetables and you are set. Others, like carrots or beets, need to be cooked a little beforehand to ensure they aren’t too crunchy.
  • Time: the amount of time you let the vegetables sit in the brine is completely up to your taste buds. I recommend trying them every day to see how they change.

Below is a rough outline of what I used to preserve the radish leaves from last week’s CSA share. We look forward to hearing your quick pickle recipes!

Quick Pickled Radish Leaves

Ingredients:

  • 1 large bunch radish leaves, trimmed, washed and sliced into 1″ strips
  • 1-1/2 cups rice vinegar
  • 1-1/2 cups water
  • 1 tablespoon kosher salt
  • 2 large garlic cloves, peeled and smashed
  • 1 teaspoon black mustard seeds
  • 1/2 teaspoon fennel seeds
  • 1/2 teaspoon coriander seeds
  • A few allspice berries
  • A few dried hot peppers

Directions:

  • Place radish leaves in a quart sized glass canning jar and set aside.
  • Place the remaining ingredients in a small saucepan and bring to a boil over medium heat. Remove from heat and carefully pour brine and spices over the radish leaves. Set aside and allow to cool to room temperature. Place in the refrigerator and use within 2-3 weeks.