Weekly Farm Notes :: May 5th, 2015

Hello! Happy Cinco de Mayo! I have no personal affiliation with this celebration but I sure do look forward to enjoying a margarita tonight 🙂 Hope to see you at the market tomorrow.

~~~~~~~~~~~~~~~~~~~~~~~~~~~~~~~~~~~~~~~~~~~~~~~~~~~

May 6th Produce

Here are some of the items you can expect this week:

  • Purple Kohlrabi: I am sooo excited for kohlrabi! You may not be familiar with this funky looking vegetable but now is the time to get acquainted. Kohlrabi is part of the Brassica family, along with Brussels sprouts, broccoli, cabbage, kale and collards, so you know it is good for you. It takes a little effort to peel but you are rewarded with crunchy goodness that has a mild broccoli flavor. For those that love little health statistics – kohlrabi has more Vitamin C than oranges or red cabbage. I love to eat it raw but it can be steamed, roasted, pickled, or turned into a number of salads, fritters or soups. Here is a good place to start for inspiration.
  • Pak Choi: I broiled my pak choi last week and really liked the results! It takes a little prep but heres what you do – slice the entire head in half and carefully clean out each section under cold running water. Lay on clean kitchen towels and pat dry. Toss with a little vegetable oil and broil for a few minutes on each side. Remove from oven and trim leaves away (which should now be quite brown), slicing thinly once cool enough to handle. Place the lower section back under the broiler until browned, a few minutes longer. Allow to cool slightly and then slice thinly. Toss with rice and protein of choice for a great meal.
  • Romaine & Red Leaf Lettuce: if you need a go-to dressing for all your greens, look no further! Check out the recipe below and toss it with your lettuce, chard and Asian greens.
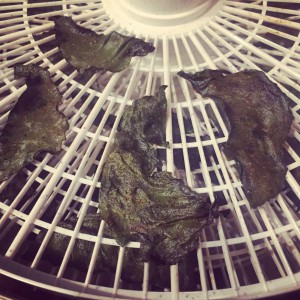
  • Rainbow Swiss Chard: don’t forget, you can dehydrate your greens if desired. Check out our recipe here.
  • Tender Collards: can you really ever have enough pesto in your life? I don’t think so. Add this recipe to your collection.
  • Summerfest Asian Greens: I still haven’t done anything fun with these greens yet – tell us how you use them!

Upcoming Produce

Below are some items that you can expect to see in the coming weeks:

  • Beets: I always tend to roast beets but here is a tasty boiled salad idea from our friends at Riverview Farm.
  • Salad Turnips: if you haven’t had salad turnips before, you are in for a treat. They are sweet and tender and will totally change your opinion of turnips! I just slice them to eat raw in a salad. We would love to hear how you use them!
  • Baby Red Romaine: do you guys follow the Main Street Farmers Market blog? They post great recipes. This is more of an idea than a recipe, but I think adding these greens to the Ploughman’s Lunch would be great.
  • White Kohlrabi: the white version tastes just like the purple version (to me, at least). For a quick feast, just peel, slice into finger length pieces, and dip into hummus.
  • Chinese Napa Cabbage: this is the main ingredient used in the most common type of Korean kimchi. I think a southern take on kimchi is in order!

~~~~~~~~~~~~~~~~~~~~~~~~~~~~~~~~~~~~~~~~~~~~~~~~~~~

Recipe :: Balsamic-Mustard Vinaigrette

I love this dressing because it is flavorful enough to stand up to the assertive greens we receive each week. The recipe below makes 1/4 cup but I would double or triple it to make sure there is plenty on hand.

Ingredients:

  • 1 tablespoon balsamic vinegar
  • 2 teaspoons Dijon mustard
  • 1-1/2 teaspoons minced shallot (I think green garlic would work great here too)
  • 1/2 teaspoon mayonnaise
  • 1/2 teaspoon fresh minced thyme
  • 1/8 teaspoon salt
  • Pinch pepper
  • 3 tablespoons extra-virgin olive oil

Directions:

  1. Whisk vinegar, mustard, shallot, mayo, thyme, salt and pepper together in a small bowl until smooth. Whisking constantly, slowly drizzle in oil until emulsified. Keeps refrigerated for 2 weeks.

~~~~~~~~~~~~~~~~~~~~~~~~~~~~~~~~~~~~~~~~~~~~~~~~~~~

Events

May 16th: Wildwood Harvest is having an open house from 10am-2pm. I plan on bringing a picnic to enjoy on the farm – hope to see you there!

May 22nd: Crabtree Farms is hosting a “Buying Local on a Budget” class from 6-7:30pm.

~~~~~~~~~~~~~~~~~~~~~~~~~~~~~~~~~~~~~~~~~~~~~~~~~~~

Other News

Have you read Alice O’Dea’s latest article? Check out her latest article on bean salads!


Lemon Balm Shrub

Shrubs, which are acidic syrups typically flavored with fruit and/or herbs, date back to the 15th century. You can read all about the interesting history here but my main interest lies in the preservative nature of shrubs. These syrups were originally concocted in order to preserve delicate fruits and herbs before the time of refrigeration. Today, they offer the same qualities but are typically developed as a fun drink, both alcohol-free and as a cocktail mixture.

There are various ways to make a shrub at home. My recipe below is about as simple as it gets – dissolve sugar in vinegar and then steep herbs in the mixture. The process doesn’t get much harder, one just has to wait a bit longer for the final product. The Kitchn has a great run down here and Serious Eats adds another layer of complexity here by suggesting cold-processed shrubs are the way to go.

A simple online search will yield a shrub recipe for just about any ingredient. Don’t limit yourself to fruit and herbs – beets, fennel and spices all make for interesting recipes!

Lemon Balm Shrub
makes 3 drinks

Ingredients:

  • 3/4 cup granulated sugar
  • 3/4 cup apple cider vinegar
  • 1/4 cup lightly packed lemon balm leaves
  • Sparkling water, to serve

Directions:

  • Combine sugar and vinegar in a medium saucepan and stir to combine. Heat mixture over medium-high heat until it reaches a simmer, or until the sugar is fully dissolved. Remove from heat, add the lemon balm, cover and allow to steep for 10 minutes. Strain to remove the lemon balm and cool to room temperature. Transfer to an air tight container and refrigerate until ready to use.
  • To make a drink: combine 1/4 cup shrub and 1 cup sparkling water in a tall glass. Stir to combine and enjoy.

Weekly Farm Notes :: April 27th, 2015

Hello! Hope everyone is having a great start to the week. Below are this week’s farm notes. See you at the market on Wednesday!

~~~~~~~~~~~~~~~~~~~~~~~~~~~~~~~~~~~~~~~~~~~~~~~~~~~

April 22nd Produce

Here are some of the items you may have picked up at market last week:

  • Black Summer Pok Choi: toss this Sesame Pak Choi with Asian noodles or rice and protein and you can have dinner on the table in no time.
  • Red Russian Kale: give this recipe a try for Garlicky Kale Salad with Crispy Chickpeas and use the green garlic in the dressing!
  • Rainbow Swiss Chard: don’t throw away those chard stems! See the recipe below for a little inspiration.
  • Tronchuda Beira Kale: I love fritters and these Potato, Scallion and Kale Cakes look like something I need to make very soon.
  • Butterhead Lettuce: we have grown this variety before called Adrianna. It has grown so strangely this year but is still very tender with a buttery texture. It is not washed because it is so delicate. Try this lettuce with some Red Russian Kale and the Summerfest Asian greens for a delicious salad.
  • Summerfest Komatsuma Asian Greens: wonderful rich flavor for salad, saute or soup.
  • Green Garlic: try this in the garlicky kale salad dressing listed above!

April 29th Produce

Below are some items that you can expect to see this week:

  • Red Dragon Mustard Greens: I thought this nutritional breakdown from Whole Foods was very interesting:
    • The cholesterol-lowering ability of steamed mustard greens is second only to steamed collard greens and steamed kale in a recent study of cruciferous vegetables and their ability to bind bile acids in the digestive tract. When bile acid binding takes place, it is easier for the bile acids to be excreted from the body. Since bile acids are made from cholesterol, the net impact of this bile acid binding is a lowering of the body’s cholesterol level. It’s worth noting that steamed mustard greens (and all steamed forms of the cruciferous vegetables) show much greater bile acid binding ability than raw mustard greens.
  • Garlic Chives: high in Vitamin C also rich in vitamins A & B, iron, calcium, sulfur and magnesium. Good tonic herb to take regularly.

~~~~~~~~~~~~~~~~~~~~~~~~~~~~~~~~~~~~~~~~~~~~~~~~~~~

Recipe :: Chard Stem Relish

Looking for a fun way to use your Swiss chard stems? Here is a great recipe from Steven Satterfield’s Root to Leaf: A Southern Chef Cooks Through the Seasons. I made a batch this past weekend but haven’t used it on anything yet. I might drizzle a little over blue cheese on crackers. Let us know how you use it!

Ingredients:

  • 2 cups diced Swiss chard stems
  • 1 cup red wine (I used Cabernet Sauvignon)
  • 1/2 cup red wine vinegar
  • 1/2 cup granulated sugar
  • 1 teaspoon kosher salt
  • 1/2 teaspoon freshly ground black pepper

Directions:

  1. Combine all ingredients in a medium saucepan and bring to a simmer over medium heat. Cook until stems are tender, 8-10 minutes. Remove stems with slotted spoon and reduce liquid by half. Let cool separately and combine. Store for 4 weeks.

~~~~~~~~~~~~~~~~~~~~~~~~~~~~~~~~~~~~~~~~~~~~~~~~~~~

Events

May 16th: Wildwood Harvest is having an open house from 10am-2pm. I plan on bringing a picnic to enjoy on the farm – hope to see you there!

May 22nd: Crabtree Farms is hosting a “Buying Local on a Budget” class from 6-7:30pm.

~~~~~~~~~~~~~~~~~~~~~~~~~~~~~~~~~~~~~~~~~~~~~~~~~~~

Other News

Have you read Alice O’Dea’s latest article? Check out her latest article on the benefits of eating beans!


Preserve the Harvest :: Dehydrated Greens + Recipe

Hello!

I just went through a week of intense preserving to help Mark & Gina use up pounds and pounds of kale and collards, along with some parsley and edible flowers, that would have gone to the compost heap otherwsie. I could have made it easier on myself by just processing the greens in two or three ways but I couldn’t control myself and ended up preserving by: making soup, blending and freezing greens, making and freezing compound butter, fermenting, dehydrating and steeping edible flowers in a sweetened apple cider vinegar mixture (called a shrub – more to come on this!). I list all of these items to give you some insight into the various paths I used to preserve the harvest. Each process has it’s upsides and downsides. For example, blending kale with water and then freezing it in ice cube trays is really simple and cheap (no added ingredients) but freezer space is limited and how many kale cubes does one really need?

Dehydrating has tradeoffs as well – it is simple to prepare, relatively hands off and the finished product can be stored at room temperature. However, it is energy intensive as each batch has to dry for hours at a time (even tender greens take 2 hours in my dehydrator). For someone with limited time, however, I think the tradeoff is worth while.

The dehydrating process is really simple:

  • Wash greens well
  • Dry well
    • I put mine through a salad spinner and then pat them dry with a clean towel.
  • Remove ribs and cut into desired shapes
    • If you are against wasting the ribs, I would at least cut them out and then dehydrate them separately from the leaves as they will dry at different rates.
  • Season if desired
    • This step depends on how you intend to use the greens. If you want to eat them as “chips”, I would suggest tossing them with at least a little oil and salt (see below for recipe idea). If you just want to dehydrate them in order to throw them in soups later, you can probably skip this step.
  • Dehydrate
    • Using a dehydrator: I have tried various temperatures but find that 135 degrees works best for greens. It only takes 2-3 hours at this temperature, whereas it can take hours and hours more if you drop it down much lower. I know raw foodist don’t cook anything over 104 degrees as they believe the nutritional value is lost. This may be true but since dried greens are such a small part of my overall diet, I don’t worry about it much.
      • If you don’t have a dehydrator but are looking to purchase one, this article gives a lot of helpful information.
    • Using an oven: I have never dehydrated food in an oven so I would do your own research if this is the route you wish to take. From what I have read, most ovens don’t go below 170 so you have to prop the oven door open to maintain the correct temperature. It seems like this could be difficult to control but I would love to hear from anyone who tries it.
  • Store in an airtight container in a cool, dark, dry spot.
    1. This is a good article to understand where and why dehydrated food should be stored and how long you can expect it to last.

In the end, you can dehydrate just about anything. Since greens are so plentiful right now, give this a shot if you are out of other ideas!

Spiced Swiss Chard Chips

Recipe notes: 1) depending on the size of your dehydrator, you may be able to fit more greens at once. I am using a round, 4 level Nesco dehydrator.

Ingredients:

  • 1 tablespoon vegetable oil
  • 1/4 teaspoon five spice powder
  • 1/4 teaspoon ground turmeric
  • 1/8 teaspoon cayenne, or more if desired
  • 1/8 teaspoon table salt
  • 1/2 pound (about 15 medium leaves) Swiss chard, washed and dried thoroughly

Directions:

  • Whisk oil, spices and salt together in a large mixing bowl. Set aside.
  • Trim Swiss chard ribs and set aside. Cut leaves into desired shapes. I cut the leaves in half along the ribs and then cut each half into halves or thirds, depending on the size.
  • Place leaves in the mixing bowl and toss gently but thoroughly with the spices. Arrange the leaves on the dehydrating trays, taking care not to overlap them too much.
  • Dehydrate at 135 degrees F, checking after 2 hours to see if they are crisp. If not, continue to dehydrate, checking every 20-30 minutes. Allow to cool to room temperature and transfer to an airtight container. Store in a cool, dry place. These should last for months but I bet they won’t stick around that long 🙂

Weekly Farm Notes :: April 20th, 2015

Hello!

This is the first in a series I hope to publish each week to give you some insight into what you can do with items you picked up last week at market and also what produce to expect in the coming weeks. I will also provide you with recipes and any local food-related news and events of interest. Let’s jump right into it!

~~~~~~~~~~~~~~~~~~~~~~~~~~~~~~~~~~~~~~~~~~~~~~~~~~~

April 15th Produce

Here are some of the items you have picked up at market last week:

  • Radishes: these are the Icicle variety. Gina suggests roasting them to calm the spiciness. Here is a great article and link to a recipe from The Kitchn. I plan on trying it tonight!
  • Black Summer Pok Choi: need a little inspiration? Check out the recipe below!
  • Red Russian Kale: have you tried our Green Tahini Sauce yet? If not, this kale would be great in it!
  • Rainbow Swiss Chard: now that it is getting warmer, a Chilled Swiss Chard Soup is in order.
  • Tronchuda Beira Kale: this unique specialty from Portugal is also called Portuguese cabbage or sea kale. The taste and texture of the wavy green leaves are similar to collards. The thick fleshy midribs and stems can be peeled and eaten like celery or included in soup.
  • Red and Green Romaine and Red Leaf Lettuce: the red leaf lettuce has some bronze colored edges and the red romaine has some hints of red. These aren’t as colorful as usual given the sun has not been out a lot recently and they were harvested a little early.
  • Summerfest Komatsuma Asian Greens: I look forward to experimenting with these greens. Let us know how you use them!

April 22nd Produce

Below are some items that you can expect to see this week:

  • Red Dragon Mustard Greens: I developed a Mustard Green Harissa recipe last year when I was trying to figure out what to do with these greens. While I love mustard greens simply sauteed and eaten in any type of egg dish, this recipe will spice things up a bit more.
  • Garlic Chives: I love garlic chive pesto but here’s a thought if you don’t want to be too exact: make a deconstructed pesto. Toss pasta with minced garlic chives, Parmesan, toasted and chopped nuts of choice and a healthy dressing of olive oil. Couldn’t be easier!
  • Tronchuda Beira Kale: looking for healthy food you can eat on the run? This kale would work great in our Quinoa and Kale Bites!
  • Summerfest Komatsuma Asian Greens: I look forward to experimenting with these greens. Let us know how you use them!

~~~~~~~~~~~~~~~~~~~~~~~~~~~~~~~~~~~~~~~~~~~~~~~~~~~

Recipe

I just picked up a copy of America’s Test Kitchen The Complete Vegetarian Cookbook which features over 700 vegetarian recipes. There are plenty of vegan and gluten-free options and many of them are quick to put together. I haven’t tried it yet but the recipe below looks like a great option for your Pok Choi (or Bok Choy).

Ingredients:

  • 2 teaspoons vegetable oil
  • 2 heads bok choy (4 ounces each), stalks sliced 1/2 inch thick and greens chopped
  • 1 shallot, minced
  • 1-1/2 cups basmati rice, rinsed
  • 1-1/2 cups water
  • 3/4 cups coconut milk
  • 1 lemon grass stalk, trimmed to bottom 6 inches and smashed
  • Salt and pepper
  • 2 tablespoons minced fresh cilantro
  • 1 teaspoon grated lime zest plus 2 teaspoons juice

Directions:

  1. Heat oil in large saucepan over medium-high heat until shimmering. Add bok choy (pok choi) stalks and shallots and cook, stirring occasionally, until softened, about 2 minutes.
  2. Stir in rice, water, coconut milk, lemon grass and 2 teaspoons salt and bring to a boil. Reduce heat to low, cover and simmer gently until liquid is absorbed, 18-20 minutes.
  3. Fold in cilantro, lime zest and juice and bok choy greens, cover and cook until rice is tender, about 3 minutes. Discard lemon grass. Season with salt and pepper to taste and serve.

~~~~~~~~~~~~~~~~~~~~~~~~~~~~~~~~~~~~~~~~~~~~~~~~~~~

Events

Join us at the Main Street Farmers Market Spring-A-Ma-Jig this Wednesday, April 22nd from 4-6pm! There will be fresh smoked chicken and chicken tacos from Hoe Hop Valley Farm, some spring side dishes from The Farmers Daughter Cafe, live music, and kids activities. It’s sure to be a great time!

~~~~~~~~~~~~~~~~~~~~~~~~~~~~~~~~~~~~~~~~~~~~~~~~~~~

Other News

Have you read Alice O’Dea’s latest article? Check out her Takeaways From the Scenic City Supper Club!


Green Tahini Sauce

Our friends over at Choose To Eat have a recipe for falafel that comes together really fast with the use of canned chickpeas. Falafel is great served with a tahini sauce but we thought it would be even better with a healthy dose of greens included. You can use any greens you have on hand – kale, spinach, tender collards, Swiss chard, mustard greens, even radish tops. Serve the falafel and sauce with pita and my personal favorite, our Curtido recipe, and you have a filling, healthful dinner in no time!

Green Tahini Sauce
makes about 1 cup

Ingredients:

  • 1/2 cup tahini
  • 1/2 cup water
  • 1/4 cup olive oil
  • 1 large garlic clove
  • 1/2 to 3/4 packed cup of chopped greens
  • 1 tablespoon fresh lemon juice
  • 1/4 teaspoon cumin seeds
  • 1/4 teaspoon table salt

Directions:

  • Place all ingredients into a blender and process until very smooth, 30-60 seconds depending on your blender. Taste and add extra greens, salt or lemon juice to taste.

Quinoa & Kale Bites

Hello!

This is just a quick post to share a recipe I made this week. It is inspired by this recipe from the 101 Cookbooks blog. I changed a few things but the base is the same – quinoa, kale and edamame baked in muffin tins. It is nutritious, fast to prepare and will provide a number of quick meals you can eat on the run. We hope you enjoy it!

Quinoa & Kale Bites
makes 12 muffin bites

Ingredients:

  • 3 cups cooked quinoa (from about 1 cup raw quinoa)
  • 1/2 packed cup of cooked finely chopped kale or other tender greens
  • 4 large eggs, lightly beaten
  • 1/2 cup shelled edamame, roughly chopped
  • 1/3 cup shredded Manchego or cheese of choice
  • 1 tablespoon minced cilantro
  • 1 teaspoon minced garlic (from about 3 medium cloves)
  • 1/4 teaspoon lemon zest (from about 1/4 of a large lemon)
  • Salt to taste (will depend on saltiness of cheese; I used 3/4 teaspoon table salt)

Directions:

  • Adjust oven rack to middle position and heat to 350 degrees.
  • Spray a standard 12 cup muffin tin with non-stick cooking spray and set aside.
  • Combine all ingredients in a large mixing bowl and mix until thoroughly combined. Fill each muffin tin almost to the top with the mixture and pat down lightly to even out the top. Bake for 25 minutes or until the muffins are set and they are golden brown around the sides. Remove from oven and allow to cool in the tin for 5-10 minutes. Transfer to a cooling rack and cool completely before storing in the refrigerator.

Preserve the Harvest :: Quick Pickled Radish Leaves

Making quick pickles is one of the fastest and easiest ways to preserve the harvest. These types of pickles are made by pouring an acidic brine over produce, allowing the brine to flavor the vegetable or fruit over a number of days in the refrigerator. Although they are called quick “pickles” it is important to understand a few important ways in which they differ from fermented pickles.

  • Time: quick pickles are ready in a matter of hours or days whereas fermented pickles take weeks or even months.
  • Flavor development: quick pickles get their flavor from the acidic brine and any flavoring components whereas fermented pickles get flavor from bacteria present during the fermentation process. Fermented pickles tend to have a more complex and developed flavor but you have more control over the final flavor with quick pickles.
  • Refrigeration: quick pickles have to be refrigerated and typically last only a few weeks, unlike fermented pickles which have a much longer shelf life.

Quick pickling is pretty foolproof but here are a few tips to get you started:

  • Vinegar/Water Ratio: I suggest starting with equal parts vinegar to water to see how you like the balance of flavor. You can always adjust it during the next batch. To determine the amount of brine needed, just measure the amount that will fit in the jar you intend to use.
  • Types of Vinegar: I wouldn’t use balsamic vinegar but just about anything else goes – apple cider vinegar, rice vinegar, white wine vinegar, red wine vinegar, distilled white vinegar. I like to use rice vinegar because it’s has the lowest acidity level (~4%) of those I mentioned above (wine vinegars are around 7%) so the flavor of the vegetables and spices can shine through a bit more.
  • Flavorings: Whole spices and crushed garlic are great places to start when deciding how to flavor your brine. I prefer to keep the spicing relatively mild so I can use my pickles on just about anything. Mustard seeds, bay leaves and peppercorns are classic but don’t stop there. I have added cumin seeds, fennel seeds, allspice, cinnamon sticks, cloves and dried hot chiles to batches in the past.
  • Sugar: a lot of recipes I find include sugar – and some of them have A LOT! I don’t find that I need sugar because I use rice vinegar. If you are using a vinegar with a higher acidity level (see Types of Vinegar section above) then you might want to add a tablespoon or two to help balance the flavor.
  • Vegetables: some vegetables, like greens, thinly sliced onions or thinly sliced cucumbers don’t need to be pre-cooked. Just pour the hot brine over the vegetables and you are set. Others, like carrots or beets, need to be cooked a little beforehand to ensure they aren’t too crunchy.
  • Time: the amount of time you let the vegetables sit in the brine is completely up to your taste buds. I recommend trying them every day to see how they change.

Below is a rough outline of what I used to preserve the radish leaves from last week’s CSA share. We look forward to hearing your quick pickle recipes!

Quick Pickled Radish Leaves

Ingredients:

  • 1 large bunch radish leaves, trimmed, washed and sliced into 1″ strips
  • 1-1/2 cups rice vinegar
  • 1-1/2 cups water
  • 1 tablespoon kosher salt
  • 2 large garlic cloves, peeled and smashed
  • 1 teaspoon black mustard seeds
  • 1/2 teaspoon fennel seeds
  • 1/2 teaspoon coriander seeds
  • A few allspice berries
  • A few dried hot peppers

Directions:

  • Place radish leaves in a quart sized glass canning jar and set aside.
  • Place the remaining ingredients in a small saucepan and bring to a boil over medium heat. Remove from heat and carefully pour brine and spices over the radish leaves. Set aside and allow to cool to room temperature. Place in the refrigerator and use within 2-3 weeks.

Collard Green and Pecan Pesto

Pesto needs no introduction. I bet almost everyone reading this has made one type or another. There are so many variations, based on anything from herbs (basil, cilantro, parsley, sage), greens (kale, arugula), mushrooms, tomatoes, olives, and roasted red peppers. This is my Southern take on the classic by using collard greens and pecans.

There are a couple tips for making a great pesto: first, roast the nuts and second, toast most of the garlic. Roasting the nuts brings out the flavor while toasting the garlic mellows the flavor so it doesn’t take over the dish (I do add a little raw garlic at the end, however).

Enjoy!

Collard Greens & Pecan Pesto
makes enough for 1 pound pasta

Recipe note: 1) you can use the traditional Parmesan here but I liked mixing it up a bit by using cheddar; 2) use a traditional skillet (cast iron or aluminum) as opposed to a non-stick skillet to toast garlic as non-stick skillets can release harmful chemicals when heated without fat in the pan; 3) reserve a cup of the pasta cooking water to thin out the pesto if you plan on tossing it with pasta.

Ingredients:

  • 1 cup (just under 4 ounces) pecan pieces
  • 5 large garlic cloves, unpeeled plus 1 small clove, minced
  • 4-1/2 ounces collard greens, stemmed and roughly chopped (about 2-1/2 cups)
  • 1/2 cup extra-virgin olive oil
  • 2-1/2 ounces extra aged cheddar, shredded on large holes of box grater (about 3/4 cup) (see recipe note)
  • Salt to taste (I used 1/2 teaspoon)
  • Freshly ground black pepper to taste (I used 5 to 10 grinds)
  • Apple cider vinegar to taste (I used 1-1/2 teaspoons)
  • 1 pound dry pasta of choice (fusilli, bowtie, shells)

Directions:

  • Adjust oven rack to middle position and preheat to 350 degrees F. Place nuts on a rimmed baking sheet and roast for 5-8 minutes or until fragrant. Remove from oven and set aside to cool.
  • Heat unpeeled garlic cloves in a small skillet (see recipe note) over medium heat, turning every few minutes, until soft and skin is starting to darken and pull away. Set aside. Once cool enough to handle, remove skins and mince.
  • Add nuts, garlic, greens and oil to a large food processor and pulse until nuts and greens are broken down but still have a little texture. Transfer to a bowl and mix in cheese and raw garlic. Taste and add salt, pepper and vinegar as needed. Toss with pasta of choice and reserved cooking water (see recipe note), adding a little at a time until desired consistency is reached.

Dietary Guidelines (Alice O’Dea Article)

Hi there! In this weeks article, Alice discusses the 5 food categories in light of the new governmental dietary guidelines coming out later this year. Food doesn’t have to be complicated or confusing, she reminds us, as long as you “get real food and prepare it yourself”, you should be fine. Just another great reminder why it is best to buy local and from a farmer you trust (like us!).

There’s recently been some discussion in the news and on social media about the new dietary guidelines that will be coming out this year. This is a process we go through every five years, and it inevitably is fraught with controversy and leads to confusion. This year has been no exception. Unfortunately, while the details are being ironed out by the experts, the rest of us still have to eat.

The good news, though, is that figuring out what to eat is not as complicated as a lot of people make it out to be. Most of the confusion and controversy arises because modern eaters have so many options to choose from, which can be quite overwhelming. But if you ignore all the claims on the boxes and in the ads, and pay attention to just the food that ends up on your plate, things can get a lot simpler and clearer.

Eat a wide variety of foods (not a lot of anything) that are sourced as close to the farm as possible, and you will likely be getting a balanced diet. What you might not get in one meal, you’ll make up for in the next. Over the course of a day or two, things will balance out. Looking at the government’s recommendations is an interesting exercise, as it helps to have a general sense of the proportions, but for most people, there’s no need to measure out each bit of food. Take Michael Pollan’s famous advice (“Eat food. Not too much. Mostly plants.”), and you’ll be fine.

If you’re curious, you can find out how many calories you should be eating on a given day to either lose, gain or maintain your current weight by using the calculator here. That link will also give you a food plan, with some detail as to what you should be eating, but don’t worry too much about the particulars. It will give you just a general sense of what sorts of things (and how much of them) you should be seeing on your plate day to day, and then you can think about how you might best supply your body with those foods without surrounding them with empty fats, sugars and starches. The five categories of foods included are fruits, vegetables, grains, dairy and protein.

When it comes to fruit, raw and without added sweetener is the ideal to shoot for. Just eat an apple, banana or grapefruit, plain and unadorned. This way, you get the vitamins and minerals without any extra calories or sugar. You could get some of those nutrients in a supplement or in juice, but then you’d be missing out on the fiber that you get when you enjoy simple, fresh fruit. And if it’s out of season, dried versions can be a good alternative.

Eat a wide variety of vegetables in all sorts of colors for maximum nutrition. If you’re struggling to get enough vegetables into your diet, keep in mind that frozen vegetables can be as delicious and nutritious as fresh ones, and are easy to slip into a dish. Making eggs for breakfast? Make a frittata instead and you can probably fit in at least a serving or two of your day’s veggies. Serving soup? Whether or not it’s called for in the recipe (or even if the soup is from a can), mix in some greens. Make rarebit instead of grilled cheese, nibble on cabbage chips instead of potato chips and so on. After a while, you’ll get there without even thinking about it all that much.

Grains have become a loaded subject lately, but there are plenty to choose from, so this is probably a pretty easy category for most people—even those who are trying to avoid gluten or fructans. Between breads, cereals, pasta, rice and popcorn, I suspect the majority of us might be in danger of getting too much of a good thing. The trick is in trying to stick to the whole and unrefined versions while avoiding the white, heavily processed stuff.

Dairy is an unfortunately named category because the requirement here isn’t that we eat something that is made from milk, but rather that we should make sure we have adequate sources of calcium, potassium and vitamin D. There are soy-, rice- and nut-based alternatives for those who are avoiding animal products or are lactose-intolerant (though fermented dairy is an option for some in the latter category).

And finally, there is protein, which can be a real Catch-22. Either we’re getting plenty because we eat a lot of meat (but then are also getting a potentially unhealthy dose of dietary cholesterol and saturated fat), or we have little or no animal protein in our diets and may not be getting enough from other sources. But even here, if we phase back the meats and ramp up plant proteins such as beans, lentils, quinoa, seeds and nuts—and don’t sweat the details—we’re probably going to be just fine. The key is to eat from a variety of protein sources while also eating an interesting assortment of vegetables and grains. The particulars will sort themselves out.

If you have a medical issue, by all means work with your health care team to come up with a proper diet. But otherwise, you’re going to be fine if, for the most part, you just get real food and prepare it yourself. That way, you can simply enjoy eating and not worry about the details.